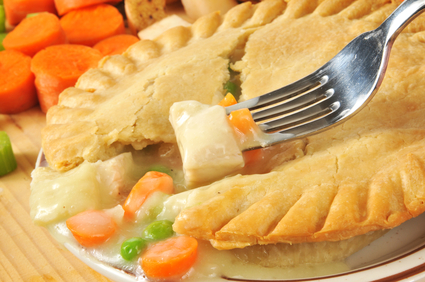
Easy Chicken Potpie
Packed with chicken, potatoes, peas, and carrots, this winter favorite makes two golden pies – so you can serve one at dinner and save the other for a busy weeknight. These potpies are perfect for both weekends and weeknights.
INGREDIENTS
2 Cups Peeled & Diced Potatoes
2 Cups Sliced Carrots
1 Cup Butter (Cut Into Cubes)
1 Cup Chopped Onion
1 Cup Unbleached Flour
2 Teaspoons Kosher Salt
1 Teaspoon Dried Thyme
1 Teaspoon Freshly Ground Pepper
3 Cups Chicken Broth
1 1/2 Cups Milk
4 Cups Cooked Chicken (Cut Into Cubes)
1 Cup Frozen Peas
1 Cup Frozen Corn
2 Packages Refrigerated Pie Shells (Or Make Your Own)
Preheat your oven to 425 degrees. In a large-size saucepan place diced potatoes and sliced carrots. Add water to cover vegetables. Bring to a boil. Reduce heat and cook, covered, for 10 minutes until vegetables are crisp tender. Drain and set aside. In a large-size skillet, heat butter over a medium-high heat. Add onions. Cook and stir until tender. Stir in flour, kosher salt, thyme, and pepper. Slowly stir in broth and milk. Bring to a boil. Stir constantly. Cook for 3 minutes until thickened. Stir in chicken, peas, corn and potato mixture. Remove from heat. Remove pastry shells from their tins and place each into two 9 inch pie plates. Trim even with rims. Add chicken mixture. Place remaining pastry shells over filling. Trim, seal and flute edges. Cut slits in tops. Place in oven and bake for 35 to 45 minutes until crust is lightly browned. Remember that each oven heats differently so check at 35 minutes. Remove from oven and let stand 15 minutes before serving. Makes 2 potpies (6 servings each).
*Note: If you are freezing the second potpie, cover and freeze unbaked pie. To use, remove from freezer 30 minutes before baking (do not thaw). Preheat oven to 425 degrees. Place pies on baking sheets. Cover edges loosely with foil. Bake 30 minutes. Reduce oven setting to 350 degrees, bake 70 to 80 minutes longer or until crust is golden brown and a thermometer inserted in center reads 165 degrees.
© Victoria Hart Glavin
![]()

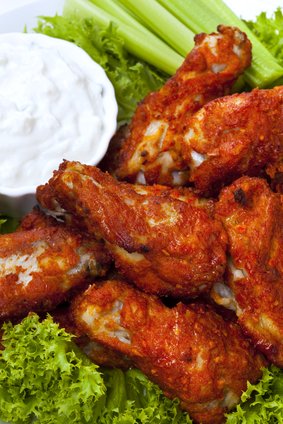
Baby Face Buffalo Wings
The reason that I named these Buffalo wings Baby Face is because when you eat them there’s a good chance that your face will get all messy just like a baby’s. If you are having a Super Bowl party then you just might want to make these to serve your hungry fans.
INGREDIENTS
2 Pounds Chicken Wings (Separated Into Wings & Drumettes)
2 Tablespoons Melted Butter
3 Tablespoons Bottled Red Hot Pepper Sauce
2 Teaspoons Ground Paprika
1/4 Teaspoon Kosher Salt
1/4 Teaspoon Ground Cayenne Pepper
1/2 Cup Blue Cheese Dip
Celery Sticks
Place chicken wing pieces in a shallow dish. In a small-size bowl mix together melted butter, hot pepper sauce, paprika, kosher salt and cayenne pepper. Pour mixture over wing pieces. Cover wings with plastic wrap and let sit at room temperature for 1/2 hour. Drain and throw away marinade. Place wings on the unheated rack of a broiler pan. Broil 4 to 5 inches from the heat for about 10 minutes or until chicken is tender and no longer pink. Remove from oven and transfer to serving platter. Serve with blue cheese dip and celery sticks. Serves 6
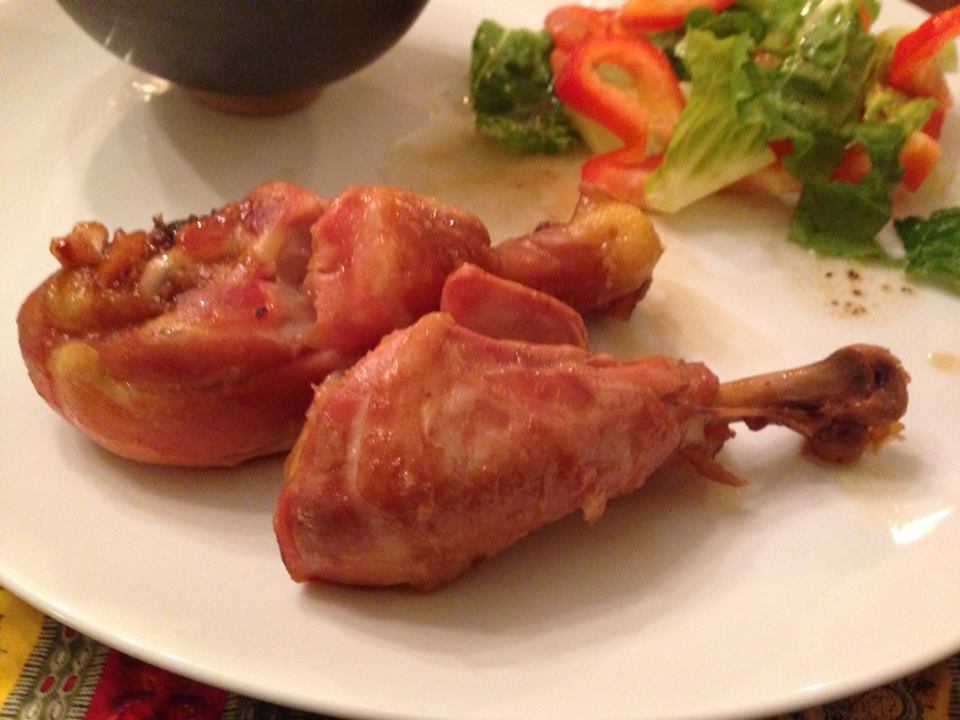
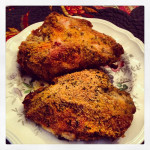
Chicken Drumsticks In Ponzu Sauce
After the holidays I am a bit “cooked out” so I think about easy and healthy ways to prepare meals. Over the past year I’ve been making weekly trips to my local Japanese market seeking out interesting cooking ideas. Here is a super easy and tasty dish that is a fabulous weeknight meal. Serve with rice and a salad.
INGREDIENTS
6 Organic Chicken Drumsticks
10 Ounces Ponzu Sauce
Preheat oven to 350 degrees. Place chicken in glass baking dish and pour Ponzu sauce all over chicken pieces. Place in oven, uncovered, for about 30 minutes. Turn chicken after 15 minutes into cooking. When chicken is done remove from oven and transfer to serving dish. Spoon some of the cooked sauce over chicken. Serve warm. Serves 2
Note: Ponzu sauce can be found in most Asian stores and some well stocked grocery stores. You could also substitute chicken breasts or chicken thighs for drumsticks if you want.
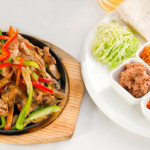

Turkey Fajitas
I knew a guy who, right after Thanksgiving dinner, would get up from the table and bring put 12 large paper plates. He would lay the paper plates out on the table and make 12 of the exact same Thanksgiving dinners and then wrap each one in plastic wrap. Stored in the fridge he would take one plate out each day, heat it up, and find a place in the house to relish his Thanksgiving dinner by himself for 12 days! He loved Thanksgiving dinner that much. Most of us have leftover turkey, but really don’t want to have two weeks of Thanksgiving dinner. Here is a good way to use up leftover turkey and also feel like you’re having a completely different meal.
INGREDIENTS
1 Tablespoon Olive Oil
1 Pound Turkey Cut Into Strips
1 Sliced Onion
1 Sliced Red Bell Pepper
1/2 Cup Water
1 Teaspoon Ground Cumin
1 Teaspoon Chili Powder
1/2 Teaspoon Kosher Salt
1/2 Teaspoon Freshly Ground Pepper
Hot Pepper Sauce To Taste
2 Tablespoons Chopped Fresh Cilantro
Warmed Flour Tortillas
Toppings Of Your Choice
Heat olive oil in a large-size skillet over a medium-high heat. Add turkey (dark meat may be more moist) and brown for 2 minutes. Add onions and red peppers. Cook for 2 minutes. Stir occasionally until vegetables are tender. Stir in water, cumin, chili powder, kosher salt and pepper. Cook for 4 minutes. Stir frequently. Stir in hot pepper sauce and cilantro. Cook for 1 more minute. Remove from heat and transfer to serving bowl. Serve with warm tortillas and your favorite toppings. Serves 4

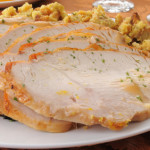
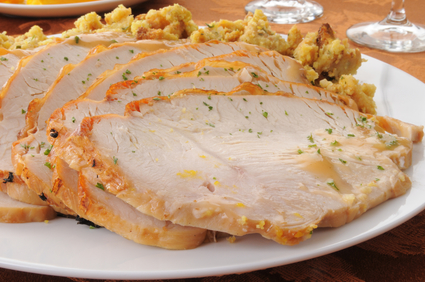
Sage & Butter Roasted Turkey
Who doesn’t love Thanksgiving Traditions? I swear my husband lives for Thanksgiving! Here is a delicious Thanksgiving turkey recipe that I’m sure that you will love.
INGREDIENTS
2 Sliced Lemons
2 Cups Water
2 Gallons Ice Water
Juice of 1 Lemon
1 1/2 Cups Kosher Salt
1/2 Cup Sugar
1 Tablespoon Whole Peppercorns
1 Organic Fresh Turkey (12 to 15 Pounds)
1/2 Cup Butter Cut Into Slices
10 Fresh Sage Leaves
3 Tablespoons Olive Oil
3 Roughly Chopped Carrots
3 Roughly Chopped Celery Stalks
2 Quartered Onions
Freshly Ground Pepper
In a large-size stockpot (large enough to hold the turkey) bring 2 cups water, lemon slices, kosher salt, sugar, and peppercorns to a boil. Remove pot from heat and add ice water and lemon juice. Get that turkey submerged into the water. Cover the pot and place in fridge for at least 8 hours or preferably overnight. This is the brining process. Remove brined turkey and rinse under cold water. Place turkey onto wire rack to drain. You may want to put paper towels underneath to soak up water. Dry turkey with paper towels. Run your fingers under turkey’s breast and thighs to get the skin loose. Work slices of butter and sage leaves under the skin. Dry skin again with paper towels. Rub skin with olive oil. Put carrots, celery, and onions in shallow roasting pan. Put turkey in the center. Sprinkle with ground pepper. Put into the fridge for at least 4 hours or preferably overnight. Remove from fridge 2 hours before cooking. Preheat oven to 450 degrees. If there is any liquid that has collected in roasting pan remove with a baster. Tuck turkey wings underneath and tie legs together with kitchen twine. Put turkey in oven. Turn oven temperature down to 350 degrees. Roast for 1 hour and then baste with pan juices. If the breast is browning too quickly then cover with foil. Rotate roasting pan and continue to roast. Baste turkey every half hour for 2 1/2 to 3 more hours. You will want the meat thermometer to read 160 to 165 degrees. Remember that your turkey will continue to cook after leaving the oven. Remove turkey from oven and transfer turkey to cutting board. Let rest for 30 minutes before carving. Reserve any drippings for gravy. Serves 10


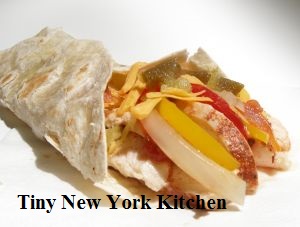
Mediterranean Chicken Wraps
It’s mid-week and I feel like eating a bit lighter. You can make my Mediterranean Chicken Wraps for lunch or dinner. Just make sure that you marinate the chicken for a few hours before cooking.
INGREDIENTS
1 Pound Boneless & Skinless Chicken Breasts
2 Cups Italian Dressing For Marinade
6 Large Wraps
1 Cup Hummus
1 Head Romaine Lettuce
1 Cup Pitted Black Olives
1 Large Sliced Tomato
In a large-size bowl place the chicken breasts. Add the Italian dressing and cover with plastic wrap. Place in the fridge for 3 to 6 hours. When ready to cook remove from the fridge and grill the chicken thoroughly on a grill pan. Throw away the marinade. Remove from the heat and cut the chicken into slices. Spread hummus on each wrap. Place the lettuce leaves, tomato slices, pitted olives and chicken on top of the hummus. Roll the wraps and serve for either lunch or dinner. Serves 6
 Crusty Parmesan Chicken
For chicken that is crunchy and delicious hot or cold, try this quick and easy oven-fried version. The recipe multiplies easily to feed a crowd.
INGREDIENTS
1 Cup Dry Bread Crumbs
1/2 Cup Grated Parmesan Cheese
1/2 Teaspoon Paprika
1/2 Teaspoon Garlic Powder
1/2 Teaspoon Kosher Salt
1/2 Teaspoon Freshly Ground Pepper
2 Tablespoons Freshly Chopped Parsley
5 Tablespoons Butter
4 to 6 Chicken Breasts (About 3 Pounds)
Preheat your oven to 350° F. In a medium-size bowl, stir together the bread crumbs, Parmesan cheese, paprika, garlic powder, kosher salt, pepper, and parsley. In a large-size sauté pan, over a medium heat, melt the butter. Dip the chicken breasts in the butter, and then roll in the breadcrumb mixture. Place the chicken, skin side up, in a parchment paper lined baking dish. Arrange the chicken breasts so they don’t touch. Place into the oven and bake for 1 hour or until the juices run clear. Remove from the oven. To serve warm, wrap in foil and transport in a container designed to hold the heat. To serve cold, let cool slightly, cover loosely with foil, and refrigerate until well chilled. Transport in a cooler. Serve 4

 A Few Words About Hamburgers
A delicious, juicy, tender hamburger can be yours, if you choose the right ground beef. The amount of fat directly contributes to the juiciness of the burger, so the leaner the beef, the drier the burger. Some markets state the cut of beef used for grinding while other indicate the percentage of fat in the grind. Some markets do both. Here are the three grinds that most shops carry:
Ground Sirloin
Ground sirloin has only 7 percent fat which makes it the leanest ground beef, but it can make a dense burger if overcooked. To combat dryness add 2 tablespoons of a wet condiment like teriyaki sauce, pesto, Dijon mustard, ketchup or mayonnaise for every pound of ground sirloin.
Ground Round
Ground round is a great choice for hamburgers because it has 15 percent fat.
Ground Chuck
Ground chuck is the ground beef of choice for many burger lovers. It has a relatively high fat content at 20 percent fat which makes a very juicy and very rich burger.
Ground Turkey or Ground Chicken
There are some people who prefer ground turkey or chicken for their burgers. Both must be cooked through so care must be taken to prevent dryness. Make sure to incorporate moisture by adding one of the ingredients suggested for ground sirloin. Also mix in 2 tablespoons of dried bread crumbs. As the meat heats and the fat melts the bread crumbs absorb and retain the fat that would otherwise drip out of the patty.
Shrinkage
Hamburgers shrink during cooking and a perfectly shaped raw patty can end up looking like a hockey puck. To avoid this, shape about 5 ounces of ground meat into a 4 inch round. Then make an indentation about 2 inches wide and 1 inch thick in the top. As the meat cooks the indentation will equalize the shrinkage.
No Don’t Do It!
Never Ever press on a hamburger to speed its cooking. You’ll squeeze out the precious fat and juices that make the burger taste so good. Yes, we’ve all done it…just resist that innate urge to do it again!

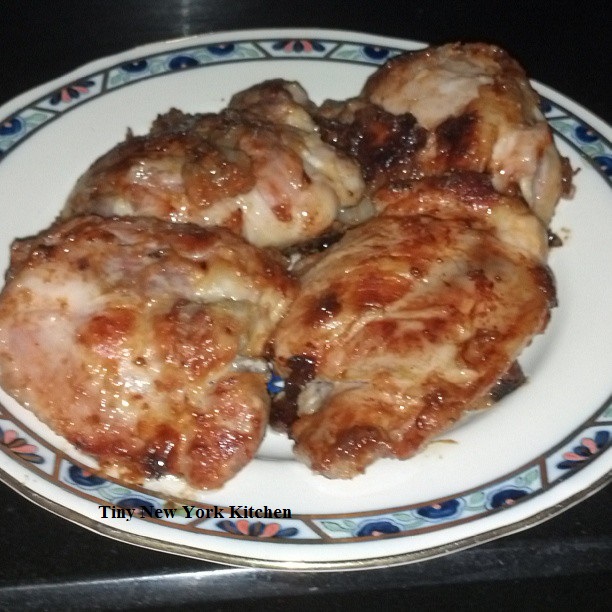 Tender Salt Chicken
If you’re looking for a new way to make chicken here is a nice change of pace. It’s made with a wonderful Asian ingredient called Shio-Koji. Shio-Koji is a Japanese traditional condiment made from malted rice and salt. Its salty flavor can be a great substitute for salt, by lowering the overall salt content to less than 50%. Shio-Koji is a live food that is rich in enzymes. It brings out the umami in foods. Shio-Koji imparts a rich savory flavor making any dish delicious. It is excellent to use when marinating fish or meat and can be found in most Asian grocery stores.
INGREDIENTS
2 Tablespoons Miso
1 Tablespoon Shio-Koji
1 Pound Chicken Thighs
4 Tablespoons Plain Yogurt
3 Tablespoons Olive Oil
In a medium size bowl combine the yogurt, miso and Shio-Koji. Mix well to combine. Place the chicken thighs in a large ziplock bag and pour the Shio-Koji mixture in the bag to cover the chicken. Zip up the bag and give a good shake to ensure that all of the chicken is nicely covered. Place in the fridge and let sit for at least 2 hours. Place a large size sauté pan on the stove and pour in the olive oil. Turn the heat to medium-high and place the chicken thighs into the sauté pan. Cook one side for 3 minutes and then turn over. Cook the other side for another 3 minutes. Reduce the heat to medium-low and cook for15 to 20 minutes. Remove from the heat and transfer to a serving plate. Serves 2


 Super Easy Chicken Fajitas
I’ve really been in a Mexican food mood as of late. Since getting back from Tucson a couple of months ago I have really been yearning for good South of the Border cuisine. Keeping in line with easy weeknight meals here is a quick and easy family dinner.
INGREDIENTS
1 Tablespoon Olive Oil
1 Pound Chicken Breast Strips
1 Cup Salsa
3 Tablespoons Fresh Lime Juice
1 Teaspoon Worcestershire Sauce
1 Bell Pepper (Cut into Thin Strips)
1 Medium Onion (Cut into Thin Strips)
10 Flour Tortillas for Fajitas or Soft Tacos
In a medium size skillet add the olive oil and chicken strips. Cook over a medium-high heat for 4 minutes. Add the salsa, lime juice and Worcestershire sauce. Add the peppers and onions. Give a good stir. Cook for 5 minutes until the vegetables are crisp-tender. Remove from the heat and spoon the filling into tortillas. Add additional salsa as a topping if you like. Roll these babies up and serve. Makes 10 fajitas.
Tip: Feel free to add shredded cheese, sliced mushrooms, tomatoes or anything your heart desires.