Drinking From Bottles, Cans, And Brown Paper Bags!
For as long as beverages have been available in disposable containers, etiquette books have advised people not to drink out of cartons, bottles, and cans. The only exception to this rule was the consumption of beer and soda at outdoor picnics or barbecues, where suitable glasses might not be available.
Nowadays, however, you can buy everything from green tea to chocolate soy milk in packages made from glass, plastic, paper, and aluminum – or a variety of combinations. Convenient little juice boxes come with their own plastic straws, and sports drinks come in wide-mouth containers for easy gulping. People even wear water bottles with designer labels, like handbags as they traipse through the mall.
Drinking directly from bottles or cans might be the most convenient option on the tennis court or on the go, but when it comes to serving beverages in your home, drinks should be drunk from a glass, never a can or bottle. And definitely not from the milk carton.
“Work With What You Got!”
© Victoria Hart Glavin Tiny New York Kitchen

Perplexing Foodstuffs
There are those foods that can be rather difficult to figure out how to eat without looking like you were born in a cave. Here are some useful tips for properly eating perplexing foodstuffs.
Artichokes
Pluck off artichoke leaves and scrape the tender part (not the prickly point) between your teeth (preferably after dipping in melted butter). Work your way to the delicate inner leaves, and then use a knife to cut off the remaining small leaves and feathery innards. Cut the artichoke “heart” into bite-sized pieces and eat with a fork.
Asparagus
Eat asparagus with your fingers if served raw as crudités. Eat with a fork and knife if served with dinner.
Bread
Break bread into bite-sized pieces, and butter it or dip it into olive oil just one piece at a time.
Crab (Soft-Shelled)
Eat entire crab, including shell, either in sandwich form or using a fork and knife. Remove inedible pieces from your mouth with a fork.
Fajitas
Place meats, vegetables, and other fillings on a flat tortilla. Roll up and use your fingers to eat fajitas from one end.
Fondue
Spear bread, vegetables, or fruit with a fondue spear and dip into cheese or sauce. Remove food from spear using a dinner fork, and eat from a plate. DO NOT double dip. Spear uncooked meat cubes and place spear into fondue broth or sauce. When cooked, transfer meat to a plate using a dinner fork and cut into smaller pieces to eat.
Lobster
Wear a lobster bib to avoid fishy splatters, Crack shells with shellfish crackers and extract meat with a small fork or pick. Cut larger pieces with a knife, and eat with a fork after dipping in melted butter. Clean your hands by dipping fingers into finger bowls, and use lemon (if provided) to cut extra grease. Dry your hands with your napkin.
Peas
Use a knife to push peas onto a fork. Do not mash peas before eating, or eat peas from a knife.
Raw Shellfish
Use a small fork to extract mussels, clams, or oysters from the half-shell. Season with fresh lemon or cocktail sauce. In informal settings, you may quietly slurp shellfish from shells.
Soup
Using a soup spoon, spoon soup away from your body and then quietly sip from side of spoon. Tilt bowl away from you to spoon up remaining drops.
Spaghetti
Twirl pasta with fork tines into bite-sized portions, and allow any dangling pieces to fall back onto your fork. You may also rest fork tines against the bowl of a spoon while you twirl pasta.
Steamers
Extract clam from shell using a small fork, and use a fork and knife to remove inedible neck. In informal settings, it is permissible to use fingers.
“Work With What You Got!”
© Victoria Hart Glavin Tiny New York Kitchen
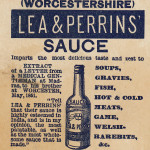
Season With Worcestershire Sauce
Think of Worcestershire sauce as the “Fish Sauce” of American cooking. Worcestershire sauce is probably one of the most underused condiments. The sauce is a fermented mix of vinegar, molasses, anchovies, and other seasonings that adds great flavor to a dish without adding many calories. I often add a splash to salad dressings, marinades, and sauces, or use it to season ground meat for meatloaf or burgers. Just go easy because it’s high in sodium.
"Work With What You Got!"
© Victoria Hart Glavin Tiny New York Kitchen
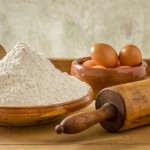
If you have many occasions to use a rolling pin then you really should have different sizes and different shapes of rolling pins on hand. Sometimes a very long, thick, and heavy one will be best. For other dough you will want a smaller, lighter one. The French style, which is extra long, narrow, and tapered at both ends, is especially good for rolling dough into a round shape, as for a pie crust, while the straight-sided rolling pin is better for an oblong shape.
If you’re unfortunate enough to be without any rolling pin at all, other things will do a decent job. Try a straight-sided bottle, tall jar, or a drinking glass.
"Work With What You Got!"
© Victoria Hart Glavin Tiny New York Kitchen

Storing Candy
One of the nice things about homemade candy is that it can be eaten when it is at its freshest. In addition, it contains no chemicals, artificial flavoring, or preservatives, although the lack of preservatives does limit its storage capabilities. Most homemade candy, however, will keep well for several weeks if it is stored properly. The exception is divinity, which gets stale quickly and should be eaten within two days of preparation.
Here are some rules for storing candy successfully.
Sticky and chewy candies, like taffy, nougat, and caramels, and hard candies, like butterscotch, should be individually wrapped in waxed paper, plastic wrap, or foil.
All candy keeps best in an airtight container in a cool, dry place. Some chocolate candies, like truffles, are best stored in the refrigerator.
Do not store brittle candies in the same container with soft, creamy candies. The moisture from the soft candies may make the hard candies sticky.
Candy freezes well. Place the candy, individually wrapped if appropriate, in a cardboard box or plastic container. Overwrap the container with freezer paper or foil. To thaw the candy, let it stand for several hours, or overnight, and come to room temperature before opening the container. This will prevent moisture from collecting on the candies because of the temperature change.
"Work With What You Got!"
© Victoria Hart Glavin Tiny New York Kitchen

Making The Best Candy
Candy is not difficult to make. Some candy recipes require little or no cooking at all. Other candy recipes need only careful timing and adequate beating. For some types of candy, however, special care is necessary. Follow these basic instructions and you can become a successful and versatile candy maker.
Always read a recipe through from beginning to end BEFORE starting to cook. This is important with all recipes, but especially candy recipes. You never will know if you need special equipment or a special ingredient until you read the recipe.
Always use the best quality, freshest ingredient available.
Measure ingredients accurately, using standard measuring spoons for small amounts, a fluid measuring cup for liquids, and graduated measuring cups for dry ingredients.
Follow recipes carefully. Use only the ingredients specified and add them in the order and by the method given.
To prevent sugaring, carefully follow directions about stirring and about covering the pan.
Use moderate or low heat, according to instructions in the recipe, so the syrup does not reach the boiling point too quickly.
Always use a saucepan large enough to allow space for the candy to bubble up when boiling. A 2 quart pan is large enough in most cases, but sometimes a 3 quart or even a 4 quart pan is preferable. A pan in which candy is made should be a heavy gauge metal, which holds heat evenly and will prevent sticking.
Candy making involves a lot of stirring and beating. Although an electric mixer may be used in some stages of preparation, such as beating egg whites for divinity, for most candy mixtures a spoon is best. A long handled wooden spoon is preferable, since it will never get too hot to handle. God bless wooden spoons!
A candy thermometer that clips onto the side of the pan is almost a necessity for successful candy making, since it is critical that the candy be removed fro the heat at the moment it reaches the proper temperature. It is best to use a clearly marked, easy to read thermometer with a mercury ball that is set low enough to measure the temperature of the boiling syrup, but does not touch the bottom of the pan.
To use a candy thermometer, be sure it is at room temperature before putting it into the hot syrup. Lower the thermometer gradually into the candy mixture AFTER the sugar is dissolved and the syrup has begun to boil.
The cold-water test is an alternative to a candy thermometer. Many cooks still rely upon this test, although it is not as accurate as a candy thermometer (hard ball/soft ball).
Temperature Tests For Candy
Temperature of Syrup Test Description of Syrup When Dropped Into Very Cold Water
234° to 240 ° Soft Ball Forms a soft ball that flattens on removal from water
244° to 248° Firm Ball Forms a firm ball that does not flatten on removal from water
250° to 266° Hard Ball Forms a hard ball that, on removal from water remains hard enough to hold its shape yet pliable
270° to 290° Soft Crack Separates into threads that are hard, but not brittle, when removed from water
300° to 310° Hard Crack Separates into threads that are hard and very brittle
To water-test, use very cold, but NOT ice, water. Use a clean cup, spoon, and fresh water for each test. Remove the pan from the heat and drop a little of the hot mixture into the water. Use your fingers to gather the drops into a ball and feel its consistency. If the candy is not yet ready, immediately return the pan to the heat.
Avoid making candy on damp or rainy days. High humidity is the candy maker’s enemy. If for any reason you cannot postpone a candy making session, cook the candy 1 or 2 degrees higher on the thermometer than indicated in the recipe.
Altitude also affects candy making. Temperatures given in recipes are typically for sea level. At high altitudes the candy must be cooked about 2 degrees higher.
Be patient and always allow sufficient time. Most candy does take time to make, and there is no way to rush the cooking with disaster.
"Work With What You Got!”
© Victoria Hart Glavin Tiny New York Kitchen
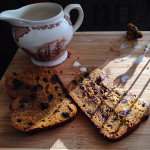
Make Pumpkin Bread Eggnog French Toast Of Course!
Substitution Guide
|
Ingredient |
Substitution |
|
Allspice (1 tsp.) |
1/2 tsp. cinnamon + 1/4 tsp. nutmeg + 1/4 tsp. ground clove |
|
Baking Powder (1 tsp.) |
1/4 tsp. baking soda + 1/2 tsp. cream of tartar |
|
Baking Soda (1 tsp.) |
2 tsp double-acting baking powder + replace acidic liquid ingredient in recipe with non-acidic liquid |
|
Balsamic Vinegar |
Equal amount of sherry or cidar vinegar |
|
Bread Crumbs (1 cup) |
3/4 cup cracker crumbs |
|
Brown Sugar (1 cup) |
1 Tbsp. light molasses + enough sugar to fill 1 dry measure cup or 1 cup raw sugar |
|
Butter, salted (1 cup or 2 sticks) |
1 cup or 2 sticks unsalted butter + 1/4 tsp. salt or 1 cup margarine or 7/8 cup lard or vegetable shortening |
|
Buttermilk (1 cup) |
Place 1 Tbsp. white vinegar or lemon juice in a liquid measure. Fill to 1 cup with room temp whole or 2% milk and let stand for 5 minutes or 1 cup milk + 3/4 tsp. cream of tartar or 1 cup plain yogurt |
|
Canola, Sunflower and Vegetable Oils |
Substitute one for one |
|
Chocolate, Bittersweet or Semi-Sweet (1 oz.) |
1/2 oz. Unsweetened chocolate + 1 Tbsp. granulated sugar |
|
Cocoa Powder (3 Tbsp. Dutch-processed) |
1 oz. Unsweetened chocolate + 1/8 tsp. baking soda + reduce fat in recipe by 1 Tbsp. or 3 Tbsp. natural cocoa powder + 1/8 tsp. baking soda |
|
Corn Starch (as a thickener) |
Equal amounts of Minute Tapioca for cornstarch, use slightly less for flour |
|
Cream of Tartar (1/2 tsp.) |
1/2 tsp. white vinegar or lemon juice |
|
Egg (1 whole large egg) |
3-1/2 Tbsp. thawed frozen egg or egg substitute or 2 egg whites |
|
Garlic (1 fresh clove) |
1 tsp. Garlic Salt or 1/8 tsp. Garlic Powder or 1/4 tsp. dried minced garlic |
|
Gingerroot (1 Tbsp. minced) |
1/8 tsp. ground ginger powder or 1 Tbsp. rinsed and chopped candied ginger |
|
Half & Half (1 cup) for cooking or baking |
1-1/2 Tbsp. butter or margarine + enough milk to equal 1 cup |
|
Heavy Cream (1 cup) for cooking or baking |
3/4 cup milk + 1/3 cup butter or margarine |
|
Herbs, Fresh (1 Tbsp.) |
1 tsp. dried herbs |
|
Honey (1 cup) for cooking or baking |
1 1/4 cups granulated sugar + 1/4 cup of liquid appropriate for recipe |
|
Italian Seasoning (1 tsp.) |
1/2 tsp. dried basil + 1/4 tsp. dried oregano + 1/4 tsp. dried thyme |
|
Molasses (1 cup) |
1 cup honey or 1 cup dark corn syrup or 3/4 cup light or dark brown sugar dissolved in 1/4 cup liquid |
|
Mushrooms, fresh (1 cup sliced and cooked) |
1 can (4 oz.) mushrooms, drained |
|
Mustard, Prepared (1 Tbsp.) |
1/2 tsp. dry mustard powder + 2 tsp. white vinegar |
|
Onion (1 small minced) |
1/2 tsp. onion powder |
|
Poultry Seasoning (1 tsp.) |
1/4 tsp. ground thyme + 3/4 tsp. ground sage |
|
Pumpkin Pie Spice (1 tsp.) |
1/2 tsp. ground cinnamon + 1/4 tsp. ground ginger + 1/8 tsp. allspice + 1/8 tsp. nutmeg |
|
Sour Cream (1 cup) |
1 cup plain yogurt or 1 Tbsp. lemon juice and enough evaporated milk to equal 1 cup |
|
Tomato Juice (1 cup) for cooking |
1/2 cup tomato sauce + 1/2 cup water |
|
Tomato Sauce (1 cup) for cooking |
1/2 cup tomato paste + 1/2 cup water |
|
Wine, Red (1 cup) |
1 cup nonalcoholic wine, apple cider, beef broth or water |
|
Wine, White (1 cup) |
1 cup nonalcoholic wine, white grape juice, apple juice, chicken broth or water |
|
Yogurt (1 cup) |
1 cup buttermilk or 1 Tbsp. lemon juice and enough milk to equal 1 cup or 1 cup sour cream |
"Work With What You Got!"
© Victoria Hart Glavin Tiny New York Kitchen
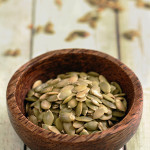
Don’t Forget The Seeds!
Just like pumpkins, the seeds of butternut and other hard winter squashes can be tossed with a splash of olive oil and a pinch of kosher salt, then toasted for a crunchy every occasion snack.
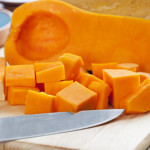
Keep Squash Fresh
A whole squash can be stored in a cool, dry place for up to a month. Once peeled and cubed, it will stay fresh in the refrigerator for up to one week in an airtight container. Once peeled and cubed, don’t keep it any longer than a week in an airtight container in the fridge. If flesh had dark or mush spots, it’s time to throw it away.


