Heart healthy beets are packed with nutrients and are perfect for late winter meals. You will love them for their vibrant color, sweet flavor, and versatility.
There are just 60 calories in 1 cup of beets. While low calorie, beets are also packed with potassium, iron, vitamin C, and heart healthy nitrates. The greens are rich in vitamins A and K. Try using beets in soups and sautés.
While red beets are the most common variety, other varieties of beets do exist. Golden beets, as their name implies, are a golden yellow color. Chioggia beets contain red and white stripes on the inside, which is why they are often referred to by their nickname – candy cane beets.
To store fresh beets, separate the leaves from the root and place in separate plastic bags in the refrigerator. The greens should be used within a few days while the roots can last up to two to three weeks.
To peel uncooked beets, use a vegetable peeler to remove the thin skin. For roasted beets, use a paper towel to gently rub off the skins. This gives you a better grip and helps keep beet juice from staining your hands.
Beet juice has been used as far back as the 16th century for makeup, hair dye, and fabric dye. It’s still used commercially as a natural food coloring and clothing dye.
To remove beet juice stains from your cutting board, sprinkle with salt and rub with a lemon half before rinsing. You can remove stains from your hands by rubbing them with a little baking soda, then washing with soap.
Beets are high in nitrates, natural compounds that may help lower your blood pressure and help your body use oxygen more efficiently. Many pro athletes and Olympians drink beet juice to improve their performance.
Beets get their deep red color from compounds called betalains, which have strong antioxidant and anti-inflammatory properties.
37% of the recommended daily intake of folate for adults is in 1 cup of raw beets. Folate needs increase during pregnancy, as this vitamin helps babies develop in the womb, making beets a great addition to a pregnant woman’s diet.
©Tiny New York Kitchen © 2021 All Rights Reserved
Roasting refers to proteins and vegetables cooked mostly at high temperatures in the oven. Baking uses a lower temperature to cook breads, baked goods, and casseroles.
Roasting makes any vegetable taste better. It brings out their flavor, caramelizes their natural sugars, and adds crunch. If your family doesn’t love certain vegetables like broccoli or Brussels sprouts, roasting is a great way to change their mind. Double what you’re roasting and then turn extra servings into quick meals later in the week. Cooking a little extra with one meal lets you make the most of value-sized packages of proteins and other store sales. With leftover already planned, you won’t need to lean on takeout.
Why we love to roast:
It’s Affordable! Inexpensive ingredients are tastiest when roasted. Root vegetables are browned and crisp, tomatoes and grapes are extra juicy and sweet, and tough cuts of beef are fall-apart tender. You also don’t need any special equipment to roast.
Roasting Is Healthful! Roasted foods need very little fat to cook compared to frying or sautéing. Roasting also intensifies flavors without added salt, sugar, or other ingredients.
It’s Easy! Roasted foods need little prep before they cook. And once the oven door closes, you can walk away. Fewer pans and utensils are needed, making cleanup easier too.
Essential Tools For Roasting:
Rimmed Sheet Pan: The rim keeps vegetables from falling off the sides and catches any juices from meats and fish.
Oven-Save Skillet: Go from stovetop to oven and back. Sear meats before roasting or make a pan sauce with the meat drippings after roasting.
Roasting Pan: Best for large roasts, hams, and turkeys. An inner rack lifts the meat so it can brown and crisp underneath.
Parchment Paper: Line pans to keep foods from burning and sticking, then toss for easy cleanup. If roasting at a higher temp or broiling use foil.
Metal Tongs: Flip and stir foods on a hot pan with ease. Look for tongs with a heat resistant grip.
Silicone Brush: Brush on a sticky glaze or baste foods with sauce. The silicone bristles are easy to clean.
Tips For Sheet Pan Roasting:
Jump Start Browning by preheating your sheet pan before adding vegetables.
Pat foods very dry with paper towels so the outside browns while the inside cooks through.
Cut foods to the same size and thickness so smaller pieces don’t burn.
Space out foods on the sheet pan so they have room to crisp and brown.
Let sheet pans cool before rinsing to keep the metal from warping.
©Tiny New York Kitchen © 2021 All Rights Reserved
Buttermilk is a fermented dairy drink that was traditionally the liquid left behind after churning butter out of cultured cream. Today, most modern buttermilk is cultured. Cultured buttermilk was first commercially introduced in the US in the 1920s. Commercially produced buttermilk is milk that has been pasteurized, homogenized, and then inoculated with a culture of Lactococcus lactis to simulate the naturally occurring bacteria in the old-fashioned buttermilk. The tartness of cultured buttermilk is primarily due to lactic acid produced by lactic acid bacteria while fermenting lactose, the primary sugar in milk.
Condensed buttermilk and dried buttermilk are very important in the food industry. Liquid buttermilk is used primarily in the commercial preparation of baked goods and cheese. Buttermilk solids are used in ice cream manufacturing as well as being added to pancake mixes to make buttermilk pancakes.
Buttermilk reacts with the baking soda and powder to give quick breads their rise and tender crumb. The reaction is best at the beginning, you’ll want to get the loaf in the oven right after mixing the wet and dry ingredients. Buttermilk can also be used in marinating meats, especially chicken and pork, because the lactic acid helps to tenderize, retain moisture, and allows added flavors to permeate the meats.
©Tiny New York Kitchen © 2021 All Rights Reserved
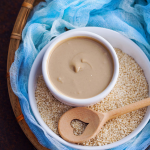
Tahini, a roasted sesame seed paste, is the key ingredient in hummus recipes, but you can also use tahini these ways:
Nut-Free Peanut Sauce
Combine with soy sauce, lime juice, brown sugar, and crushed red pepper. Check labels to be certain that your tahini is nut-free.
Veggie Burgers
Add a spoonful to help bind bean or lentil burger mixture together instead of using an egg.
Oatmeal
Drizzle over a bowl of oatmeal topped with sliced bananas, a dollop of yogurt, and maple syrup.
Dressing
Stir together with lemon juice, olive oil, and minced garlic as a dressing for salads or grain bowls.
Brownies
Swirl into a pan of brownie batter before baking to balance the sweetness of the chocolate.
©Tiny New York Kitchen © 2021 All Rights Reserved
This holiday season, whether you are planning your usual celebrations or making new smaller traditions it is important to balance holiday favorites and healthful options that are delicious. Sticking to wellness goals can be challenging during the holidays. Here are some tips to help you stay on track.
Pack Healthful Snacks For Travel
If you’re traveling this holiday season it can be challenging to eat healthy. Rest stops, gas stations, and airports aren’t known for healthful snack options. Pack your own for holiday trips. Try apples or bananas paired with nut butter, trail mix, or pre-cut vegetables with hummus cups. Be sure to fill up your water battle, too.
Mindful Eating
Mindfulness is the practice of being present and in the moment and can help you fully enjoy each eating experience. Turn off technology, set the table and eat slowly, using all of your senses with each bite. These habits can help you tune into your hunger cues and allow you to savor your meals without overdoing it. Plus, mindfulness can help you fully engage in the time you’re spending with loved ones.
Work In A Workout
When you’re in the thick of holiday prep, your exercise routine may fall by the wayside. Since you can’t add more hours to the day, fit in exercise when you can by parking farther away at the grocery store or taking the stairs at the mall.
Indulge Your Sweet Tooth Mindfully
There are many holiday treats to choose from. Plan to pick out your favorites and truly savor them. That will make it easier to skip the rest. If you stick to your normal healthy eating patterns most of the time, you will come out of the holiday season satisfied but not over stuffed.
©Tiny New York Kitchen © 2020 All Rights Reserved
Cheese Boards are a no-cook, sure-to-please option for any holiday celebration. Build a cheeseboard that’s affordable yet special. Then toast the season with festive cocktails.
A few inexpensive ingredients and simple homemade touches are all you need for a spectacular, special occasion-worthy spread. Here are some smart tips to deck your board with festivity and flavor without breaking the bank.
For a classic, colorful centerpiece, make your own cranberry and herb cheeseball. Start with a container of spreadable cheese and form into a ball. Use a sheet of plastic wrap to avoid messy hands. Roll the ball in a combination of finely chopped dried cranberries, parsley, and chives until thoroughly coated. Let sit at room temperature for 15 minutes before serving.
No need to buy expensive cheeses. Inexpensive cheddar is always a crowd pleaser. Skip the pre-cut cubes and cut the block yourself. Orange or white, mild or extra sharp. Cheddar is always a favorite.
Upgrade affordable goat cheese by rolling the log in herbs and spices, like dried thyme, dried oregano, or crushed rainbow peppercorns for a beautiful, flavorful crust. You could also keep it plain and top with jarred pepper jelly or mango chutney.
Instead of mixed nuts, opt for crunchy snack mixes, which are often less expensive and just as delicious. For the board, look for one with little or no seasoning.
Give a budget-friendly feta or mini mozzarella balls a flavor boost by marinating cubes in olive oil with herbs like parsley, oregano, or rosemary, and other seasonings like sliced chilis, crushed garlic, or lemon zest. Refrigerate overnight or up to 3 days.
Round out your cheese board with other delicious items like fresh or dried fruit (dried apricots, figs, grapes, and sliced pears), pitted olives, and plain crackers.
Pair your cheese board with a festive holiday beverage and enjoy!
©Tiny New York Kitchen © 2020 All Rights Reserved
Warm Dough
Make sure not to let the dough get warm. Use cold butter and ice water. Refrigerate the dough before you roll it out. If the butter warms it will be absorbed by the flour, become sticky, and make for a tough crust.
Uneven Crust
To get an even, round crust, begin rolling from the middle of the dough round, pushing outward and stopping the pressure 1/4 inch from the edge. Then lift the round, give it a quarter turn and repeat.
Transferring Crust
To transfer your pie dough from the rolling surface to the pie plate, lift it with a bench scraper, gently drape it over a rolling pin, then place it in the pie plate.
©Tiny New York Kitchen © 2020 All Rights Reserved
Sweet potatoes are available year-round, but their true seasons are fall and winter.
When selecting choose firm, unblemished sweet potatoes without any breaks in their thin skin.
Preparing: To bake whole sweet potatoes, scrub them well first and prick their skins in a few places with a fork. Place them on a baking sheet to catch their juices, and bake in a preheated 400-degree oven until they are tender when pierced with a knife, about 45 minutes. They may then be peeled and sliced or cut into chunks for glazing, or puréed. You can also peel uncooked sweet potatoes and cook them in salted boiling water until tender before glazing or pureeing.
Sweet potatoes do not keep well. Store them in a cool, dark place, but plan to use them within a week or so.
©Tiny New York Kitchen © 2020 All Rights Reserved


