
I know that summer baking seems counter intuitive, but for some reason I feel compelled to keep baking in the warmer months of the year. Keeping your home cool can be though enough without the oven adding to the heat. Plus, adding in heat-sensitive ingredients and humidity and you can have less than perfect baking results. Summer does bring wonderful seasonal ingredients like berries and stone fruits that should be missed.
Use your oven in the morning or evening. We all know that your oven can heat up your kitchen quickly. This is why I like to bake early in the morning or in the evening when the outside temperature is lower.
Choose recipes with shorter baking times. In keeping with minimizing the heat from your oven, look for baking recipes that don’t require lots of oven time. A simple cake or a pan of mini cupcakes will bake more quickly than a Bundt cake or even a pan of brownies. If you’re a cookie baker try baking a pan at a time to avoid having the oven on for all the time it takes to bake dozens of cookies. You can refrigerate the dough between batches or even freeze the dough to bake when your cookie cravings strike.
Refrigerate cookie dough and pie crusts. Speaking of cookie dough, keep in mind that a warmer kitchen will also make your cookie doughs warmer. If the butter in the dough begins to melt, you could end up with flat, tough cookies. You can try scooping and baking your cookies quickly, but if you refrigerate the dough before baking and between batches you will avoid these issues. This applies to pie crusts as well. It’s not unusual on a warm day to end up with a too warm, too soft pie crust once it’s rolled out, placed in the pan and the edges fluted. When this happens, just put the pie pan in your refrigerator for a bit to let it cool and rest.
Keep an eye on softening butter. With a warmer kitchen butter will soften faster. The warmer it is the faster butter will soften. If you’re using a recipe that contains softened butter, remember to check for softness sooner than normal to ensure that the butter doesn’t get too soft and affect the texture of your baked goods.
Humid days can definitely affect your baking. If you are baking something with a lot of liquid in it, then it may take longer to bake than usual. Keep an eye on whatever you’re baking and follow the recipe’s directions and your best judgement to check for doneness.
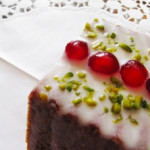
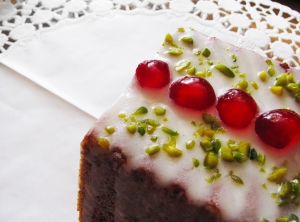
Fresh berries and stone fruits are one of summer’s gifts and it is nice to bake with them. There are so many easy ways to bake with summer fruit. A simple fruit crisp or cobbler is always a welcome treat on a summer day. They are also wonderful garnishes for many desserts like cheesecake and pound cake.
Frosting and heat generally don’t mix well. If you’ve made a cake or cupcakes that are frosted you may want to keep them in the refrigerator until it’s time to serve them. Bring them to room temperature before serving. Refrigerating these types of desserts isn’t a bad idea year-round, especially if the dessert won’t be eaten within a day or two.
No bake desserts may be the way to go. Skipping the oven time can still yield amazing desserts that are perfect for the season with their cool, creamy flavors, and textures. From ice cream to cheesecakes to pies and a whole lot more, you can find plenty of ways to satisfy your sweet cravings.
Support your local bakery. If you are lucky enough to have a great local bakery, take advantage of it. A simple pound cake can be turned into something special with just some fresh fruit and sweetened whipped cream. Brownies can be dressed up in a big way with a scoop of ice cream, a drizzle of caramel sauce, and a sprinkling of nuts. Your grocery store can help, too, with shortcut ingredients like puff pastry.
“Work With What You Got!”
©Tiny New York Kitchen © 2020 All Rights Reserved

Now that the colder weather is here and you’ve put away your beach towel it’s time to winterize your cocktails. One way to achieve this is by using amari, the rich, bitter, herbal European-style liqueurs-before–dinner aperitifs and after-dinner digestifs-that have become more popular and widely available. Amari can add structure and backbone to cocktails and is often the secret behind some of the most iconic classic drinks. Amaro is perfect for colder months, to pair with flavors like honey, citrus, and spices. Adding it is like seasoning food because it enhances flavors and gives the drink more character.
This season bartenders are combining them with brown spirits like dark rum, bourbon, rye, and Scotch for autumn and winter drinks. You could make a variation on the Brooklyn cocktail with bourbon, amaro, maraschino liqueur, dry vermouth, blood orange liqueur, and bitters.
Some add amaro and bourbon to mulled wine or change up that Irish Coffee by using single-malt whiskey, two kinds of amaro, coffee, simple syrup, and topped with whipped cream. Change up the Negroni by keeping the gin, but replacing the Campari with amari and adding amontillado sherry.
Be inventive and try adding amari to your holiday cocktails. You may just create a new classic.
“Work With What You Got!”
©Tiny New York Kitchen © 2018 All Rights Reserved


Thanksgiving Emergency Strategies
Help, help, I have extra guests coming! My gravy doesn’t look right! What to do? These are some holiday entertaining questions that I have been asked over the years. Whether this is the first time you’ve hosted Thanksgiving dinner or your 20th time there are always things that seem to come up that feel like emergencies. From lumpy gravy to unexpected guests the pressure can just be too great at times. Not to worry, these are some good strategies that have helped me cope and make everything run smoothly.
Dear Victoria: “My turkey is still a bit frozen and my dinner is in a few hours. What should I do?”
Put that bird into a large pot and run tepid water over it for at least an hour. You can butterfly the turkey so that it cooks faster which should take about an hour and a half at 400 degrees. You can then roast it or grill it. In the future you may want to consider purchasing a fresh turkey and not a frozen one.
Dear Victoria:” I called everyone to the table and started carving the turkey to find that parts of it are still raw or undercooked. How embarrassing! What should I do?”
This situation has happened to most of us at one time or another. Don’t skip a beat and just carry on carving off any parts that are cooked, serve those and put the remaining pieces back in the pan, cover with foil, and cook until done. Most likely the breast meat will be done. Your guests can get a bit of turkey along with your delicious sides while waiting for the rest of the turkey to come out of the oven. In the future you may want to consider carving the turkey first and then cooking it.
Dear Victoria: “I always seem to overcook the turkey. I just don’t know how I keep doing this. Please help!”
For the immediate remedy I suggest you have LOTS of gravy on the table to pour over those dried out pieces of turkey. In the future make sure to invest in a meat thermometer. Insert the thermometer into your cooked turkey through the thickest part of the breast until it hits the breastbone. Remove the turkey from the oven when it reads 160 degrees. Let your turkey rest for about 30 minutes before carving.
Dear Victoria: “I have a small kitchen and don’t have much room in my oven to cook everything. How am I going to get everything done?”
Tiny New York Kitchen knows this situation all too well! First of all there are plenty of things that you can get cooked in advance. Check your menu and see what you can prepare before needing to place your turkey in the oven. If you have an outdoor grill, then by all means grill your bird. Hey, you can play it off as the “hip thing to do.” Let your side dishes cook in the oven while your turkey is grilling out there in the fresh November air!
Dear Victoria: “I made stuffing and it is pretty soggy. How can I make it un-soggy?”
This is a super easy one. Scoop it out of the turkey and/or the baking dish and spread it out on a baking sheet. Place it in the oven and bake it at 350 degrees until it is how you want it. Scoop it back into the serving dish and serve. No one will be the wiser.
Dear Victoria: “Before I call my guests to the table the food starts to get cold. How can I avoid this?”
Cover serving dishes with lids or foil to keep them warm. If a dish actually gets really cold, that is supposed to be hot, then just put it back in the oven for a little bit. Don’t be too concerned, however, as most Thanksgiving dishes are perfectly fine at room temperature.
Dear Victoria: “My side dishes aren’t browned on top? They just don’t look that appetizing. What should I do?”
If a dish is fully cooked, but doesn’t have that delicious looking brown surface (Potatoes, Vegetables, Stuffing, etc.) then simply put them under a hot broiler at least 4 inches away from the heating element. You may want to turn them as needed until browned on top. MAKE SURE that you watch them carefully. You really don’t want them to go from pasty to burned up! Always put the food too far from the broiler rather than too close. If you follow these instructions then you will get a nice browned crust on top of your dishes.
Dear Victoria: “My gravy looks way too lumpy. I can’t serve lumpy gravy! How do I fix it?”
Not to worry. You will just need to put some hard work into it with a good whisk. Whisk those lumps out. It may take a bit of time, but it can be done. If you have really stubborn lumps add just a bit of hot liquid to coax them out while you whisk. If you STILL can’t get them out take a medium weave strainer and set it over a bowl. Pour the grave in and stir. Smooth gravy will flow through the strainer and the lumps will stay behind. For the future make sure you whisk the flour or cornstarch constantly while you are adding the broth or turkey juices to keep lumps from forming.
Dear Victoria: “Help, my gravy is just way to thick. It looks like brown jelly. How do I thin it out?”
This one is super easy. Drizzle in a bit of hot broth or hot water while whisking and then heat up your gravy until it’s piping hot.
Dear Victoria: “My gravy is too thin. It looks watery. I’m horrified. Is there a good solution to this hot mess?”
This problem is just a bit trickier. Brown 1 tablespoon for every cup of gravy by stirring it in a dry frying pan over a medium heat until it turns a nice deep golden brown. Have your gravy in a wide pan on the stove over a medium high heat. Whisk the browned flour into your gravy and cook. Make sure to whisk constantly until your gravy thickens. This should do the trick.
Dear Victoria: “The top of my pumpkin pie is all cracked and looks horrible. What happened? How can I serve a cracked pumpkin pie?”
Your pumpkin pie was over baked which is why it is cracked on top. Not a soul needs to know, however, if you dollop on whipped cream and carry it to the table like the prize pie it is! Sometimes cooking is like acting. If you flub a line you just carry on like that is how it is supposed to be.
Dear Victoria: “My sister called and asked if she could bring extra guests. My goodness, what am I going to do? Dinner is in an hour!”
I’ve certainly encountered this situation plenty throughout my dinner party throwing life. I’ve always kept an open door policy because I figure that not everyone has a place to go on the holidays, which can be very sad and lonely. The good news is that most of us make way too much food for Thanksgiving. Having unexpected guests can impact a meal however. First of all, forget any leftovers that you were counting on. Make more mashed potatoes, rice or pasta. These items take 30 minutes or less to make. Slice the turkey thin. Make a quick soup by combining chicken broth, pureed cooked vegetable(s), fresh herbs, salt and pepper. As soon as you get the call immediately put bowls of nuts and snacks out before dinner.
Dear Victoria: “I have quite a large group coming for dinner and I don’t have enough room at the table. What do I do?”
You can set up dinner buffet style or you can set up multiple tables as auxiliary eating areas. Living room coffee tables and game and/or card tables work. You can let everyone sit where they want or you can seat people by age or alphabetically or however you decide to seat people. Thanksgiving is about spending time with friends and family. People will have fun no matter where they are sitting. Relax and enjoy yourself.

 Packing A Picnic & Serving Food Outdoors
Packing A Picnic
*Pack lots of extra drinks in a cooler. When it’s hot outside picnickers get thirsty.
*Pack sweet treats. Bring fresh fruit such as berries and melon or cookies instead of ice cream.
*Keep prepared foods in the refrigerator until it is time to pack them up.
*Bring a soccer ball, football, baseball & mitts or a Frisbee. If you live close to the park either walk, rollerblade or ride your bikes.
*Pack sunscreen! Even when it is overcast or if you’re lying in the shade make sure to wear sunscreen.
Serving Food Outdoors
*When taking foods on a picnic make sure to keep perishables in the cooler with either ice or freezer packs until serving time. Make sure that the food is cold BEFORE it goes into the cooler.
*Pack just the right amount that you and your picnickers are going to eat. You don’t want to bring leftovers back home.
*If you are driving to your picnic don’t put your cooler and picnic basket in the hot trunk. Instead transport your picnic in the air-conditioned car.
*At you picnic site, keep the cooler and picnic basket in the shade. Open the cooler as little as possible.
*Never leave foods at room temperature for more than 2 hours. If the temperature outside is over 90°F, perishable foods should be left out no longer than 1 hour.
*If you buy a lot of take-out foods, such as fried chicken or barbecued beef, make sure to eat the food within 2 hours of pickup. Otherwise, buy the food in advance, refrigerate and reheat just before serving.
*Keep desserts made with whipped cream, cream cheese or dairy products refrigerated until you are ready to serve. Store any leftovers in a refrigerator or cooler.
*When preparing food outdoors, away from home, make sure to bring a jug of water, soap and paper towels for hand washing.
 Serving & Storing Cake
To enjoy cakes at their best, follow these tips:
*Allow cakes with butter type frosting to stand for about an hour before slicing.
This allows the frosting to set.
*For cakes that are filled or frosted with whipped cream make sure to assemble
Them no more than 2 hours before serving. This will prevent them from
Getting soggy.
*To cut your cakes use a thin bladed knife cut pieces. Run the knife under hot
Water and make sure to wipe the knife dry before cutting the first piece
And in between subsequent cuts.
*For storing cakes most cakes can be covered and stored at room temperature
For 2 to 3 days. It is good to have a cake cover, but if you don’t have
A cake cover then just invert a large bowl over your cake. If you directly
Cover the cake with plastic wrap then it will for sure make a mess of the
Frosting.
*For those cakes that have a filling or a frosting that contains eggs, whipped
Cream or cream cheese it is best to store your cake covered in the fridge.
*If you want to freeze your cake then you should put your cooled and unfrosted
Cake layers on a baking sheet. Freeze them until they are nice and firm.
After the layers are frozen then transfer them to large freezer bags or wrap
Them and seal them in freezer wrap. They will keep in the freezer for up to
4 months. Thaw them before frosting.
*If you are serving your cake directly from the pan then cover them and freeze
Them in the pan. Make sure to thaw them before frosting them.

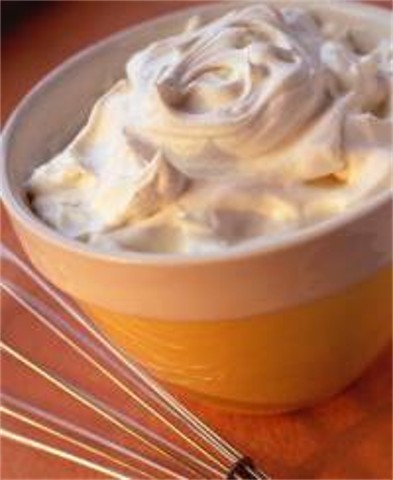
No More Weeping Whipped Cream
There are several ways to prevent whipped cream from weeping or separating into foam and water. The easiest way is to buy an envelope of commercial whipped cream stabilizer and follow the directions. Another option is to sprinkle 1 teaspoon of unflavored gelatin into 1 tablespoon of cold water in a medium size bowl until it softens. Then place the bowl over boiling water, to make a double boiler, until the gelatin melts. Remove the bowl from the heat. Slowly whisk in 1 pint of heavy whipping cream. Mix well. Cover and chill the bowl for at least 1 hour. Now beat with an electric mixer to form stiff peaks. Add ½ cup of powdered sugar and 1 teaspoon of vanilla extract. Refrigerate and cover until you are ready to use.


