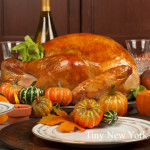
The turkey came originally from America and was first domesticated by the Aztecs in Mexico. The Spanish introduced turkeys into Europe and they soon became a popular choice in France, Italy and Britain.
When early settlers from Britain, France and Holland crossed the Atlantic to North America, the vast flocks of turkey that roamed wild provided them with sustenance. They were plentiful and so easy to trap or shoot that the older children of the family were given the responsibility of catching them. The Native Americans meanwhile taught the new settlers the rudiments of farming, and in November 1621, on the first anniversary of their arrival, the Pilgrims entertained the locals to a feast, at the center of which was the turkey. Ever since, this has been the traditional bird served at Thanksgiving.
Turkeys are available fresh, chilled, or frozen all year round. When buying a whole bird, look for a plump well-rounded breast and legs and clear, soft and evenly colored skin. Avoid birds that are bruised, with blemishes or torn skin or any that have been badly or unevenly plucked. Turkeys vary enormously in weight.
When you’re ready to purchase your turkey it’s easy to get confused on what size to get. A good guild to go by is to figure approximately 1 1/4 pounds per person. This makes enough for the meal and provides a decent amount of leftovers.
To store your turkey place it in a large, deep dish and cover it completely with plastic wrap. Store it in the coolest part of the refrigerator; making sure that it does not come in contact with other foods.
Thaw a frozen turkey in the refrigerator for 2 to 4 days. Estimate 24 hours for every 5 pounds, so 2 days for a 10 pounder, 3 days for a 15 pounder, etc.
And then there is always the frozen turkey emergency that goes like this, “Help, help, it’s Wednesday, and my turkey is still frozen!!!” It’s been a long time, but I’ve been in this predicament. What you do is leave the turkey in its wrapper and put it in a large-size container. A lobster pot works well. Fill the container with cold tap water and let it sit for 30 minutes. Dump out the water and refill. Let it sit another 30 minutes. Repeat until the turkey is thawed, then roast immediately or transfer to the refrigerator.
The good news is that you can brine or dry cure your turkey while it defrosts in the refrigerator. What a Godsend that is! Use a lighter brine solution, which is about 1/2 cup kosher salt per gallon of water, plus sugar and spices). If you’re dry curing, use the standard recipe. You’re turkey should stay below 40 degrees while brining. You don’t need to brine or cure a kosher or butterball type supermarket frozen turkey. These come pre-brined. If you want to be able to put your own flavor stamp on your meal, then get a natural or untreated bird and do it yourself. If you plan on brining for 2 days use the weaker solution that I just mentioned. If you plan to brine for 24 hours or less, then bump it up to 1 cup kosher salt per gallon of water. Then add an equal amount of sugar. I don’t always brine, but when I do I’ve been known to throw an assortment of flavorings in the brine. Flavorings that you could add to your brine could be: apples, lemons, oranges, onions, garlic, shallots, peppercorns, bay leaves, cinnamon sticks, cloves, allspice berries, juniper berries, mustard seeds, fennel seeds, coriander seeds, rosemary, sage, thyme, savory, parsley, or oregano. You can also replace half the water with sweet cider, hard cider, vegetable stock, turkey stock, chicken stock, beer, white wine, or red wine. If you want to dry cure then use about 1/2 teaspoon kosher salt for every pound of turkey. Then add spices to your taste.
Stuffing your turkey is a personal preference. I always stuff the bird because I love how it tastes when cooked inside the turkey. It does slow down the cooking process, however. Never stuff the turkey in advance of cooking. The stuffing can be made in advance, but the turkey should not be stuffed until just before it is placed in the oven. Weigh the stuffing and add this to the weight of the bird before calculating the cooking time. Thoroughly rinse the body cavity of the bird under cold running water, and then drain it well. Wipe the turkey, inside and out, with paper towels. Press the stuffing inside the shallow neck cavity. Make sure not to pack it in too tightly. Turn the bird over and pull the neck skin over the stuffing. Now it’s time for a little turkey bondage and truss the bird (tuck the wing tips under the breast and tie the legs together) and then cook for the calculated time. Never shorten the cooking time because although the meat may appear cooked, extra time must be allowed for cooking the stuffing thoroughly.
If you choose not to stuff your turkey then place aromatics in the body cavity of the bird. Cut a large onion in half and stud each half with 4 to 6 cloves. Place this in the body cavity of the bird. Cut an orange and a lemon into quarters and add these, together with 3 or 4 bay leaves, 4 to 6 fresh sage sprigs, and 2 to 3 fresh thyme sprigs. Add 1 cinnamon stick or 1 blade of mace for a festive hint of warm spice.
Turkeys are super easy to roast, but require a little more attention than smaller birds. Check to make sure the oven shelves are in the correct position before heating the oven. Preheat the oven to 350 degrees. Place the prepared bird on a rack in a large-size roasting pan. Smear the turkey breast generously with butter, season with salt & pepper and place in the oven. Baste the turkey from time to time during cooking. When the breast has browned, cover with foil to protect it and continue cooking. Remove the covering foil for the final 20 minutes of cooking. To check if the meat is cooked, insert a skewer into the thickest part of the thigh. If the juices run clear and the meat is white, it is cooked. If the juices are pink and the meat is soft and pink, the turkey is not ready. Return it to the oven and check again after 20 minutes. Cooking times will differ depending on whether your bird was purchased fresh or frozen. Plan on 20 minutes per pound in a 350 degree oven for a defrosted turkey and 10 to 15 minutes per pound for fresh. Remember to add more time if you’re turkey is stuffed. You should have an instant-read thermometer in your kitchen drawer. Insert the thermometer into the breast (all the way to the bone) and if it reads 160 degrees you’re good to go. You may also measure the thigh by inserting the thermometer into the thickest part, but not touching the bone, and it should read 165 degrees.
Remove the turkey from the oven and cover it closely with foil. Leave it to rest for at least 30 minutes. This will even out the temperature and make it easier to carve. I know some chefs who let it rest for 2 hours, but I don’t think that one needs to wait that long. If you wish to make gravy in the roasting pan, transfer the bird to a carving plate.
When you’ve let your bird rest awhile remove the trussing string. Hold the bird steady in position with a carving fork. Cut off the legs, then cut these in half or carve the meat from the bones. Make a horizontal cut across the breast above the wing. Carve neat and even vertical slices off the breast. Repeat on the other side of the bird. Arrange slices on a warmed platter. Add the turkey legs or sliced meat to the platter or set them aside for serving separately. Scoop out the stuffing and serve with the meat.
“Work With What You Got!”
© Victoria Hart Glavin Tiny New York Kitchen © 2016 All Rights Reserved


