Roasting refers to proteins and vegetables cooked mostly at high temperatures in the oven. Baking uses a lower temperature to cook breads, baked goods, and casseroles.
Roasting makes any vegetable taste better. It brings out their flavor, caramelizes their natural sugars, and adds crunch. If your family doesn’t love certain vegetables like broccoli or Brussels sprouts, roasting is a great way to change their mind. Double what you’re roasting and then turn extra servings into quick meals later in the week. Cooking a little extra with one meal lets you make the most of value-sized packages of proteins and other store sales. With leftover already planned, you won’t need to lean on takeout.
Why we love to roast:
It’s Affordable! Inexpensive ingredients are tastiest when roasted. Root vegetables are browned and crisp, tomatoes and grapes are extra juicy and sweet, and tough cuts of beef are fall-apart tender. You also don’t need any special equipment to roast.
Roasting Is Healthful! Roasted foods need very little fat to cook compared to frying or sautéing. Roasting also intensifies flavors without added salt, sugar, or other ingredients.
It’s Easy! Roasted foods need little prep before they cook. And once the oven door closes, you can walk away. Fewer pans and utensils are needed, making cleanup easier too.
Essential Tools For Roasting:
Rimmed Sheet Pan: The rim keeps vegetables from falling off the sides and catches any juices from meats and fish.
Oven-Save Skillet: Go from stovetop to oven and back. Sear meats before roasting or make a pan sauce with the meat drippings after roasting.
Roasting Pan: Best for large roasts, hams, and turkeys. An inner rack lifts the meat so it can brown and crisp underneath.
Parchment Paper: Line pans to keep foods from burning and sticking, then toss for easy cleanup. If roasting at a higher temp or broiling use foil.
Metal Tongs: Flip and stir foods on a hot pan with ease. Look for tongs with a heat resistant grip.
Silicone Brush: Brush on a sticky glaze or baste foods with sauce. The silicone bristles are easy to clean.
Tips For Sheet Pan Roasting:
Jump Start Browning by preheating your sheet pan before adding vegetables.
Pat foods very dry with paper towels so the outside browns while the inside cooks through.
Cut foods to the same size and thickness so smaller pieces don’t burn.
Space out foods on the sheet pan so they have room to crisp and brown.
Let sheet pans cool before rinsing to keep the metal from warping.
©Tiny New York Kitchen © 2021 All Rights Reserved
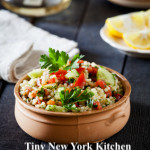
Tabouli (.تبولة also tabbouleh, tabouleh, tabbouli, taboulah) is a Levantine vegetarian dish made mostly of finely chopped parsley with tomatoes, mint, onions, bulgur (that is soaked not cooked), and seasoned with olive oil, lemon juice, salt, and sweet pepper. Some variations add cucumbers, lettuce, or use semolina instead of bulgur. Tabouli is traditionally served as part of a mezze (small dishes served as appetizers) in the Arab world, but its popularity has grown tremendously in Western cultures.
Originally from the mountains of Lebanon and Syria, tabouli has become one of the most popular salads in the Middle East. The wheat variety salamouni was cultivated in the Beqaa Valley region in Lebanon and was considered, in the mid-19th century) as well-suited for making bulgur, a basic ingredient of tabouli.
In the Middle East, particularly Syria, Lebanon, Palestine, Jordan, Egypt, and Iraq, it is usually served as part of a meze. The Syrian and the Lebanese use more parsley than bulgur wheat in their dish. A Turkish variation of the dish known as kisir and a similar Armenian dish known as eetch use far more bulgur than parsley. Another ancient variant is called terchots. In Cyprus, where the dish was introduced by the Lebanese, it is known as tambouli. In the Dominican Republic, a local version introduced by Syrian and Lebanese immigrants is called Tipile.
“Work With What You Got!”
©Tiny New York Kitchen © 2020 All Rights Reserved
Choosing A Bird
How big should you buy? If you don’t want leftovers then estimate 1 pound of turkey per person. If you do want leftovers then estimate 1 1/2 pounds per person.
Fresh Or Frozen
Should you buy fresh or frozen? Fresh will keep for 4 days in the refrigerator. There is no need to thaw it and some believe that fresh is more flavorful. Frozen is often more affordable, can be purchased weeks in advance, but requires thawing time.
Defrosting
There are two ways to defrost your frozen turkey. 1. In the refrigerator; if you have more time, allow the bird to thaw in the refrigerator in its original packaging. Allow 24 hours of thawing for every 5 pounds of turkey. 2. Cold water bath; if you’re short on time submerge the turkey in a cold water bath. Change the water every 30 minutes. Allow 30 minutes of thawing for every pound of turkey.
Roasting
Remove the giblets. The giblets typically include the heart, liver, and gizzard (often gathered in a bag), plus the neck. You can throw them away or simmer them in stock or water to make your own broth to use in gravy or stuffing.
Tie The Legs
For even roasting, use butcher’s twine to loosely tie the turkey legs together, and then tuck the wings under the shoulders. Don’t wash the bird. Washing can easily spread bacteria. To kill any bacteria, roast the turkey until it reaches an internal temp of 165 degrees.
Brush With Melted Butter
Bump up the flavor by adding herbs, spices, and citrus zest to the butter.
Take The Temperature
Ignore the pop-up timer, they’re unreliable. Instead use an instant read thermometer and take the temperature in the thickest part of the thigh (it takes the longest to cook) and make sure the thermometer isn’t touching any bone. 165 degrees is the magic number.
Let It Rest
Once the turkey comes out of the oven, cover loosely with foil and let it rest at room temperature for 15 minutes. This allows the juices to reabsorb for moist and delicious meat.
Storing
Leftovers should be put away right when you’re done serving. If anything is left out for more than 2 hours, throw it away. Store leftovers in airtight containers in the refrigerator for up to 4 days or in the freezer for up to 3 months. Reheat to 165 degrees and cover to preserve moisture and texture.
“Work With What You Got!”
©Tiny New York Kitchen © 2018 All Rights Reserved
Whether you’re hosting your first Thanksgiving or you’ve been making the family feast for decades, refer to our Thanksgiving timeline checklist to keep your prepping, shopping, and cooking on track for the big day.
1 TO 2 WEEKS BEFORE THANKSGIVING
Confirm the number of guests and plan your menu
Order your turkey
Plan your table setting, serving dishes, and decorations
Read through all your recipes to determine the food and cooking equipment you will need
Make your shopping and to-do lists
Shop for nonperishable food items, plus any cooks’ tools, cooking equipment and tableware you need
A FEW DAYS BEFORE
Prepare the turkey brine, but do not add the turkey, cover and refrigerate
Prepare food that can be made several days ahead of time, such as pie pastry and cranberry sauce
THE DAY BEFORE
Complete your food shopping
If you ordered a fresh turkey, pick it up or have it delivered
If you are brining the turkey, place it in the brine and refrigerate
Prepare dishes that can be made in advance such as soups and pies
Chop vegetables for side dishes; refrigerate in covered bowls or sealable plastic bags
Peel and cut the potatoes, place in cold water and refrigerate
Set the table
THANKSGIVING DAY
Refrigerate wines that need chilling
Prepare the stuffing and other side dishes
Prepare the turkey for roasting and put in the oven at the determined time
If you plan to stuff the turkey, do not stuff it until just before you put it in the oven
While the turkey is roasting, make the mashed potatoes
While the turkey is resting, make the gravy and cook or reheat the side dishes
Carve the turkey and serve your guests
Have a wonderful Thanksgiving!
“Work With What You Got!”
©Tiny New York Kitchen © 2018 All Rights Reserved
Tiny New York Kitchen Wishes You And Your Loved Ones A Very Happy Thanksgiving!
The holiday season is in full swing and soon you’ll be living on Thanksgiving leftovers. Ever had pumpkin pie for breakfast followed by a full turkey meal for lunch and another for dinner? It’s easy to get in the habit of holiday indulging.
The average American gains more than a pound each holiday season. Over a decade that really adds up. As they say, “It’s easy to put it on and hard to take off.”
There are ways to enjoy the holidays, but keep yourself in check so that you don’t fall into the trap of complete abandon.
High Fat Foods
Pigs In A Blanket: High In Fat, Salt, and Carbs.
Fried Cheese Balls: High In Fat And Small So It’s Easy To Overeat.
Baked Brie: Fatty And Addictive, Plus You Have To Slather It Onto Some Carb Calories.
Chips: They Have No Nutritional
Eat In Moderation
Cheese And Crackers: Calorically Dense And Super Easy To Eat. They’re Not Special So Spend Your Holiday Calories On Something More Festive.
Once-A-Year Favorites: You Only Eat Stuffing, Latkes, And Eggnog Once Or Twice A Year. If You’ve Been Coveting Aunt Martha’s Chiffon Pie Or Cousin Tommy’s Cooked Goose, Enjoy In Moderation.
Be My Guest
Crispy, Crunchy Crudités: Make The Brightly Colored Vegetables Your First Stop For Noshing. Add Hummus To Slow Digestion.
Pork Tenderloin, Ham Or Turkey: Protein Is Going To Suppress Your Appetite Due To The Fact That It Is Slow Digesting And Triggers The Release Of Several Satiety Hormones.
Shrimp Cocktail: Low In Fat, High In Protein And A Perfect First Course For A Low Calorie Tour Of The Buffet.
Swedish Meatballs: Another Protein Packed Option That Stands Out Amid A Carbohydrate Heavy Table.
Prosciutto Wrapped Asparagus: A Great Choice To Fuel Your Body While Keeping Your Appetite In Check.
Enjoy the holidays, but enjoy them in moderation.
“Work With What You Got!”
© Victoria Hart Glavin Tiny New York Kitchen © 2017 All Rights Reserved
Remove Turkey From Refrigerator At Least 1 Hour Prior To Roasting.
Preheat Oven To 325 Degrees.
Place Turkey In Sink And Remove Neck & Giblets.
Place In Roasting Pan And Brush With Melted Butter. Season With Salt & Pepper.
Place Turkey In Lower Third Of The Oven And Roast For 10 Minutes Per Pound.
To Determine If Turkey Is Done, Place Thermometer Between Thigh & Breast. Temperature Should Register Between 160 To 165 Degrees And Juices Should Run Clear.
When Turkey Is Done, Remove From Oven, Cover Loosely With Foil, And Allow To Rest 30 To 45 Minutes, Which Allows Time To Heat Side Dishes.
Carve & Enjoy!
Approximate Cooking Times Based On 10 Minutes Per Pound At 325 Degrees:
9 Pound Turkey: 1 1/2 To 1 3/4 Hours
12 Pound Turkey: 2 To 2 1/4 Hours
14 Pound Turkey: 2 1/4 To 2 1/2 Hours
16 Pound Turkey: 2 1/2 To 2 3/4 Hours
18 Pound Turkey: 3 To 3 1/4 Hours
20 Pound Turkey: 3 1/2 To 3 3/4 Hours
22 Pound Turkey: 4 To 4 1/4 Hours
25 Pound Turkey: 4 1/4 To 4 1/2 Hours
If You Have Stuffed Your Turkey Then Add More Time.
“Work With What You Got!”
© Victoria Hart Glavin Tiny New York Kitchen © 2016 All Rights Reserved
The turkey came originally from America and was first domesticated by the Aztecs in Mexico. The Spanish introduced turkeys into Europe and they soon became a popular choice in France, Italy and Britain.
When early settlers from Britain, France and Holland crossed the Atlantic to North America, the vast flocks of turkey that roamed wild provided them with sustenance. They were plentiful and so easy to trap or shoot that the older children of the family were given the responsibility of catching them. The Native Americans meanwhile taught the new settlers the rudiments of farming, and in November 1621, on the first anniversary of their arrival, the Pilgrims entertained the locals to a feast, at the center of which was the turkey. Ever since, this has been the traditional bird served at Thanksgiving.
Turkeys are available fresh, chilled, or frozen all year round. When buying a whole bird, look for a plump well-rounded breast and legs and clear, soft and evenly colored skin. Avoid birds that are bruised, with blemishes or torn skin or any that have been badly or unevenly plucked. Turkeys vary enormously in weight.
When you’re ready to purchase your turkey it’s easy to get confused on what size to get. A good guild to go by is to figure approximately 1 1/4 pounds per person. This makes enough for the meal and provides a decent amount of leftovers.
To store your turkey place it in a large, deep dish and cover it completely with plastic wrap. Store it in the coolest part of the refrigerator; making sure that it does not come in contact with other foods.
Thaw a frozen turkey in the refrigerator for 2 to 4 days. Estimate 24 hours for every 5 pounds, so 2 days for a 10 pounder, 3 days for a 15 pounder, etc.
And then there is always the frozen turkey emergency that goes like this, “Help, help, it’s Wednesday, and my turkey is still frozen!!!” It’s been a long time, but I’ve been in this predicament. What you do is leave the turkey in its wrapper and put it in a large-size container. A lobster pot works well. Fill the container with cold tap water and let it sit for 30 minutes. Dump out the water and refill. Let it sit another 30 minutes. Repeat until the turkey is thawed, then roast immediately or transfer to the refrigerator.
The good news is that you can brine or dry cure your turkey while it defrosts in the refrigerator. What a Godsend that is! Use a lighter brine solution, which is about 1/2 cup kosher salt per gallon of water, plus sugar and spices). If you’re dry curing, use the standard recipe. You’re turkey should stay below 40 degrees while brining. You don’t need to brine or cure a kosher or butterball type supermarket frozen turkey. These come pre-brined. If you want to be able to put your own flavor stamp on your meal, then get a natural or untreated bird and do it yourself. If you plan on brining for 2 days use the weaker solution that I just mentioned. If you plan to brine for 24 hours or less, then bump it up to 1 cup kosher salt per gallon of water. Then add an equal amount of sugar. I don’t always brine, but when I do I’ve been known to throw an assortment of flavorings in the brine. Flavorings that you could add to your brine could be: apples, lemons, oranges, onions, garlic, shallots, peppercorns, bay leaves, cinnamon sticks, cloves, allspice berries, juniper berries, mustard seeds, fennel seeds, coriander seeds, rosemary, sage, thyme, savory, parsley, or oregano. You can also replace half the water with sweet cider, hard cider, vegetable stock, turkey stock, chicken stock, beer, white wine, or red wine. If you want to dry cure then use about 1/2 teaspoon kosher salt for every pound of turkey. Then add spices to your taste.
Stuffing your turkey is a personal preference. I always stuff the bird because I love how it tastes when cooked inside the turkey. It does slow down the cooking process, however. Never stuff the turkey in advance of cooking. The stuffing can be made in advance, but the turkey should not be stuffed until just before it is placed in the oven. Weigh the stuffing and add this to the weight of the bird before calculating the cooking time. Thoroughly rinse the body cavity of the bird under cold running water, and then drain it well. Wipe the turkey, inside and out, with paper towels. Press the stuffing inside the shallow neck cavity. Make sure not to pack it in too tightly. Turn the bird over and pull the neck skin over the stuffing. Now it’s time for a little turkey bondage and truss the bird (tuck the wing tips under the breast and tie the legs together) and then cook for the calculated time. Never shorten the cooking time because although the meat may appear cooked, extra time must be allowed for cooking the stuffing thoroughly.
If you choose not to stuff your turkey then place aromatics in the body cavity of the bird. Cut a large onion in half and stud each half with 4 to 6 cloves. Place this in the body cavity of the bird. Cut an orange and a lemon into quarters and add these, together with 3 or 4 bay leaves, 4 to 6 fresh sage sprigs, and 2 to 3 fresh thyme sprigs. Add 1 cinnamon stick or 1 blade of mace for a festive hint of warm spice.
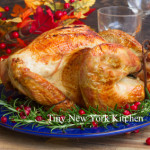
Turkeys are super easy to roast, but require a little more attention than smaller birds. Check to make sure the oven shelves are in the correct position before heating the oven. Preheat the oven to 350 degrees. Place the prepared bird on a rack in a large-size roasting pan. Smear the turkey breast generously with butter, season with salt & pepper and place in the oven. Baste the turkey from time to time during cooking. When the breast has browned, cover with foil to protect it and continue cooking. Remove the covering foil for the final 20 minutes of cooking. To check if the meat is cooked, insert a skewer into the thickest part of the thigh. If the juices run clear and the meat is white, it is cooked. If the juices are pink and the meat is soft and pink, the turkey is not ready. Return it to the oven and check again after 20 minutes. Cooking times will differ depending on whether your bird was purchased fresh or frozen. Plan on 20 minutes per pound in a 350 degree oven for a defrosted turkey and 10 to 15 minutes per pound for fresh. Remember to add more time if you’re turkey is stuffed. You should have an instant-read thermometer in your kitchen drawer. Insert the thermometer into the breast (all the way to the bone) and if it reads 160 degrees you’re good to go. You may also measure the thigh by inserting the thermometer into the thickest part, but not touching the bone, and it should read 165 degrees.
Remove the turkey from the oven and cover it closely with foil. Leave it to rest for at least 30 minutes. This will even out the temperature and make it easier to carve. I know some chefs who let it rest for 2 hours, but I don’t think that one needs to wait that long. If you wish to make gravy in the roasting pan, transfer the bird to a carving plate.
When you’ve let your bird rest awhile remove the trussing string. Hold the bird steady in position with a carving fork. Cut off the legs, then cut these in half or carve the meat from the bones. Make a horizontal cut across the breast above the wing. Carve neat and even vertical slices off the breast. Repeat on the other side of the bird. Arrange slices on a warmed platter. Add the turkey legs or sliced meat to the platter or set them aside for serving separately. Scoop out the stuffing and serve with the meat.
“Work With What You Got!”
© Victoria Hart Glavin Tiny New York Kitchen © 2016 All Rights Reserved

