
French Toast Toppings
Ok, most of us love maple syrup on our pancakes and French toast, but sometimes it’s fun to change it up a bit. Here are some interesting alternatives that just may become your new favorites.
Apples & Thyme
Sauté 2 large Gala apples (cut into 1/2 inch thick pieces(, 1 tablespoon fresh thyme leaves and 1/4 teaspoon sugar in 2 tablespoons unsalted butter for 6 minutes until just tender.
Sweet & Spicy Bacon
Cook 1 pound bacon (cut into 1/2 inch pieces) in large-size skillet over a medium heat 10 minutes until nearly crisp. Using a slotted spoon transfer bacon to plate lined with paper towels. Wipe out skillet. Return bacon to skillet and cook 1 minute. Sprinkle with 1 tablespoon brown sugar and cook, tossing, until sugar melts. Drizzle with 2 tablespoons maple syrup and sprinkle with 1/8 teaspoon cayenne. Toss to coat.
Herbed Goat Cheese
In bowl combine 4 ounces goat cheese (at room temperature), 1 tablespoon chopped fresh tarragon and 1 tablespoon fresh parsley, 1 teaspoon lemon zest, and 1/4 teaspoon crushed red pepper flakes.
“Work With What You Got!”
© Victoria Hart Glavin Tiny New York Kitchen © 2016 All Rights Reserved

Pantry & Freezer Staples
How long do pantry and freezer staples last? Staple items are known for their long shelf life, but they don’t stay fresh forever! Use this handy list to determine how long you should keep them on hand.
Freezer
Hamburger & Stew Meats: Shelf Life: 1 to 2 Days Storage: 3 to 4 Months
Ground Turkey, Veal, Pork, Lamb: Shelf Life: 1 to 2 Days Storage: 3 to 4 Months
Bacon: Shelf Life: 7 Days Storage: 1 Month
Sausage (Raw From Pork, Beef, Chicken or Turkey): Shelf Life: 1 to 2 Days Storage: 1 to 2 Months
Fresh Steaks: Shelf Life: 3 to 5 Days Storage: 6 to 12 Months
Fresh Roasts: Shelf Life: 3 to 5 Days Storage: 4 to 12 Months
Chicken or Turkey (Whole): Shelf Life: 1 to 2 Days Storage: 1 Year
Chicken or Turkey (Cut Up): Shelf Life: 1 to 2 Days Storage: 9 Months
Lean Fish: Shelf Life: 1 to 2 Days Storage: 6 Months
Fatty Fish: Shelf Life: 1 to 2 Days Storage: 2 to 3 Months
Fresh Shrimp, Scallops, Crawfish, Squid: Shelf Life: 1 to 2 Days Storage 3 to 6 Months
Pantry
Baking Powder: Shelf Life: 18 Months Storage: Keep In Dry Place In Airtight Container
Beans (Dried & Uncooked): Shelf Life: 1 Year Storage: Store In Cool & Dry Place
Chocolate (Semisweet & Unsweetened): Shelf Life: 18 Months Storage: Keep In Cool Place
Cocoa: Shelf Life: 1 Year Storage: Keep In Cool Place
Cornstarch: Shelf Life: 18 Months Storage: Store In Airtight Container
Flour (White or Whole Wheat): Shelf Life: 6 to 8 Months Storage: Store In Airtight Container or Freeze To Extend Shelf Life
Nuts (In Shell & Unopened): Shelf Life: 4 Months Storage: Freeze to Extend Shelf Life
Spices & Herbs (Ground): Shelf Life: 6 Months Storage: Store in Airtight Containers In Dry Areas Away From Sunlight & Heat. Before Using, Check Aroma – If Faint Replace.
Sugar (Brown): Shelf Life: 4 Months Storage: Store in Airtight Container
Sugar (Confectioners’): Shelf Life: 18 Months Storage: Store in Airtight Container
Sugar (Granulated): Shelf Life: 2 Years Storage: Store in Airtight Container
Vinegar (Unopened): Shelf Life: 2 Years
“Work With What You Got!”
© Victoria Hart Glavin Tiny New York Kitchen © 2016 All Rights Reserved

Ways To Use Maple Syrup
Add flavor to your favorite recipes by replacing refined white sugar with pure maple syrup. 1 1/3 cups (335 ml) of maple syrup replaces 1 cup (225 g) of white sugar. When using maple syrup, reduce the amount of liquid in recipes by 1/3 cup (85 ml).
Drizzle on fruit
Use on pancakes, waffles, and French toast
Use a touch in smoothies and yogurt
Sweeten teas, herbal teas, and coffee
Add a spoon to your favorite cereal
Use in barbeque sauces
“Work With What You Got!”
© Victoria Hart Glavin Tiny New York Kitchen © 2015 All Rights Reserved

Less Stress Holidays
Holiday time is a wonderful time of year, but let’s face it, there is plenty of stress that comes with it. During the holidays, it’s better to keep things as simple as possible.
Appetizers & Hors D’Oeuvres: Keep it simple. Serve a simple, but beautiful cheese platter. Add bowls of dried fruit and nuts, as they’re always very festive. I like to set up a small snack table set with bowls of olives, savory popcorn, and Marcona almonds. I also like to serve a crudité platter for guests who may not want to eat rich foods or are perhaps trying to eat a bit healthier around the holidays.
Plan Your Menu: If you’re having a sit-down dinner, try to make a menu that can be prepared somewhat in advance. Some great options might be a beef Bourguignon, braised short ribs, coq au vin or any other main dish that can be made the day before. I am a big proponent of choosing things to cook that can be prepped ahead of time. I like to start off a dinner party with a nice salad that incorporates some seasonal ingredients like pomegranates, pears, citrus or candied nuts. A winter squash soup is also a nice way to begin a meal. Dessert can be a simple winter fruit crisp or a spice cake served with ice cream.
Get A Head Count: When it comes to a holiday meal, any time of year, depending on the number of guests, a simple yet broad menu works best. For buffet holiday parties with over a dozen people, you might want to offer a couple of different entrees. Add a vegetable and perhaps roasted potatoes or roasted root vegetables. Offering a nice crisp green salad always rounds out the menu as well. Add some delicious small rolls or a sliced baguette and you’re good to go.
Serving A Nice Beverage: Then there are the beverages. Having a festive specialty drink is always welcomed by your guests. If you’re mixing the drinks yourself, keep it simple. Please don’t spend all of your time being a bartender at your own party. That’s no fun! You could mix a nice holiday punch bowl with an adult kick ahead of time. A splash of pomegranate liqueur or elderflower liqueur is a nice addition to prosecco or champagne. A white Christmas cosmo (made with white cranberry juice) is a holiday favorite. Make it in advance and when you’re ready to serve just shake with ice and serve.
Make In Advance: Many things can be done days before the party. Shopping for non-perishable foods like spices, flour, sugar can all be purchased many days before your party. You can also make your holiday cookie dough or pie crusts in advance. All you need to do is to make sure you freeze them until you’re ready to use them.
Keep Calm & Have Fun: The most important thing is to keep calm and have fun. A holiday party of any kind should be a time of joy for everyone, even the host. If you find yourself working way too hard to throw and plan a party then ask friends or family members for help. Perhaps a few good friends could bring a dish or two to help ease the stress on your kitchen. The goal is to have a good time with family and friends.
Happy Holidays From Tiny New York Kitchen!
“Work With What You Got!”
© Victoria Hart Glavin Tiny New York Kitchen © 2015 All Rights Reserved

Ways To Resist Overeating During The Holidays
Tiny New York Kitchen’s new motto is that December is the new January! With countless cocktail parties, cookie exchanges, and holiday meals this time of year, even the most responsible eaters can be tempted to go all out. Here are a few tips that can prevent total diet derailment, and still enjoy yourself, during the holiday season.
Fill your fridge with healthy, protein-rich snacks that will fill you up and keep you full so that you are less likely to indulge during holiday festivities.
Decide which temptations you would like to resist and to what degree. Remember moderation is key!
Indulge wisely. Allow yourself to enjoy those must-have treats that you look forward to all year long. Whether it’s eggnog, mashed potatoes, pecan pie, or red velvet cake – keep in mind that there is no need for an all-out binge-fest. Enjoy a reasonable yet rewarding amount of holiday foods that you absolutely love. Remember that no single meal will wreck your waistline.
Pay attention to how much water you are drinking. Try and consume 8 to 10 glasses of water per day.
Hit the gym. This way if you do indulge a bit at least it can be somewhat “guilt-free.”
Eat breakfast! When you skip breakfast you set yourself up to eat more at the next meal. Whatever you do, eat breakfast!
To recover the day after “food hangover” feeling that follows a rich meal, eat a normal breakfast with protein, such as yogurt or eggs, the next morning. The rest of the day, avoid refined carbs, drink at least 8 to 10 glasses of water to flush out the sodium. Also, fill up on “clean” foods such as fruits, vegetables, and protein.
Freeze those leftovers. Have leftover pecan pie? Freeze it! Storing tempting foods in the freezer to keep them out of sight means you’re much less likely to eat them since you’d have to defrost them first.
Be a smart snacker! Before you head out to those holiday parties, have a nibble of something so you don’t risk becoming starved. A handful of nuts, a mozzarella stick, Greek yogurt, or protein bar will work wonders.
Double up on those drinks! When you arrive at a party, start with a non-alcoholic drink to quench your thirst. Then have a glass of wine, champagne, or cocktail, but always alternate with zero-calorie liquids such as water or club soda. You’ll feel much better at the end of the night, and certainly the next day.
It’s ok to tell lies, but do it politely, of course. It’s hard to say “no” to your boss or your nana when they offer you a treat. Tell them thank you and take it. Tell them how delicious it looks, but that you’ve just eaten and are going to save it for later. Wrap it up and take it with you. If it ends up in the trash or given to someone else then that’s A-Okay!
If you’re going to a holiday party, offer to bring a healthy dish that you love. Bringing something healthy that you love will guarantee that there is something healthy that you can fill your plate with. It will also give you a chance to show your friends, family or coworkers that healthy food can taste great.
Get Up, Stand Up! When you’re at a party or buffet, get one plate, and then step away from the food table, but stay on your feet! Standing up helps with digestion and makes it more difficult to keep piling food on your plate, and burn calories.
Get thyself distracted! After a holiday meal, get your mind off food by offering to help clear the table or do the dishes. Chew a piece of gum or pop a breath mint. Its kind of like brushing your teeth so that you won’t be tempted to ruin your fresh breath for another piece of pecan pie.
Cut those serving portions down. There is no need to ruin a family recipe by reducing sugar or cutting out fatty ingredients. Instead make the real version of your great-grandmother’s famous date-nut cake, but cut it into 18 small slices rather than 10 giant pieces.
If you do overeat don’t beat yourself up, acknowledge it and then let it go. If you do go a little crazy at a party, it’s really not helpful to beat yourself up about it. Each day and each party is like a “reset,” it’s a chance to try again.
Happy Holidays!
"Work With What You Got!”
© Victoria Hart Glavin Tiny New York Kitchen

Substitution Guide
|
Ingredient |
Substitution |
|
Allspice (1 tsp.) |
1/2 tsp. cinnamon + 1/4 tsp. nutmeg + 1/4 tsp. ground clove |
|
Baking Powder (1 tsp.) |
1/4 tsp. baking soda + 1/2 tsp. cream of tartar |
|
Baking Soda (1 tsp.) |
2 tsp double-acting baking powder + replace acidic liquid ingredient in recipe with non-acidic liquid |
|
Balsamic Vinegar |
Equal amount of sherry or cidar vinegar |
|
Bread Crumbs (1 cup) |
3/4 cup cracker crumbs |
|
Brown Sugar (1 cup) |
1 Tbsp. light molasses + enough sugar to fill 1 dry measure cup or 1 cup raw sugar |
|
Butter, salted (1 cup or 2 sticks) |
1 cup or 2 sticks unsalted butter + 1/4 tsp. salt or 1 cup margarine or 7/8 cup lard or vegetable shortening |
|
Buttermilk (1 cup) |
Place 1 Tbsp. white vinegar or lemon juice in a liquid measure. Fill to 1 cup with room temp whole or 2% milk and let stand for 5 minutes or 1 cup milk + 3/4 tsp. cream of tartar or 1 cup plain yogurt |
|
Canola, Sunflower and Vegetable Oils |
Substitute one for one |
|
Chocolate, Bittersweet or Semi-Sweet (1 oz.) |
1/2 oz. Unsweetened chocolate + 1 Tbsp. granulated sugar |
|
Cocoa Powder (3 Tbsp. Dutch-processed) |
1 oz. Unsweetened chocolate + 1/8 tsp. baking soda + reduce fat in recipe by 1 Tbsp. or 3 Tbsp. natural cocoa powder + 1/8 tsp. baking soda |
|
Corn Starch (as a thickener) |
Equal amounts of Minute Tapioca for cornstarch, use slightly less for flour |
|
Cream of Tartar (1/2 tsp.) |
1/2 tsp. white vinegar or lemon juice |
|
Egg (1 whole large egg) |
3-1/2 Tbsp. thawed frozen egg or egg substitute or 2 egg whites |
|
Garlic (1 fresh clove) |
1 tsp. Garlic Salt or 1/8 tsp. Garlic Powder or 1/4 tsp. dried minced garlic |
|
Gingerroot (1 Tbsp. minced) |
1/8 tsp. ground ginger powder or 1 Tbsp. rinsed and chopped candied ginger |
|
Half & Half (1 cup) for cooking or baking |
1-1/2 Tbsp. butter or margarine + enough milk to equal 1 cup |
|
Heavy Cream (1 cup) for cooking or baking |
3/4 cup milk + 1/3 cup butter or margarine |
|
Herbs, Fresh (1 Tbsp.) |
1 tsp. dried herbs |
|
Honey (1 cup) for cooking or baking |
1 1/4 cups granulated sugar + 1/4 cup of liquid appropriate for recipe |
|
Italian Seasoning (1 tsp.) |
1/2 tsp. dried basil + 1/4 tsp. dried oregano + 1/4 tsp. dried thyme |
|
Molasses (1 cup) |
1 cup honey or 1 cup dark corn syrup or 3/4 cup light or dark brown sugar dissolved in 1/4 cup liquid |
|
Mushrooms, fresh (1 cup sliced and cooked) |
1 can (4 oz.) mushrooms, drained |
|
Mustard, Prepared (1 Tbsp.) |
1/2 tsp. dry mustard powder + 2 tsp. white vinegar |
|
Onion (1 small minced) |
1/2 tsp. onion powder |
|
Poultry Seasoning (1 tsp.) |
1/4 tsp. ground thyme + 3/4 tsp. ground sage |
|
Pumpkin Pie Spice (1 tsp.) |
1/2 tsp. ground cinnamon + 1/4 tsp. ground ginger + 1/8 tsp. allspice + 1/8 tsp. nutmeg |
|
Sour Cream (1 cup) |
1 cup plain yogurt or 1 Tbsp. lemon juice and enough evaporated milk to equal 1 cup |
|
Tomato Juice (1 cup) for cooking |
1/2 cup tomato sauce + 1/2 cup water |
|
Tomato Sauce (1 cup) for cooking |
1/2 cup tomato paste + 1/2 cup water |
|
Wine, Red (1 cup) |
1 cup nonalcoholic wine, apple cider, beef broth or water |
|
Wine, White (1 cup) |
1 cup nonalcoholic wine, white grape juice, apple juice, chicken broth or water |
|
Yogurt (1 cup) |
1 cup buttermilk or 1 Tbsp. lemon juice and enough milk to equal 1 cup or 1 cup sour cream |
"Work With What You Got!"
© Victoria Hart Glavin Tiny New York Kitchen
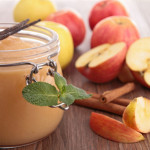
To make a refreshing, savory applesauce, I recommend using Fuji apples. There is no need to add sugar because they are extra sweet on their own. If you prefer your applesauce a bit more tart, McIntosh apples will do nicely as their tangy flavor balances with a tender texture.

 Constitution Week – Foods of Our Forefathers Part IV
The longer winters in New England produced a diet somewhat different from that in Virginia. Not as many varieties of fruits and vegetables grew as in the South, and emphasis was put on those which would store well or which could be converted to something stable through drying, salting, or pickling. The staple grain in the early days was rye, in addition to the new grain, Indian corn. A common bread was called “Rye’ n Injun,” and was baked from a yeast dough of rye, cornmeal, and molasses. Wheat did not grow well in the harsh climate, and the small amount of wheat flour available was used “for best,” as was the refined sugar.
Sweet potatoes and other root vegetables and cabbages were major items on the menu. All cooking was done in cavernous fireplaces, either in kettles or on spits. The cooking range, although invented by Count Rumford in the late 1700’s, didn’t become popular until the Civil War era. The New England boiled dinner of corned beef, potatoes, cabbage and whatever else was available, was a natural outgrowth of fireplace cooking. Beans baked in a pot set in the coals also fit the New England style of cooking and the available found supply.
Although mutton had been the main meat supply in England, pigs were more attractive than sheep in the new land. For one thing, sheep usually had only one lamb at a time, while a litter of pigs a dozen strong was not uncommon. Also, pigs could forage for themselves at an earlier age than sheep, and thrived on the vegetation in forest and field.
Cattle were kept largely for milk and cheese, and although they were scarce at first, they reproduced prolifically in the Northeast. In fact, the Reverend John Cotton once remarked “milk and ministers were the only things cheap in New England.”
In other parts of the country, settlers found more new foods and used them in new ways. In Louisiana, for example, French settlers adapted their old world recipes to accommodate such new foods as tomatoes, okra, crayfish, red snapper, catfish and, of course, corn. The climate was amenable to growing fruits and vegetables year ‘round, making a varied diet easy to get – even if it didn’t taste like home.
In the Charleston and Savannah areas, rice cultivation began very early, in 1694, and soon became a major business. Much of the rice was exported. Oranges were also grown in the Charleston area.
In the Southwest, the Spanish had developed a cuisine all their own, as they moved north from Mexico and Latin America. New varieties of beans, plus the ever-present corn, were cooked with traditional Spanish spices plus something unknown in Spain – hot peppers. With the continual warm weather were also possible, at least where water was available, and there was little emphasis on preservation. In the more arid areas, however, variety was as limited as during winter in New England. Beans, corn and squash were the order of the day.
As time went on, Americans moved west, and the frontiersmen had an entirely new set of problems to meet. Trappers and explorers traveled light, and that usually meant living primarily off the land. Many subsisted almost exclusively on meat, killing bear, venison and small game as they went. One of Pierre LeSeur’s men wrote in his journal of consuming about 10 pounds of buffalo meat each day, plus four bowls of broth. While buffalo meat apparently took some getting used to, this particular explorer wrote that “it made us quite fat, and none was sick.”
One “recipe” called for bear steak fried in tallow and covered with whisky – meat and drink in one meal! Pemmican, made from dried meat, fat and berries ground together, was travelling food. Beef and buffalo cut into strips and dried in the sun was called “jerky,” and kept well, even though it was tough chewing!
Bread was almost unknown, but occasionally a hardtack or ship biscuit could be obtained at a trading post.
The frontiersmen, including migrating settlers, also found the edible wild plants to be helpful sources of nutrients missing from the dried and salted staples. These included such things as dandelions, polk sprouts, sassafras, grapes and various nuts and berries. When they found a place to stay for a season, corn could be planted by simply making a hole with a pointed stick or ax, dropping several kernels into the rich soil – and a crop would grow; plowing simply wasn’t necessary.
To Be Continued…

 Constitution Week – Foods of Our Forefathers Part III
The abundance of meat in America was a major change in the diet of the early settlers. Rabbits and squirrels were available year-round nearly everywhere, plus deer and other large game in many regions. As settlers moved west, buffalo gained importance in the diet. Fish, shellfish and wild fowl became common food, and they were all essentially “free.” The existence of these various forms of game was a literal life saver in times of uncertain crops and unbroken land. The game gradually diminished, of course, as the population expanded and settlers pushed west, but it provided a large share of the diet in early and frontier days.
Ham, of course, appeared on almost every settler’s table, rich or poor. It might be the only meat served at a meal or it might appear in company with more exotic roasts and fowl, but it was always there – breakfast, dinner and supper.
Corn was also a staple of the colonists, either fresh in summer, or as hominy or corn meal all year. Corn was also put to another use by an early Virginian, Captain George Thorpe, who may have been the first food technologist in America as he invented Bourbon whiskey shortly before he was massacred by the Indians in 1622.
Meal patterns for working people in rural early America were very different from those common today. Breakfast was usually early and light which consisted of bread, hominy grits, and sometimes fruit in season. Coffee, which was a new beverage at the time, was popular that is if it was available. A drink made from caramelized grain was sometimes substituted. Chicory was popular in the South, either alone or used to stretch the coffee. Tea was often made from local leaves such as sage, raspberry or dittany. Alcohol in some form was often served.
Breakfast in more elegant homes or large plantations might be later in the morning, and include thinly sliced roast and ham.
Dinner was served somewhere between midday and midafternoon, depending on the family’s circumstances, and was the big meal of the day. There was almost always ham, as well as greens (called sallat), cabbage and other vegetables. In the proper season, special dainties would appear – fresh fruits and berries, or fresh meat at appropriate butchering times.
Desserts could be simple such as a scooped out pumpkin, baked until done and then filled with milk, to be eaten right out of the shell. Or dessert could be more complex such as ice cream or other fruit flavored frozen pudding or a blanc mange. Blanc mange was prepared from milk and loaf sugar, flavored with a tablespoon or two of rosewater, thickened with a solution of isinglass (derived from fish bladder, soaked overnight in boiling water). This mixture was boiled for 15 to 20 minutes, then poured into molds to set.
If isinglass was not available (most was imported from England), homemade calves foot jelly could be substituted, but eh dessert was not as fine.
Various alcoholic beverages, including wines, applejack, “perry” (hard cider made from pears), or beer were commonly consumed.
In winter, peaches and other fruit disappeared from the dinner table, to be replaced by dishes made from stored apples and dried fruit of various sorts. Soups or broths also took their place. Milk grew scarce as cows “dried up” in the short days. Vegetables gradually decreased in variety as stored crops wilted.
Apples quickly became a staple in early America. Orchards were easy to start, required a minimum of care, and apples stored well. Housewives devised a multitude of “receipts,” including sauces and butters for off-season, as well as many using dried apples.
Supper was late and a light bread and butter, some of the left-over roast from dinner, fruit (fresh if in season, pickled and spiced otherwise), and coffee or tea.
To Be Continued…

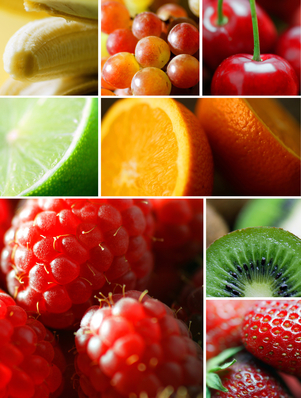 Fruit Essentials
Have you ever come home from the market after purchasing fruit to find that you spent money for nothing? I have plenty of times and it ticks me off every time. Here are some Fruit Essentials that may help you have more fruit shopping success.
Did you know that many plants that are botanically fruits are not sweet? We think of them as vegetables or non-fruits. Avocados, beans, coconuts, corn, cucumbers, eggplants, green peppers, okra, peas, pumpkins, sugar peas, string beans and tomatoes all fall in the fruit category. Some cookbooks make a distinction between fruit, vegetables and fruit vegetables. Fruit vegetables are foods that are botanically fruits, but are most often prepared and served like vegetables. These fruits are considered fruit vegetables: Aubergine, autumn squash, avocado, bitter melon, cantaloupe, chayote, chile, courgette, cucumber, eggplant, gherkin, green bean, green sweet pepper, hot pepper, marrow, muskmelon, okra, olive, pumpkin, red sweet pepper, seedless cucumber, squash, sweet pepper, tomatillo, tomato, watermelon, wax gourd, yellow sweet pepper and zucchini.
Pectin is a substance contained in some fruit which is used for making jams and jellies thicker. High pectin fruits are apples, cranberries, currants, lemons, oranges, plums and quinces. Low pectin fruits are bananas, cherries, grapes, mangos, peaches, pineapples and strawberries.
Low pectin fruits seem to discolor quicker than high pectin fruits ( bananas and eggplants). Lemon juice or vinegar slows the discoloring process. Other fruits and vegetables that discolor quickly are avocados, cauliflower, celery, cherries, figs, Jerusalem artichokes, mushrooms, nectarines, parsnips, peaches, pears, potatoes, rutabaga and yams.
Bruising: When a fruit is bruised the cell walls break down and discoloration begins. The process can be slowed down by refrigeration.
Cleaning: It is important to clean our fruit and vegetables. Rinse fruit in cold running water and scrub as needed before cooking or eating. Soaking fruit in water for more than a few minutes can leach out water soluble vitamins.
Peeling: The fruit skin usually contains a lot of important nutrients, but if you need to peel a thick-skinned fruit cut a small amount of the peel from the top and bottom. Then on a cutting board cut off the peel in strips from top to bottom. A good way to peel thin skinned fruit is to place the fruit in a bowl with boiling water and let stand for about 1 minute. Remove and cool in an ice water bath. You could also spear the fruit with a fork and hold over a gas flame until the skin cracks OR quarter the fruit and peel with a sharp paring knife or potato peeler.
Wax: Oh those beautiful waxed apples that wink at us at the market. They are beautiful because they are waxed. I don’t know about you, but I would rather not eat wax. Wax can be removed from the surface of fruits by washing them with a mild dishwashing soap and then thoroughly rinsing them. This will remove most of the wax, but probably not all of it.
Purchasing Ripe: Purchase these fruits fully ripe: Berries, cherries, citrus, grapes and watermelon. All of the fruits in this list, except berries, can be refrigerated without losing flavor.
Purchasing Not-So-Ripe: Apricots, figs, melons, nectarines, peaches and plums develop more complex flavors after picking. Store these fruits at room temperature until they are as ripe as you would like them.
Refrigeration: You can refrigerate apples,ripe mangos and ripe pears as soon as you get them. Do not refrigerat bananas.
Seasonal Fruit: Winter is the season for citrus. Fall is the season for apples and pears. Late spring is the season for strawberries and pineapples. Summer is perfect for blueberries, melons, peaches and plums.
Washing: Dry fruit with paper towels or kitchen towels and then use a blow dryer on the cool setting to completely dry fruit.
Squeezing: A microwave can be used to get more juice from citrus fruits. Microwave citrus fruits for about 20 seconds before squeezing the fruit for juice.


