
Autumn’s bounty is vibrant, varied, and delicious. Apples of all varieties are now available at farmers’ markets and supermarkets, including crunchy, sweet Honeycrisp, gorgeous Galas, MacIntosh mottled with both green and red, pale yellow Ginger Golds, and dark, dusky Paula Reds.
Apples are the perfect snack, satisfying and sweet. Try slicing an apple, place the slices in a plastic baggie, sprinkle liberally with cinnamon, close the bag, and shake until the slices are well coated with cinnamon. The apple slices will stay crisp and white for several days in the refrigerator. Perfect for grab and go school lunches, picnics or work from home snack breaks.
A versatile cooking ingredient, apples go well with both sweet and savory components. Combing apples with plums, cranberries, figs, raspberries or blueberries will yield particularly pleasing desserts, such as pies, puddings, tarts, cobblers, and crisps. Whether baked, poached or sautéed, apples lend marvelous layers of flavor to breads, sauces, slaws, salads, stuffing, coleslaw, chutney, and relishes.
As the weather turns cooler, what could be more comforting than the scent of apples roasting in the oven, mingling with spicy cinnamon. Apples enjoy an easy association with all manner of spices, including allspice, cloves, ginger, and nutmeg.
©Tiny New York Kitchen © 2020 All Rights Reserved
Choosing A Bird
How big should you buy? If you don’t want leftovers then estimate 1 pound of turkey per person. If you do want leftovers then estimate 1 1/2 pounds per person.
Fresh Or Frozen
Should you buy fresh or frozen? Fresh will keep for 4 days in the refrigerator. There is no need to thaw it and some believe that fresh is more flavorful. Frozen is often more affordable, can be purchased weeks in advance, but requires thawing time.
Defrosting
There are two ways to defrost your frozen turkey. 1. In the refrigerator; if you have more time, allow the bird to thaw in the refrigerator in its original packaging. Allow 24 hours of thawing for every 5 pounds of turkey. 2. Cold water bath; if you’re short on time submerge the turkey in a cold water bath. Change the water every 30 minutes. Allow 30 minutes of thawing for every pound of turkey.
Roasting
Remove the giblets. The giblets typically include the heart, liver, and gizzard (often gathered in a bag), plus the neck. You can throw them away or simmer them in stock or water to make your own broth to use in gravy or stuffing.
Tie The Legs
For even roasting, use butcher’s twine to loosely tie the turkey legs together, and then tuck the wings under the shoulders. Don’t wash the bird. Washing can easily spread bacteria. To kill any bacteria, roast the turkey until it reaches an internal temp of 165 degrees.
Brush With Melted Butter
Bump up the flavor by adding herbs, spices, and citrus zest to the butter.
Take The Temperature
Ignore the pop-up timer, they’re unreliable. Instead use an instant read thermometer and take the temperature in the thickest part of the thigh (it takes the longest to cook) and make sure the thermometer isn’t touching any bone. 165 degrees is the magic number.
Let It Rest
Once the turkey comes out of the oven, cover loosely with foil and let it rest at room temperature for 15 minutes. This allows the juices to reabsorb for moist and delicious meat.
Storing
Leftovers should be put away right when you’re done serving. If anything is left out for more than 2 hours, throw it away. Store leftovers in airtight containers in the refrigerator for up to 4 days or in the freezer for up to 3 months. Reheat to 165 degrees and cover to preserve moisture and texture.
“Work With What You Got!”
©Tiny New York Kitchen © 2018 All Rights Reserved
Whether you’re hosting your first Thanksgiving or you’ve been making the family feast for decades, refer to our Thanksgiving timeline checklist to keep your prepping, shopping, and cooking on track for the big day.
1 TO 2 WEEKS BEFORE THANKSGIVING
Confirm the number of guests and plan your menu
Order your turkey
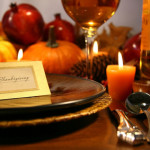
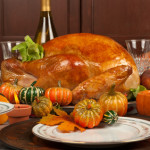
Plan your table setting, serving dishes, and decorations
Read through all your recipes to determine the food and cooking equipment you will need
Make your shopping and to-do lists
Shop for nonperishable food items, plus any cooks’ tools, cooking equipment and tableware you need
A FEW DAYS BEFORE
Prepare the turkey brine, but do not add the turkey, cover and refrigerate
Prepare food that can be made several days ahead of time, such as pie pastry and cranberry sauce
THE DAY BEFORE
Complete your food shopping
If you ordered a fresh turkey, pick it up or have it delivered
If you are brining the turkey, place it in the brine and refrigerate
Prepare dishes that can be made in advance such as soups and pies
Chop vegetables for side dishes; refrigerate in covered bowls or sealable plastic bags
Peel and cut the potatoes, place in cold water and refrigerate
Set the table
THANKSGIVING DAY
Refrigerate wines that need chilling
Prepare the stuffing and other side dishes
Prepare the turkey for roasting and put in the oven at the determined time
If you plan to stuff the turkey, do not stuff it until just before you put it in the oven
While the turkey is roasting, make the mashed potatoes
While the turkey is resting, make the gravy and cook or reheat the side dishes
Carve the turkey and serve your guests
Have a wonderful Thanksgiving!
“Work With What You Got!”
©Tiny New York Kitchen © 2018 All Rights Reserved

The holiday season is in full swing and soon you’ll be living on Thanksgiving leftovers. Ever had pumpkin pie for breakfast followed by a full turkey meal for lunch and another for dinner? It’s easy to get in the habit of holiday indulging.
The average American gains more than a pound each holiday season. Over a decade that really adds up. As they say, “It’s easy to put it on and hard to take off.”
There are ways to enjoy the holidays, but keep yourself in check so that you don’t fall into the trap of complete abandon.
High Fat Foods
Pigs In A Blanket: High In Fat, Salt, and Carbs.
Fried Cheese Balls: High In Fat And Small So It’s Easy To Overeat.
Baked Brie: Fatty And Addictive, Plus You Have To Slather It Onto Some Carb Calories.
Chips: They Have No Nutritional
Eat In Moderation
Cheese And Crackers: Calorically Dense And Super Easy To Eat. They’re Not Special So Spend Your Holiday Calories On Something More Festive.
Once-A-Year Favorites: You Only Eat Stuffing, Latkes, And Eggnog Once Or Twice A Year. If You’ve Been Coveting Aunt Martha’s Chiffon Pie Or Cousin Tommy’s Cooked Goose, Enjoy In Moderation.
Be My Guest
Crispy, Crunchy Crudités: Make The Brightly Colored Vegetables Your First Stop For Noshing. Add Hummus To Slow Digestion.
Pork Tenderloin, Ham Or Turkey: Protein Is Going To Suppress Your Appetite Due To The Fact That It Is Slow Digesting And Triggers The Release Of Several Satiety Hormones.
Shrimp Cocktail: Low In Fat, High In Protein And A Perfect First Course For A Low Calorie Tour Of The Buffet.
Swedish Meatballs: Another Protein Packed Option That Stands Out Amid A Carbohydrate Heavy Table.
Prosciutto Wrapped Asparagus: A Great Choice To Fuel Your Body While Keeping Your Appetite In Check.
Enjoy the holidays, but enjoy them in moderation.
“Work With What You Got!”
© Victoria Hart Glavin Tiny New York Kitchen © 2017 All Rights Reserved

The turkey came originally from America and was first domesticated by the Aztecs in Mexico. The Spanish introduced turkeys into Europe and they soon became a popular choice in France, Italy and Britain.
When early settlers from Britain, France and Holland crossed the Atlantic to North America, the vast flocks of turkey that roamed wild provided them with sustenance. They were plentiful and so easy to trap or shoot that the older children of the family were given the responsibility of catching them. The Native Americans meanwhile taught the new settlers the rudiments of farming, and in November 1621, on the first anniversary of their arrival, the Pilgrims entertained the locals to a feast, at the center of which was the turkey. Ever since, this has been the traditional bird served at Thanksgiving.
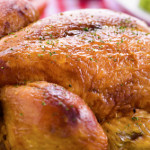
Turkeys are available fresh, chilled, or frozen all year round. When buying a whole bird, look for a plump well-rounded breast and legs and clear, soft and evenly colored skin. Avoid birds that are bruised, with blemishes or torn skin or any that have been badly or unevenly plucked. Turkeys vary enormously in weight.
When you’re ready to purchase your turkey it’s easy to get confused on what size to get. A good guild to go by is to figure approximately 1 1/4 pounds per person. This makes enough for the meal and provides a decent amount of leftovers.
To store your turkey place it in a large, deep dish and cover it completely with plastic wrap. Store it in the coolest part of the refrigerator; making sure that it does not come in contact with other foods.
Thaw a frozen turkey in the refrigerator for 2 to 4 days. Estimate 24 hours for every 5 pounds, so 2 days for a 10 pounder, 3 days for a 15 pounder, etc.
And then there is always the frozen turkey emergency that goes like this, “Help, help, it’s Wednesday, and my turkey is still frozen!!!” It’s been a long time, but I’ve been in this predicament. What you do is leave the turkey in its wrapper and put it in a large-size container. A lobster pot works well. Fill the container with cold tap water and let it sit for 30 minutes. Dump out the water and refill. Let it sit another 30 minutes. Repeat until the turkey is thawed, then roast immediately or transfer to the refrigerator.
The good news is that you can brine or dry cure your turkey while it defrosts in the refrigerator. What a Godsend that is! Use a lighter brine solution, which is about 1/2 cup kosher salt per gallon of water, plus sugar and spices). If you’re dry curing, use the standard recipe. You’re turkey should stay below 40 degrees while brining. You don’t need to brine or cure a kosher or butterball type supermarket frozen turkey. These come pre-brined. If you want to be able to put your own flavor stamp on your meal, then get a natural or untreated bird and do it yourself. If you plan on brining for 2 days use the weaker solution that I just mentioned. If you plan to brine for 24 hours or less, then bump it up to 1 cup kosher salt per gallon of water. Then add an equal amount of sugar. I don’t always brine, but when I do I’ve been known to throw an assortment of flavorings in the brine. Flavorings that you could add to your brine could be: apples, lemons, oranges, onions, garlic, shallots, peppercorns, bay leaves, cinnamon sticks, cloves, allspice berries, juniper berries, mustard seeds, fennel seeds, coriander seeds, rosemary, sage, thyme, savory, parsley, or oregano. You can also replace half the water with sweet cider, hard cider, vegetable stock, turkey stock, chicken stock, beer, white wine, or red wine. If you want to dry cure then use about 1/2 teaspoon kosher salt for every pound of turkey. Then add spices to your taste.
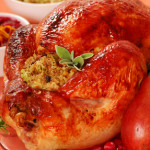
Stuffing your turkey is a personal preference. I always stuff the bird because I love how it tastes when cooked inside the turkey. It does slow down the cooking process, however. Never stuff the turkey in advance of cooking. The stuffing can be made in advance, but the turkey should not be stuffed until just before it is placed in the oven. Weigh the stuffing and add this to the weight of the bird before calculating the cooking time. Thoroughly rinse the body cavity of the bird under cold running water, and then drain it well. Wipe the turkey, inside and out, with paper towels. Press the stuffing inside the shallow neck cavity. Make sure not to pack it in too tightly. Turn the bird over and pull the neck skin over the stuffing. Now it’s time for a little turkey bondage and truss the bird (tuck the wing tips under the breast and tie the legs together) and then cook for the calculated time. Never shorten the cooking time because although the meat may appear cooked, extra time must be allowed for cooking the stuffing thoroughly.
If you choose not to stuff your turkey then place aromatics in the body cavity of the bird. Cut a large onion in half and stud each half with 4 to 6 cloves. Place this in the body cavity of the bird. Cut an orange and a lemon into quarters and add these, together with 3 or 4 bay leaves, 4 to 6 fresh sage sprigs, and 2 to 3 fresh thyme sprigs. Add 1 cinnamon stick or 1 blade of mace for a festive hint of warm spice.
Turkeys are super easy to roast, but require a little more attention than smaller birds. Check to make sure the oven shelves are in the correct position before heating the oven. Preheat the oven to 350 degrees. Place the prepared bird on a rack in a large-size roasting pan. Smear the turkey breast generously with butter, season with salt & pepper and place in the oven. Baste the turkey from time to time during cooking. When the breast has browned, cover with foil to protect it and continue cooking. Remove the covering foil for the final 20 minutes of cooking. To check if the meat is cooked, insert a skewer into the thickest part of the thigh. If the juices run clear and the meat is white, it is cooked. If the juices are pink and the meat is soft and pink, the turkey is not ready. Return it to the oven and check again after 20 minutes. Cooking times will differ depending on whether your bird was purchased fresh or frozen. Plan on 20 minutes per pound in a 350 degree oven for a defrosted turkey and 10 to 15 minutes per pound for fresh. Remember to add more time if you’re turkey is stuffed. You should have an instant-read thermometer in your kitchen drawer. Insert the thermometer into the breast (all the way to the bone) and if it reads 160 degrees you’re good to go. You may also measure the thigh by inserting the thermometer into the thickest part, but not touching the bone, and it should read 165 degrees.
Remove the turkey from the oven and cover it closely with foil. Leave it to rest for at least 30 minutes. This will even out the temperature and make it easier to carve. I know some chefs who let it rest for 2 hours, but I don’t think that one needs to wait that long. If you wish to make gravy in the roasting pan, transfer the bird to a carving plate.
When you’ve let your bird rest awhile remove the trussing string. Hold the bird steady in position with a carving fork. Cut off the legs, then cut these in half or carve the meat from the bones. Make a horizontal cut across the breast above the wing. Carve neat and even vertical slices off the breast. Repeat on the other side of the bird. Arrange slices on a warmed platter. Add the turkey legs or sliced meat to the platter or set them aside for serving separately. Scoop out the stuffing and serve with the meat.
“Work With What You Got!”
© Victoria Hart Glavin Tiny New York Kitchen © 2016 All Rights Reserved
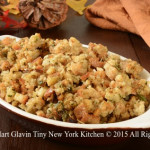
Dressing & Stuffing
I get asked this question every year about this time, “what’s the difference between dressing and stuffing?” The answer is that if you live north of the Mason-Dixon line, you probably call this side dish, baked inside a turkey, stuffing. If you’re a Southerner, you probably call it dressing. In classic cooking, it’s called forcemeat. Until Victorian times it was just called stuffing and then all of a sudden “stuffing” seemed indecent, and “dressing” was the new name.
For many years roast turkey meant stuffed turkey. Then all of a sudden health concerns arose about whether or not stuffed birds were safe. While these concerns are real, they shouldn’t affect careful cooks who follow food safety practices. Here are a few simple rules to follow while stuffing your bird.
Stuffing should always be cooked to at least 160 degrees in order to kill any potentially harmful bacteria. When the turkey is done, insert the meat thermometer deep into the center of the body cavity to check the temperature of the stuffing. If it isn’t at least 160 degrees then scoop the stuffing out of the cavity and transfer to a casserole dish. Cover and bake at 350 degrees until the stuffing reaches 160 degrees.
Always prepare your stuffing just before filling and roasting the turkey. NEVER stuff a bird the night before roasting as the turkey cavity provides a warm, moist environment that encourages bacterial growth. To save time on Thanksgiving morning, you can prepare stuffing ingredients the night before. Chop the vegetables, toast the nuts, etc. and then store them in zip lock bags in the refrigerator. If you are super pressed for time you may cook, cool, and refrigerate the seasoning meat and vegetables the night before. Reheat them thoroughly in a large-size skillet before adding to the bread or grains.
Stuffing should be warm when placed in the turkey. Cold stuffing may not cook to 160 degrees by the time the turkey is ready.
NEVER mix raw meat or vegetables into a stuffing. All meat and vegetables should be thoroughly cooked.
To serve the stuffing, remove it from the turkey and place in a serving bowl. Do not allow the stuffing or turkey to stand at room temperature for longer than 2 hours. Refrigerate any leftover stuffing separately from the turkey and use within 2 days. Reheat leftover stuffing thoroughly before serving.
“Work With What You Got!”
© Victoria Hart Glavin Tiny New York Kitchen © 2015 All Rights Reserved
Thanksgiving is nearly here. If you’re hosting Thanksgiving dinner don’t panic. Here are some important tips that will help you get organized and ensure that your meal goes smoothly and tastes delicious. What’s important is enjoying being with family and friends.
- Plan your menu according to the number of guests you’ll have.
- Order your turkey! Just how big should your turkey be? It’s recommended to have at least 1 1/4 pounds per person. If you round up a bit from that number, you’ll be able to enjoy leftovers.
- Finish your food shopping, and pick up your turkey two days before Thanksgiving. I hope that you’re turkey is a fresh one at this point. How long does a frozen turkey take to defrost? You’ll need to allow ample time to defrost your turkey in the REFRIGERATOR. Turkeys less than 12 pounds will take as long as two days to defrost. A turkey more than 20 pounds can take up to five days to defrost.
- Prepping is important. Make pie crust and store in the refrigerator. Finish any baking (cornbread, muffins, pies). Peel and cut potatoes, and store in water in fridge. Make fresh cranberry sauce. Cut carrots, celery, onions, and mushrooms for stuffing. Sauté and store in fridge. Place white wine in fridge to get nice and chilled.
- The day before Thanksgiving prep green beans, Brussels sprouts, cauliflower, or any other vegetables, and store in a Ziploc bag in the fridge. Set the table and label serving dishes.
- Thanksgiving Day prepare stuffing and other side dishes. Prepare turkey for roasting and place in oven at determined time. If you choose to stuff the turkey, do it right before you put it in the oven. Take stuffing out of the turkey immediately after cooking. While turkey is roasting, make mashed potatoes.
- How do you know when your turkey is done? Use a meat thermometer inserted into the meatiest part of the turkey. Wait for the reading to reach at least 165 degrees. If you’ve stuffed the bird, make sure that also reaches the same temperature for food safety purposes.
- Those glorious leftovers! If you refrigerate the turkey within two hours of serving, your leftovers will last three to four days.
- Try to relax and wait for your guests to arrive.
- Have a wonderful Thanksgiving!
"Work With What You Got!"
Victoria Hart Glavin Tiny New York Kitchen
Turkey Roasting Guide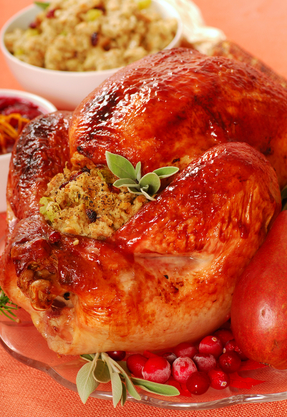
Every year I tell everyone not to overcook his or her turkey and to purchase a meat thermometer AND USE IT! The objective, of course, is to have moist and juicy breast meat with succulent thighs! The turkey is the main attraction after all.
Start with a completely defrosted bird or better yet purchase an organic fresh turkey. If your turkey is frozen, however, allow 24 hours in the fridge for every 5 pounds. This is the safest way to defrost your turkey.
The turkeys of today tend to be young, moist and tender and take much less time to cook than tougher turkeys that I grew up on. If a turkey is dry, then it has been cooked too long. The breast meat is what tends to suffer the most.
A stuffed turkey may cook at the same rate as an unstuffed one, but be prepared to allow 30 to 50 minutes more. Most turkeys take about the same time to roast in regular ovens, but a convection oven does a much better job of browning the turkey all over.
When removing the turkey legs, if you find that the meat around the thigh joint is still too pink, then cut off the drumsticks from the thighs and put the thighs into a shallow pan, place in a 450 degree oven for 10 to 20 minutes until no longer pink.
Always use a meat thermometer to gauge doneness. For a stuffed turkey, use the meat thermometer to check the temperature of the stuffing. The center of the stuffing inside the turkey must reach a temperature of 165 degrees. For an unstuffed turkey, place the meat thermometer in the thickest part of the thigh, taking care that it does not touch any bone. Roast the turkey until the meat thermometer reaches 165 degrees. Don’t forget to let the turkey rest for at least 30 minutes before carving to allow the juices to re-absorb into the flesh. You do not want the moisture to drain out.
This chart will help you determine approximately how long to roast a stuffed or unstuffed turkey.
Roasting times are for a preheated 325 degrees oven:
Approximate Roasting Times For Stuffed Turkey
Turkey Weight: 6 to 8 Pounds 3 to 3 1/2 Hours
Turkey Weight: 8 to 12 Pounds 3 1/2 to 4 1/2 Hours
Turkey Weight: 12 to 16 Pounds 4 1/2 to 5 1/2 Hours
Turkey Weight: 16 to 20 Pounds 5 1/2 to 6 Hours
Turkey Weight: 20 to 24 Pounds 6 to 6 1/2 Hours
Approximate Roasting Times For Unstuffed Turkey
Turkey Weight: 6 to 8 Pounds 2 ½ to 3 Hours
Turkey Weight: 8 to 12 Pounds 3 to 4 Hours
Turkey Weight: 12 to 16 Pounds 4 to 5 Hours
Turkey Weight: 16 to 20 Pounds 5 to 5 1/2 Hours
Turkey Weight: 20 to 24 Pounds 5 1/2 to 6 Hours

Thanksgiving Emergency Strategies
Help, help, I have extra guests coming! My gravy doesn’t look right! What to do? These are some holiday entertaining questions that I have been asked over the years. Whether this is the first time you’ve hosted Thanksgiving dinner or your 20th time there are always things that seem to come up that feel like emergencies. From lumpy gravy to unexpected guests the pressure can just be too great at times. Not to worry, these are some good strategies that have helped me cope and make everything run smoothly.
Dear Victoria: “My turkey is still a bit frozen and my dinner is in a few hours. What should I do?”
Put that bird into a large pot and run tepid water over it for at least an hour. You can butterfly the turkey so that it cooks faster which should take about an hour and a half at 400 degrees. You can then roast it or grill it. In the future you may want to consider purchasing a fresh turkey and not a frozen one.
Dear Victoria:” I called everyone to the table and started carving the turkey to find that parts of it are still raw or undercooked. How embarrassing! What should I do?”
This situation has happened to most of us at one time or another. Don’t skip a beat and just carry on carving off any parts that are cooked, serve those and put the remaining pieces back in the pan, cover with foil, and cook until done. Most likely the breast meat will be done. Your guests can get a bit of turkey along with your delicious sides while waiting for the rest of the turkey to come out of the oven. In the future you may want to consider carving the turkey first and then cooking it.
Dear Victoria: “I always seem to overcook the turkey. I just don’t know how I keep doing this. Please help!”
For the immediate remedy I suggest you have LOTS of gravy on the table to pour over those dried out pieces of turkey. In the future make sure to invest in a meat thermometer. Insert the thermometer into your cooked turkey through the thickest part of the breast until it hits the breastbone. Remove the turkey from the oven when it reads 160 degrees. Let your turkey rest for about 30 minutes before carving.
Dear Victoria: “I have a small kitchen and don’t have much room in my oven to cook everything. How am I going to get everything done?”
Tiny New York Kitchen knows this situation all too well! First of all there are plenty of things that you can get cooked in advance. Check your menu and see what you can prepare before needing to place your turkey in the oven. If you have an outdoor grill, then by all means grill your bird. Hey, you can play it off as the “hip thing to do.” Let your side dishes cook in the oven while your turkey is grilling out there in the fresh November air!
Dear Victoria: “I made stuffing and it is pretty soggy. How can I make it un-soggy?”
This is a super easy one. Scoop it out of the turkey and/or the baking dish and spread it out on a baking sheet. Place it in the oven and bake it at 350 degrees until it is how you want it. Scoop it back into the serving dish and serve. No one will be the wiser.
Dear Victoria: “Before I call my guests to the table the food starts to get cold. How can I avoid this?”
Cover serving dishes with lids or foil to keep them warm. If a dish actually gets really cold, that is supposed to be hot, then just put it back in the oven for a little bit. Don’t be too concerned, however, as most Thanksgiving dishes are perfectly fine at room temperature.
Dear Victoria: “My side dishes aren’t browned on top? They just don’t look that appetizing. What should I do?”
If a dish is fully cooked, but doesn’t have that delicious looking brown surface (Potatoes, Vegetables, Stuffing, etc.) then simply put them under a hot broiler at least 4 inches away from the heating element. You may want to turn them as needed until browned on top. MAKE SURE that you watch them carefully. You really don’t want them to go from pasty to burned up! Always put the food too far from the broiler rather than too close. If you follow these instructions then you will get a nice browned crust on top of your dishes.
Dear Victoria: “My gravy looks way too lumpy. I can’t serve lumpy gravy! How do I fix it?”
Not to worry. You will just need to put some hard work into it with a good whisk. Whisk those lumps out. It may take a bit of time, but it can be done. If you have really stubborn lumps add just a bit of hot liquid to coax them out while you whisk. If you STILL can’t get them out take a medium weave strainer and set it over a bowl. Pour the grave in and stir. Smooth gravy will flow through the strainer and the lumps will stay behind. For the future make sure you whisk the flour or cornstarch constantly while you are adding the broth or turkey juices to keep lumps from forming.
Dear Victoria: “Help, my gravy is just way to thick. It looks like brown jelly. How do I thin it out?”
This one is super easy. Drizzle in a bit of hot broth or hot water while whisking and then heat up your gravy until it’s piping hot.
Dear Victoria: “My gravy is too thin. It looks watery. I’m horrified. Is there a good solution to this hot mess?”
This problem is just a bit trickier. Brown 1 tablespoon for every cup of gravy by stirring it in a dry frying pan over a medium heat until it turns a nice deep golden brown. Have your gravy in a wide pan on the stove over a medium high heat. Whisk the browned flour into your gravy and cook. Make sure to whisk constantly until your gravy thickens. This should do the trick.
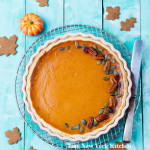
Dear Victoria: “The top of my pumpkin pie is all cracked and looks horrible. What happened? How can I serve a cracked pumpkin pie?”
Your pumpkin pie was over baked which is why it is cracked on top. Not a soul needs to know, however, if you dollop on whipped cream and carry it to the table like the prize pie it is! Sometimes cooking is like acting. If you flub a line you just carry on like that is how it is supposed to be.
Dear Victoria: “My sister called and asked if she could bring extra guests. My goodness, what am I going to do? Dinner is in an hour!”
I’ve certainly encountered this situation plenty throughout my dinner party throwing life. I’ve always kept an open door policy because I figure that not everyone has a place to go on the holidays, which can be very sad and lonely. The good news is that most of us make way too much food for Thanksgiving. Having unexpected guests can impact a meal however. First of all, forget any leftovers that you were counting on. Make more mashed potatoes, rice or pasta. These items take 30 minutes or less to make. Slice the turkey thin. Make a quick soup by combining chicken broth, pureed cooked vegetable(s), fresh herbs, salt and pepper. As soon as you get the call immediately put bowls of nuts and snacks out before dinner.
Dear Victoria: “I have quite a large group coming for dinner and I don’t have enough room at the table. What do I do?”
You can set up dinner buffet style or you can set up multiple tables as auxiliary eating areas. Living room coffee tables and game and/or card tables work. You can let everyone sit where they want or you can seat people by age or alphabetically or however you decide to seat people. Thanksgiving is about spending time with friends and family. People will have fun no matter where they are sitting. Relax and enjoy yourself.
Thanksgiving Menu Guide
In the spirit of getting organized here is a Thanksgiving Menu guide that can help you plan according. Print this list out and add your own notes. Remember that the key to a successful Thanksgiving dinner is organization.
Soups & Starters
Italian Wedding Soup (Tiny Meatballs, Tortellini & Escarole)
Creamy Mushroom Soup (Rich Mushroom Broth With Sliced Mushrooms)
Sweet Potato Kale Soup (Sweet Potatoes, Corn & Peppers Simmered in Broth, Topped With Kale)
Butternut Squash Soup (Sweet Butternut Squash Simmered in a Light Vegetable Broth With Ginger & Mace)
Chicken Stock (Chicken Bones & Fresh Vegetables Simmered For Hours)
Wild Mushroom Strudel (Portabello, Shitake & Button Mushrooms Cooked With Garlic & Herbs Finished With a Mix of Goat, Mozzarella, Gruyere & Cream Cheese Wrapped In a Crispy Puff Pastry Shell
Bacon Wrapped Scallops (Sea Scallops Wrapped in Smoked Bacon)
Sides
Garlicky Greens (Steamed Kale & Chard Seasoned with Roasted Garlic)
Roasted Brussels Sprouts (Roasted Brings Out Their Natural Sweetness)
Green Beans With Almonds (Fresh Green Beans With Sliced Crisp Almonds With a Touch of Tarragon)
Creamed Spinach With Roasted Garlic (Spinach Seasoned With Nutmeg & Tossed With Cream & Garlic)
Roasted Corn Pudding (A Savory American Classic)
Roasted Butternut Squash With Dried Cranberries (Squash, Roasted With Onions & Herbs)
Cornbread Stuffing With Sausage & Spinach (Sausage In Rustic Stuffing)
Traditional New England Stuffing (Moist Bread Stuffing With Herbs & Spices)
Classic Mashed Potatoes (Velvety Smooth Made With Cream & Butter)
Maple Bourbon Sweet Potatoes (Mashed Sweet Potatoes Sweetened With a Bourbon Maple Syrup
Home-style Green Beans (Fresh Green Beans With Cherry Tomatoes)
Apple Fennel Slaw (Granny Smith Apples, Horseradish & Fennel)
Green Salad (Mixed Green Salad With Cider Dressing)
Sweet & Sour Cabbage (Red Cabbage Braised in Duck Fat)
Peas With Pearl Onions (3 Types of Peas With Pearl Onions)
Autumn Vegetable Ragout With Soft Polenta (Vegetables & Polenta)
Roasted Beets With Orange Vinaigrette (Warm Roasted Beets With Orange Dressing)
Celery Root Salad
Warm Spinach Salad With Goat Cheese & Apples
Sweet Potato & Banana Puree
Apple Bacon Cornbread Stuffing
Mashed Potatoes And Parsnips With Crisp Root Vegetable Strips
Roasted Cauliflower And Shallots With Chard & Dukkah
Brussels Sprouts and Wheat Berry Slaw With Smoked Paprika Dressing
Rich Turkey Gravy (Smooth With Deep Roasted Flavor)
Vegan Wild Mushroom Gravy (Deep, Robust Flavor From Wild Mushrooms and a Splash of White Wine)
Organic Cranberry Orange Relish (Organic Whole Berry Relish With Orange & a Touch of Cinnamon)
Brandied Cranberry Sauce With Pecans (Whole Cranberries Cooked With Pecans, Brandy & Sugar)
Main Attraction
Organic Whole Turkey (Brined or Un-brined)
Roast Turkey With Sage Butter
Cherry Glazed Turkey
Turkey Breast
Orange Pecan Cornish Hens
Vegetarian Eggplant Parmesan
Breads
Family Style Cornbread
Parker House Rolls
Boston Brown Bread
Parmesan Garlic Biscuits
Popovers
Desserts
Pumpkin Pie
Apple Pie
Blueberry Pie
Cherry Pie
Pecan Pie
Apple Crumb Pie
Carrot Cake
Pumpkin Cake
Maple Bread Pudding
Cranberry Pear Crisp
Black Mission Fig Tart
Assorted Cookies
Make Ahead Items
Many Thanksgiving dishes or parts of dishes can be made in advance which is a big help. After writing out your menu and shopping lists look to see what can be done ahead of time.
Most soups can be made 1 or 2 days before serving.
Most appetizers (or parts of them) can be made 1 day before serving.
Roux for gravy can be made several hours before using. Just mix butter and flour together, reheat and add stock and pan drippings when time to make gravy.
Vegetables can be chopped 1 or 2 days before using.
Grate cheese or spices 1 to 2 days before using.
Wash, dry, and wrap lettuce in paper towels, and store in a ziplock bag. Place in the refrigerator until ready to toss 1 day before serving.
Most salad dressings can be made 1 to 2 days before serving.
Have turkey as prepped as possible (salted, spiced and rubbed with butter, in its pan) and ready to go in the oven.
Stuffing items such as onions, celery, mushrooms, etc can be cooked 1 day before combining with bread and stuffed into the turkey.
Bread for stuffing can be cut up the day ahead and stored in a paper bag. Dried out bread is the best for stuffing.
Desserts or parts of desserts can often be made 1 to 2 days ahead such as sauces, crusts, pie filings or toppings.


