
Have you ever found yourself making a recipe and realize that you don’t have an ingredient that it’s calling for? Here are a few ingredient alternatives that you might have on hand instead.
Mayonnaise
For 1 cup of mayonnaise use 1 cup sour cream or 1 cup plain yogurt with a pinch of salt.
Honey
For 1/4 cup of honey use 1/4 cup maple syrup or light corn syrup.
Buttermilk
For 1 cup of buttermilk use 1 tablespoon vinegar or lemon juice mixed with enough milk or plant-based milk to reach 1 cup.
Butter
If butter is used for baking or in a solid form, solid coconut oil is a good 1 to 1 substitution. If it’s melted or for cooking use olive oil.
Oil
When it comes to oil for baking, applesauce is a great substitute. For 1 cup of oil, use 3/4 cup applesauce mixed with 1/4 cup melted butter. In cooking, any neutral refined oils like canola, olive, vegetable, corn, and peanut oils are interchangeable.
Breadcrumbs
For 1 cup of breadcrumbs use 1 cup of cracker crumbs, finely crushed potato chips, tortilla chips, or pretzels pulsed in your food processor.
Brown Sugar
For 1 cup of light brown sugar, use 1 cup white sugar plus 1 tablespoon molasses. For 1 cup of dark brown sugar, use 2 tablespoons molasses. The sugar and molasses should be mixed together thoroughly.
Baking Powder
For 1 teaspoon baking powder, stir or sift together 1/4 teaspoon baking soda plus 5/8 teaspoon cream of tartar.
“Work With What You Got!”
©Tiny New York Kitchen © 2020 All Rights Reserved
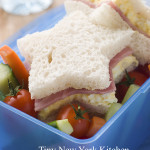
Have school lunches hit a wall? It’s gets tedious for anyone to eat the same thing every day. It may be time to mix it up to keep your kids interested in eating healthy.
You may want to include dry roasted edamame or chickpeas for a salty, crunchy snack with some protein. Individually packed, pitted olives are also a nice alternative to potato chips.
Use cookie cutters to make sandwiches into fun shapes. This also works well for using on fruits and vegetables.
Pack leftovers from dinner the night before to make a great lunch. The bonus is that it’s super easy.
When you’re at the grocery store make sure to pick up some precut fruits and vegetables. This is a big timesaver.
Pack lunch in a bento box to make lunches look exciting and practice portion control.
Get them involved in shopping for and packing their own lunch.
“Work With What You Got!”
© Victoria Hart Glavin Tiny New York Kitchen © 2017 All Rights Reserved
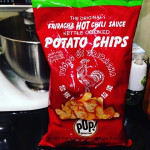
What took so long?!! I love potato chips and I love sriracha. It’s like Santa came early this year!
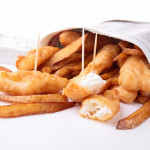
Tips For Deep-Frying
Deep-frying is such a guilty pleasure because no cooking technique gives food that irresistible crunchiness. Because it is also one of the least frequently used cooking methods, here are some important tips to help you achieve Deep-frying nirvana.
Choose the right pot. To deep-fry properly, the food should cook in 2 to 3 inches of hot oil. Choose a pot that is at least 6 inches deep to allow for bubbling without bubbling over. Cast iron (enameled or not) holds the heat well, which makes a good choice.
Use reasonably priced cooking oil. Canola, cottonseed, safflower, or a generic vegetable oil blend will all do. Much is made of the smoke point of oil (the temperature where the oil starts to smoke and break down) for deep-frying, and expensive peanut oil is often singled out as being especially desirable (watch those peanut allergies). Food should not be deep fried at temperatures above 400-degrees because it will burn before it has a chance to cook through. Most refined clear cooking oils have a smoke point of about 425-degrees (except for olive oil), so if you are deep frying at the correct temperature, the oil’s smoke point is not an issue.
Don’t reuse deep frying oil. This is another reason to use reasonably priced oil. Although you can strain the cooled oil for another round or two of deep-frying, this is a sure way of transferring unwanted flavors to your food, and the freshness of the oil obviously is reduced with storage. You don’t want to cook your tortilla chips in the same oil you used for cooking fish and chips. Just budget the price of the oil into the cost of the recipe, throw away after using, and leave it at that.
Use a deep-frying thermometer. It’s the only way to get an accurate reading of the oil temperature. Be sure the end of the thermometer is totally submerged in the oil. Keep the heat on high to maintain the correct oil temperature.
To reduce deep-frying odors, cook outside if possible. There is no reliable way to avoid the odors caused by deep-frying inside. But when the weather is cooperating, plug in an electric kettle and do your frying on your porch or patio.
Let the oil return to its correct frying temperature between batches. In most cases, you may add the food to 375-degree oil, but the temperature will drop to 335-degrees or so for the actual cooking. After removing the food, be sure to reheat the oil over high heat to its original starting temperature.
Use a wire skimmer to remove food from the oil. Also called a spider, these wide-mesh skimmers do a better job of draining away oil than a slotted spoon or slotted skimmer. They are commonly used in Asian cooking, so look for them at kitchenware stores near the woks.
Don’t drain fried foods on paper. Most people use paper towels or brown paper bags to absorb the fat from drained foods. A crunchy coating can soften where it comes into contact with the paper because the steam builds up at the contact point and has nowhere to go but into the coating. For the crispiest result, drain the food on a wire cooling rack set over a rimmed baking sheet, so the food comes into contact only with thin wires.
Keep deep-fried foods warm in the oven before serving. Deep-fried food is best served piping hot right out of the pot, which isn’t always possible when cooking multiple batches. Once you have put the food on the wire rack and baking sheet setup, slip the whole thing into a preheated 200-degree oven for up to 10 minutes.
Add salt JUST before serving. Salt can soften homemade potato chips and other fried foods, so to keep them from losing their crunch, sprinkle on the salt at the last minute.
“Work With What You Got!”
© Victoria Hart Glavin Tiny New York Kitchen

 Beach Barbecue Picnic
Salt, spray, sea air, and warm sand underfoot are all the pleasant sensations of a day at the beach which stir cravings for good and hearty food. A perfect refreshment is a traditional beach-blanket banquet, complete with charcoal-grilled corn on the cob. You can prepare this picnic to feed a crowd or simply the family on any summertime trip to the beach. For a small group, you may want to take only half of the salad and leave the rest at home for a midweek supper.
Menu
Potato Chips
Crunchy Egg Dip
Barbecued Hamburgers
French Rolls
Red Onion Slices
Tomato Slices
Lettuce
Barbecued Corn on the Cob
Mixed Bean & Artichoke Salad
Honey Applesauce Cupcakes
Beverages of Your Choice
Bake the cupcakes on the day of the picnic or bake them ahead of time and then freeze them. If they are frozen then let them thaw to room temperature on the morning of the outing. Frost them after they have thawed (if you are frosting them). Prepare the bean salad a day ahead and refrigerate it so the vegetables have time to marinate. Hard-cook the eggs for the salad garnish and the egg dip at the same time. On the morning of departure, slice the onions and tomatoes, and prepare the lettuce leaves; seal them in individual plastic bags or in small containers. Then prepare the egg dip and get the corn ready. Refrigerate the food that needs to be kept cold before packing it in the cooler. Have ready one or more large bags of potato chips and enough hamburger patties and French rolls for your picnicking party. You’ll also need a portable barbecue; potholders, a spatula, and tongs; and charcoal, charcoal starter, and fireplace matches.
Packing Your Picnic: Place the chilled beverages in the bottom of a roomy cooler. On top, pack the ears of corn and the egg dip. Tuck in the parcels containing the hamburger patties, garnishes for the salad, hamburger condiments, and butter for the corn. Carry all of the barbecue equipment in a sturdy box. In a roomy basket, pack the unbreakable items first, including serving spoons for the salad, a bottle opener, salt and pepper, and a knife for the rolls (unless they’re presliced). Fit in the cupcakes and the salad. Place the rolls and potato chips on top. For a sandy picnic, it’s always wise to carry extra paper plates, napkins, and pre-moistened towelettes.
At the Site: Start the charcoal about half an hour before you want to begin cooking; wait until the coals turn gray before grilling the meat and corn. Meanwhile, spread the blanket and let people nibble on potato chips and dip. If your site is very sandy or some of your guests are quite young, you may prefer to wait until the hamburgers and corn are almost ready before you unpack the rest of the food. Before serving the salad, stir it well; then garnish it with the egg slices, if desired, and artichokes.


