
Cheese Boards are a no-cook, sure-to-please option for any holiday celebration. Build a cheeseboard that’s affordable yet special. Then toast the season with festive cocktails.
A few inexpensive ingredients and simple homemade touches are all you need for a spectacular, special occasion-worthy spread. Here are some smart tips to deck your board with festivity and flavor without breaking the bank.
For a classic, colorful centerpiece, make your own cranberry and herb cheeseball. Start with a container of spreadable cheese and form into a ball. Use a sheet of plastic wrap to avoid messy hands. Roll the ball in a combination of finely chopped dried cranberries, parsley, and chives until thoroughly coated. Let sit at room temperature for 15 minutes before serving.
No need to buy expensive cheeses. Inexpensive cheddar is always a crowd pleaser. Skip the pre-cut cubes and cut the block yourself. Orange or white, mild or extra sharp. Cheddar is always a favorite.
Upgrade affordable goat cheese by rolling the log in herbs and spices, like dried thyme, dried oregano, or crushed rainbow peppercorns for a beautiful, flavorful crust. You could also keep it plain and top with jarred pepper jelly or mango chutney.
Instead of mixed nuts, opt for crunchy snack mixes, which are often less expensive and just as delicious. For the board, look for one with little or no seasoning.
Give a budget-friendly feta or mini mozzarella balls a flavor boost by marinating cubes in olive oil with herbs like parsley, oregano, or rosemary, and other seasonings like sliced chilis, crushed garlic, or lemon zest. Refrigerate overnight or up to 3 days.
Round out your cheese board with other delicious items like fresh or dried fruit (dried apricots, figs, grapes, and sliced pears), pitted olives, and plain crackers.
Pair your cheese board with a festive holiday beverage and enjoy!
©Tiny New York Kitchen © 2020 All Rights Reserved
It’s that time of year again, in America, when the beer turns green and the aroma of corned beef and cabbage fills the air. The dish is so comforting, but just what is corned beef? The term has nothing to do with corn, but was the English term for a small granule, such as a grain of salt. In days before modern refrigeration, salting meat was a way to preserve it and keep it from spoiling.
Corned beef is an Americanized addition to the traditional Irish diet. While colcannon (boiled potatoes, cabbage, and leeks in buttermilk flavored with wild garlic) was a common Irish dish, as was brown soda bread, corned beef was produced primarily for export to England. Upon arriving in America, however, it’s thought the Irish chose to celebrate their holiday with food that was typically not available to them in their home country, so corned beef was added to the menu, as was white soda bread studded with currants and caraway.
Corned beef is typically made from beef brisket, which is a cut of meat from the breast or lower chest, but the rump, bottom round, and even tongue, can be used. In America, the term “corned beef” is used to describe both the cured meat and the canned stuff found on grocery store shelves. In Britain, they call the canned stuff “salt beef.”
To make corned beef the meat is simmered in a blend of corned beef spices that usually include peppercorns, garlic, mustard, tarragon, thyme, parsley, cloves, and nutmeg.
In New England, you most often see corned beef served as a St. Patrick’s Day main dish or in a sandwich. As the main ingredient in New England Boiled Dinner, corned beef often pairs with potatoes, carrots, turnips, and cabbage in a hearty, savory, brothy bowl of goodness. When used in a sandwich, the most popular corned beef sandwich is the Reuben. Considered the quintessential Jewish deli sandwich, a Reuben is toasted rye bread stuffed with hot slices of corned beef, usually piled high, and topped with sauerkraut, Swiss cheese, and either Russian or Thousand Island dressing.
In New England, a frequent point of interest is also whether you prefer red vs. gray corned beef. The difference is “Red” brisket is cured with nitrite, which gives the meat its signature color. “Gray” corned beef, which is considered the authentic New England variety, is not cured with nitrate, so color forms naturally as it brines.
If you have corned beef leftovers a New England favorite is corned beef hash, which is typically served for breakfast.
“Work With What You Got!”
©Tiny New York Kitchen © 2018 All Rights Reserved

The turkey came originally from America and was first domesticated by the Aztecs in Mexico. The Spanish introduced turkeys into Europe and they soon became a popular choice in France, Italy and Britain.
When early settlers from Britain, France and Holland crossed the Atlantic to North America, the vast flocks of turkey that roamed wild provided them with sustenance. They were plentiful and so easy to trap or shoot that the older children of the family were given the responsibility of catching them. The Native Americans meanwhile taught the new settlers the rudiments of farming, and in November 1621, on the first anniversary of their arrival, the Pilgrims entertained the locals to a feast, at the center of which was the turkey. Ever since, this has been the traditional bird served at Thanksgiving.
Turkeys are available fresh, chilled, or frozen all year round. When buying a whole bird, look for a plump well-rounded breast and legs and clear, soft and evenly colored skin. Avoid birds that are bruised, with blemishes or torn skin or any that have been badly or unevenly plucked. Turkeys vary enormously in weight.
When you’re ready to purchase your turkey it’s easy to get confused on what size to get. A good guild to go by is to figure approximately 1 1/4 pounds per person. This makes enough for the meal and provides a decent amount of leftovers.
To store your turkey place it in a large, deep dish and cover it completely with plastic wrap. Store it in the coolest part of the refrigerator; making sure that it does not come in contact with other foods.
Thaw a frozen turkey in the refrigerator for 2 to 4 days. Estimate 24 hours for every 5 pounds, so 2 days for a 10 pounder, 3 days for a 15 pounder, etc.
And then there is always the frozen turkey emergency that goes like this, “Help, help, it’s Wednesday, and my turkey is still frozen!!!” It’s been a long time, but I’ve been in this predicament. What you do is leave the turkey in its wrapper and put it in a large-size container. A lobster pot works well. Fill the container with cold tap water and let it sit for 30 minutes. Dump out the water and refill. Let it sit another 30 minutes. Repeat until the turkey is thawed, then roast immediately or transfer to the refrigerator.
The good news is that you can brine or dry cure your turkey while it defrosts in the refrigerator. What a Godsend that is! Use a lighter brine solution, which is about 1/2 cup kosher salt per gallon of water, plus sugar and spices). If you’re dry curing, use the standard recipe. You’re turkey should stay below 40 degrees while brining. You don’t need to brine or cure a kosher or butterball type supermarket frozen turkey. These come pre-brined. If you want to be able to put your own flavor stamp on your meal, then get a natural or untreated bird and do it yourself. If you plan on brining for 2 days use the weaker solution that I just mentioned. If you plan to brine for 24 hours or less, then bump it up to 1 cup kosher salt per gallon of water. Then add an equal amount of sugar. I don’t always brine, but when I do I’ve been known to throw an assortment of flavorings in the brine. Flavorings that you could add to your brine could be: apples, lemons, oranges, onions, garlic, shallots, peppercorns, bay leaves, cinnamon sticks, cloves, allspice berries, juniper berries, mustard seeds, fennel seeds, coriander seeds, rosemary, sage, thyme, savory, parsley, or oregano. You can also replace half the water with sweet cider, hard cider, vegetable stock, turkey stock, chicken stock, beer, white wine, or red wine. If you want to dry cure then use about 1/2 teaspoon kosher salt for every pound of turkey. Then add spices to your taste.
Stuffing your turkey is a personal preference. I always stuff the bird because I love how it tastes when cooked inside the turkey. It does slow down the cooking process, however. Never stuff the turkey in advance of cooking. The stuffing can be made in advance, but the turkey should not be stuffed until just before it is placed in the oven. Weigh the stuffing and add this to the weight of the bird before calculating the cooking time. Thoroughly rinse the body cavity of the bird under cold running water, and then drain it well. Wipe the turkey, inside and out, with paper towels. Press the stuffing inside the shallow neck cavity. Make sure not to pack it in too tightly. Turn the bird over and pull the neck skin over the stuffing. Now it’s time for a little turkey bondage and truss the bird (tuck the wing tips under the breast and tie the legs together) and then cook for the calculated time. Never shorten the cooking time because although the meat may appear cooked, extra time must be allowed for cooking the stuffing thoroughly.
If you choose not to stuff your turkey then place aromatics in the body cavity of the bird. Cut a large onion in half and stud each half with 4 to 6 cloves. Place this in the body cavity of the bird. Cut an orange and a lemon into quarters and add these, together with 3 or 4 bay leaves, 4 to 6 fresh sage sprigs, and 2 to 3 fresh thyme sprigs. Add 1 cinnamon stick or 1 blade of mace for a festive hint of warm spice.
Turkeys are super easy to roast, but require a little more attention than smaller birds. Check to make sure the oven shelves are in the correct position before heating the oven. Preheat the oven to 350 degrees. Place the prepared bird on a rack in a large-size roasting pan. Smear the turkey breast generously with butter, season with salt & pepper and place in the oven. Baste the turkey from time to time during cooking. When the breast has browned, cover with foil to protect it and continue cooking. Remove the covering foil for the final 20 minutes of cooking. To check if the meat is cooked, insert a skewer into the thickest part of the thigh. If the juices run clear and the meat is white, it is cooked. If the juices are pink and the meat is soft and pink, the turkey is not ready. Return it to the oven and check again after 20 minutes. Cooking times will differ depending on whether your bird was purchased fresh or frozen. Plan on 20 minutes per pound in a 350 degree oven for a defrosted turkey and 10 to 15 minutes per pound for fresh. Remember to add more time if you’re turkey is stuffed. You should have an instant-read thermometer in your kitchen drawer. Insert the thermometer into the breast (all the way to the bone) and if it reads 160 degrees you’re good to go. You may also measure the thigh by inserting the thermometer into the thickest part, but not touching the bone, and it should read 165 degrees.
Remove the turkey from the oven and cover it closely with foil. Leave it to rest for at least 30 minutes. This will even out the temperature and make it easier to carve. I know some chefs who let it rest for 2 hours, but I don’t think that one needs to wait that long. If you wish to make gravy in the roasting pan, transfer the bird to a carving plate.
When you’ve let your bird rest awhile remove the trussing string. Hold the bird steady in position with a carving fork. Cut off the legs, then cut these in half or carve the meat from the bones. Make a horizontal cut across the breast above the wing. Carve neat and even vertical slices off the breast. Repeat on the other side of the bird. Arrange slices on a warmed platter. Add the turkey legs or sliced meat to the platter or set them aside for serving separately. Scoop out the stuffing and serve with the meat.
“Work With What You Got!”
© Victoria Hart Glavin Tiny New York Kitchen © 2016 All Rights Reserved

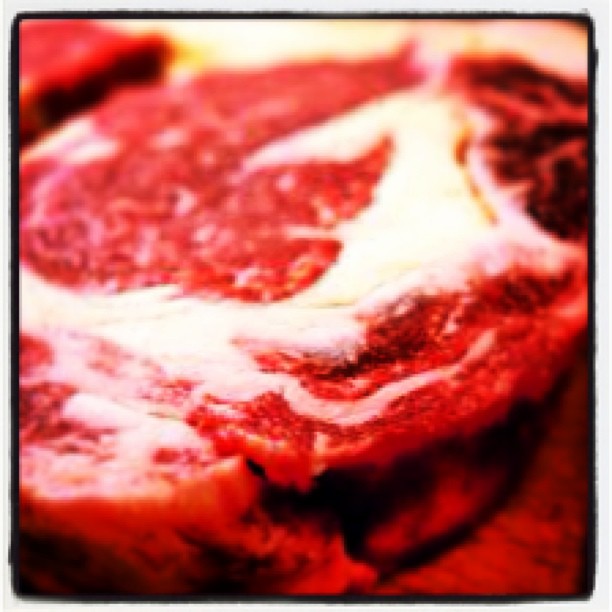
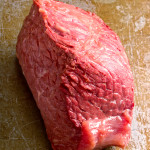
Grilled Steak 3 Ways
Honestly, you don’t need a barbeque to make grilled steaks. Just go out and get yourself a grill pan and you will be wonder what took you so long in getting one. If you do want to throw your steaks on the barbeque then I certainly hope that you’re using a charcoal grill!
Classic
Rib Eye, Filet Mignon, Porterhouse, T-Bone or Strip Steaks
Olive Oil
Kosher Salt
Freshly Ground Pepper
Buy 1 steak per person. Bring steaks to room temperature. Preheat your grill or grill pan to a medium-high heat. Brush with olive oil, sprinkle with kosher salt, and pepper. Grill, turning 3 times (for crosshatch grill marks), until target temperature is reached – anywhere from about 5 to 15 minutes, depending on thickness. Remove from heat and allow to rest off heat for 10 to 15 minutes before serving.
Black Pepper Crusted
Rib Eye, Filet Mignon, Porterhouse, T-Bone or Strip Steaks
Olive Oil
Coarse Ground Black Peppercorns
Buy 1 steak per person. You will need about 2 tablespoons coarse ground black peppercorns per steak. Preheat your grill or grill pan to a medium-high heat. Brush steaks with olive oil and coat with peppercorns. Grill, turning 2 times (for crosshatch grill marks), until target temperature is reached –anywhere from about 5 to 15 minutes, depending on thickness. Remove from heat and allow to rest off heat for 10 to 15 minutes before serving.
Carne Asada Tacos
2 Pounds Flank or Skirt Steak
Marinade:
5 Cloves Minced Garlic
1 Diced Jalapeno Pepper
2 Teaspoons Cumin
1/2 Cup Chopped Cilantro
Juice of 2 Limes
1/3 Cup Canola Oil
1 Teaspoon Kosher Salt
Place the steaks in large ziplock bag. Pour in the marinade. Place in the fridge for 2 to 12 hours. Preheat grill or grill pan. Grill over a medium-high heat, 3 to 5 minutes per side to target temperature. Medium-rare is suggested. Remove from the heat and let rest 10 to 15 minutes. Slice thinly across the grain, serve with tortillas, salsa, and avocado.


