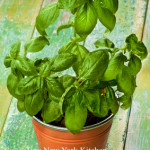
Fresh basil can be dried, but freezing holds the flavor better, and there are two easy methods.
1. Freeze Whole Leaves: Blanch basil leaves in boiling water for two seconds and immediately place in an ice bath. Dry the leaves completely, then place in a freezer-safe container, layered with parchment paper or wax paper, and freeze up to four months. For the best flavor, do not thaw before using.
2. Purée And Freeze: Remove the leaves from the stems and wash and dry them. In a food processor, purée the leaves with olive oil (use about a tablespoon of oil per cup of basil). Freeze the purée in ice cube trays, then transfer to a resealable plastic bag and freeze up to four months. To purée works best in soups, stews, and sauces.
“Work With What You Got!”
©Tiny New York Kitchen © 2019 All Rights Reserved
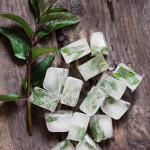
Make prep a snap with herb ice cubes, ready to toss in the pan.
Freezing herbs is an excellent way of preserving fresh delicate herbs that cannot be successfully dried. They will lose their fresh appearance and texture, but are still suitable for use in cooking. They should keep for up to 3 months.
To freeze chopped herbs, half-fill ice cube trays with chopped herbs and top up with water. Freeze, and then remove the cubes from the tray and place in freezer bags.
To use, add the appropriate number of frozen cubes to soups, stews, and stocks. Heat until melted. A standard sized ice cube tray will hold about 1 tablespoon chopped herbs.
Alternately, pack chopped herbs in plastic containers and freeze. Sprinkle them directly into soups and stews.
To freeze whole sprigs or leaves, place in freezer bags, expel any air, tightly seal and freeze.
Alternately, open freeze whole sprigs or leaves on trays. When the herbs are frozen, transfer them carefully to freezer bags, expel any air, seal tightly and return to the freezer until ready to use.
Delicate herbs that cannot be dried successfully, but that are suitable for freezing, include: basil, chives, tarragon, chervil, coriander (cilantro), dill and parsley.
“Work With What You Got!”
© Victoria Hart Glavin Tiny New York Kitchen © 2017 All Rights Reserve
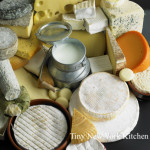
When storing cheese, keep in mind that it is a living organism. In most cases, it should be wrapped in special cheese paper, waxed paper or aluminum foil so that it can “breath” without drying out. Cheeses that need to retain moisture, such as fresh mozzarella, can be wrapped in plastic wrap.
In general, you can keep different kinds of cheeses together. The exceptions are those with strong aromas, such as blue cheeses, which should be stored in an airtight container so the other cheeses don’t pick up their sharp smells. Store cheese in the lowest part of the refrigerator, where there is less chance of accidental freezing. The vegetable bin, with its high humidity, is the perfect storage place.
Before shredding semisoft cheese on the large holes of a grater, spritz the grater with cooking oil spray so the cheese doesn’t stick. Freezing the cheese slightly makes it easier to grate, but freeze only the amount you need for the recipe.
Don’t throw away the rind from Parmesan cheese. Toss it into soup (especially chicken or bean soups or minestrone) or tomato sauce, and let it simmer for 30 minutes or so to soften and impart its flavor.
Even cheese that is fine to eat may sport a bit of mold. Trim off the blue, green, or fuzzy mold. If the mold is pink or black, then the cheese is spoiled and must be discarded. Also, if the cheese smells of ammonia, toss it out.
“Work With What You Got!”
© Victoria Hart Glavin Tiny New York Kitchen © 2017 All Rights Reserved
Most recipes have been perfected for use at seal level. At higher altitudes, adjustments in the cooking time, temperature, and ingredients could be necessary.
At sea level, water boils at 212 degrees. With each additional 500 feet of altitude, the boiling point drops 1 degree. Even though the boiling point is lower, it takes longer to generate the heat required to cook food. Therefore, at high altitudes, foods boiled in water (such as pasta and beans) will take longer to come to a boil and will require longer cooking times than recipes suggest. The processing times for canning foods and the blanching times for freezing vegetables will vary, too.
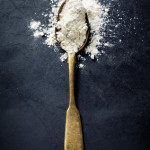
At high altitudes, cake recipes may need slight adjustments in the proportions of flour, leavening, liquid, eggs, etc. These adjustments will vary from recipe to recipe, and not set guidelines can be given. Many cake mixes now carry special directions on the label for high-altitude preparation.
High altitudes can also affect the rising of doughs and batters, deep-frying, candy making, and other aspects of food preparation. For complete information and special recipes for your area, call or write to the home agent at your county cooperative extension office or to the home economics department of your local utility company or state university.
“Work With What You Got!”
© Victoria Hart Glavin Tiny New York Kitchen © 2017 All Rights Reserved

Ways To Make The Most Of Seasonal Citrus
Zest It
Add zip to baked goods, stir-fries or stews. Make citrus salt!
Juice It
Lemons juice helps keep sliced fruits and root vegetables from turning brown. Finish savory dishes with a squeeze of lemon juice to enhance the flavors.
Freeze It
Freeze citrus juice or zest until you’re ready to use it.
Dry It
Bake peels on the lowest possible heat until dry, but still pliable. Use to flavor black tea, roasted chicken or braised meats.
Candy It
Garnish desserts and cocktails with candied peels or enjoy them as a sweet snack.
“Work With What You Got!”
© Victoria Hart Glavin Tiny New York Kitchen © 2016 All Rights Reserved

 A Few Words About Bacon
Bacon is salted, dried, cured or smoked meat from the back or sides of a pig. The term is derived from the Germanic bache/backe “back meat,” though at first the word referred to any part of a pig. Flitch (or slab bacon) designates a whole chunk of bacon before it is cut into slices. Burned bacon can be dangerous because burning it will produce carcinogens.
If you’re not doing it already then I have 3 words for you…BAKE YOUR BACON! Frying is the traditional way to cook bacon, but as we all know the high heat can make the bacon fat splatter all over the place. Baking applies lower heat, reducing splattering and shrinkage. It is also the best way to cook large amounts of bacon. Arrange the bacon slices side by side on a large, parchment paper lined, baking sheet. It’s a good idea if the baking sheet has a large rim on it. Bake in a preheated oven at 400º F for about 20 minutes or until the bacon is crisp and browned. Cooking food in the oven at this temperature is actually roasting, but there are times when the terms roasting and baking can be used interchangeably. Remove the rendered fat as it accumulates with a bulb baster, if necessary. When done it’s a good idea to transfer the bacon to paper towels to drain.
Generally bacon is about 50% fat. As it cooks, the fat becomes liquid and separates from the meat. This process is called rendering. The rendered fat can be put in a tightly covered container and stored in the fridge or freezer for sautéing or frying other foods.
Purchasing the leanest bacon can be counterproductive, as the fat gives the bacon most of its desirable flavor and crispness. Most of the extra fat melts off during cooking. The fat on bacon should be about 1/2 to 1/3 of the total weight. If you buy bacon from a butcher, you can ask for the rind to be removed and for the bacon to be sliced. A whole slab stays fresher longer. A butcher-cut slab can be stored for two weeks in the fridge or two months in the freezer. The freezing does create ice crystals which causes the bacon to splatter when fried stovetop.
Did you know that bacon can be frozen for up to 4 weeks? The curing process affects the stability of the fat, which means that bacon can turn rancid even when frozen. Although you can freeze the unopened package, it is usually better to separate the slices into conveniently sized amounts (about 4 ounces or so for breakfast). Wrap the bacon tightly in plastic wrap, then overwrap with aluminum foil. For added protection place in a ziplock bag. Long-term freezing is not recommended. Thaw thoroughly in the fridge before cooking.
Once the vacuum pack is opened, bacon will usually keep for only about a week in the fridge, although sometimes it will keep for a couple of weeks. The ends may darken and dry out and they should be sliced off and thrown away before using. To make bacon crumbles, chop the bacon first and then cook it.
Keep Calm and Eat Bacon!


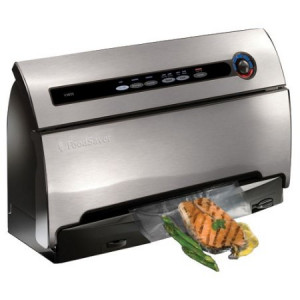 A Word About Vacuum Sealers
Freezing is an easy way to enjoy fruits and vegetables from gardens or farmers’ markets well into the winter. There are a variety of freezer bags to use for storing and freezing. I think that using a vacuum sealer is the best freezer method out there. Vacuum sealers protect foods by removing the extra air and creating a tight teal. If you want to preserve your fruits, vegetables, and meats through long-term freezing, a vacuum sealer is an investment to consider. Conventional storage bags and containers trap air in the container with the food, which can cause damage from frost and freezer burn. Because the sealer sucks all the air out of the bag before creating a tight seal, the food in the bags is better protected against the elements. A vacuum sealer costs between $75 and $200 and requires the purchase of special bags designed for this use. Besides preserving garden produce, this is a great tool to help you maximize the shelf life of other food items you buy in bulk at club stores or on sale.
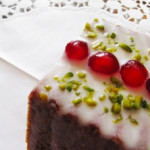
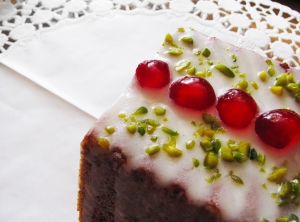 Serving & Storing Cake
To enjoy cakes at their best, follow these tips:
*Allow cakes with butter type frosting to stand for about an hour before slicing.
This allows the frosting to set.
*For cakes that are filled or frosted with whipped cream make sure to assemble
Them no more than 2 hours before serving. This will prevent them from
Getting soggy.
*To cut your cakes use a thin bladed knife cut pieces. Run the knife under hot
Water and make sure to wipe the knife dry before cutting the first piece
And in between subsequent cuts.
*For storing cakes most cakes can be covered and stored at room temperature
For 2 to 3 days. It is good to have a cake cover, but if you don’t have
A cake cover then just invert a large bowl over your cake. If you directly
Cover the cake with plastic wrap then it will for sure make a mess of the
Frosting.
*For those cakes that have a filling or a frosting that contains eggs, whipped
Cream or cream cheese it is best to store your cake covered in the fridge.
*If you want to freeze your cake then you should put your cooled and unfrosted
Cake layers on a baking sheet. Freeze them until they are nice and firm.
After the layers are frozen then transfer them to large freezer bags or wrap
Them and seal them in freezer wrap. They will keep in the freezer for up to
4 months. Thaw them before frosting.
*If you are serving your cake directly from the pan then cover them and freeze
Them in the pan. Make sure to thaw them before frosting them.


