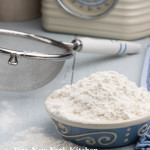
More and more people are swapping starches for flour in their recipes. If this is something that you have thought about doing then read on to find out more about cornstarch and its uses.
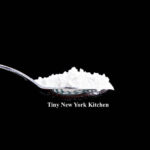
Cornstarch is one of the most versatile starches that there is. Extracted from the starchy endosperm of corn, its white powdery substance is virtually flavorless. It’s a nice ingredient for thickening puddings, soups, pie fillings, and many baked goods recipes. When added to cake, cookie, and shortbread recipes, cornstarch helps create a crumbly and tender texture.
Commercially, cornstarch is often used as an anti-caking agent. When added to packaged goods like shredded cheese, cornstarch coats the cheese and helps to absorb moisture that would otherwise cause spoiling. The absorption process also helps prevent food from clumping over time. Additionally, it is used when making sugars, such as corn syrup.
When cooking with cornstarch, it is best to mix this ingredient into a recipe that is at room temperature. When cornstarch is added to too hot of a mixture, the heat can cause unwanted clumping. Before adding any starch to a recipe, it’s recommended first to make a slurry. To make a slurry, simply mix cornstarch with a cold liquid such as water. This mixture will create a paste-like substance, that you can then add to the desired recipe. Using this slurry method will ensure that the cornstarch is evenly distributed throughout the recipe and not broken down by the heat. It is not recommended to freeze sauce and soups that include cornstarch. Freeing cornstarch can cause the molecules in the starch to break down, and once thawed, the liquid will not hold the same texture as before.
For Thickening:
Cornstarch is often used as a thickening agent when added to soups, stews, and gravies. Denser than flour, less cornstarch is needed to thicken a liquid to the desired consistency.
When cornstarch is added to a recipe, the starch molecules work to absorb water and thicken the mixture. When heated, those molecules swell and consume even more of the liquid in the recipe. Upon thoroughly cooking, the starch in the mix will have expanded size to ten times its size. Once the mixture cools, these same molecules will set. The setting of these molecules can help further solidify the dough, which makes cornstarch a great thickening agent for gooey fillings like pies and pudding. However, this molecule expansion is limited. While a cornstarch enriched recipe can be brought close to boil, it should never be fully boiled. When cornstarch is exposed to too high of temperatures, the starch molecules will begin to deflate, and the mixture will return to its runny state.
For Baked Goods:
Cornstarch not only acts as a thickening agent, but it can also be used in baked goods like cookies, brownies, and cakes. If you’re looking for more structure in your favorite dessert recipe, then you may want to try using cornstarch. Combining cornstarch with other flours can help soften the rigid proteins of the flour, resulting in a light and chewy dessert. Similar to when adding cornstarch to a soup or pudding, if adding cornstarch to a dessert batter, it should first be turned into a slurry. This will ensure that all of the molecules remain intact and that the starch is evenly distributed. Upon adding cornstarch to your baked goods, evaluate it as you would a soup. Has your batter reached the desired consistency? If not, then a bit more cornstarch may be needed. Once your dough looks perfect, bake your dessert like usual. The result should be light, fluffy, and delicious desserts.
Anti-Caking Agent:
Have you ever wondered why your powder sugar ingredients include cornstarch? Cornstarch acts as an anti-caking agent. By keeping moisture and condensation from reaching whatever it is mixed with. It helps to prevent lumps in finely ground foods like sugar. Cornstarch isn’t just used to ward off moisture from sugar. The next time you’re in the grocery store take a look at how many products list cornstarch as an ingredient. From gravy granules to shredded cheese, you might be surprised by the wide variety of foods that cornstarch is added to.
Frying With Cornstarch:
Cornstarch can also be used as a coating for fried foods. While cornstarch shouldn’t be used as a substitute for flour in baked goods, you can very easily substitute it in for flours when coating fried chicken, fish, or other items you’re frying. Not only will cornstarch work in the same way that flours do, but it will hold up better against sauces and absorb less of the frying oil. Less oil means less fat in your meal.
When frying food with cornstarch, I recommend that you coat the items lightly. Applying a light even coat to your food will ensure that it results in a crispy texture. When too much cornstarch is added, the coating often turns out gummy rather than crunchy. For the perfect, gluten-free fried food, consider blending cornstarch with a gluten-free flour like almond flour. This will help create a more breaded result, similar to wheat flour.
©Tiny New York Kitchen © 2021 All Rights Reserved
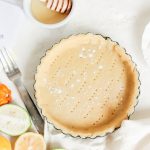
Warm Dough
Make sure not to let the dough get warm. Use cold butter and ice water. Refrigerate the dough before you roll it out. If the butter warms it will be absorbed by the flour, become sticky, and make for a tough crust.
Uneven Crust
To get an even, round crust, begin rolling from the middle of the dough round, pushing outward and stopping the pressure 1/4 inch from the edge. Then lift the round, give it a quarter turn and repeat.
Transferring Crust
To transfer your pie dough from the rolling surface to the pie plate, lift it with a bench scraper, gently drape it over a rolling pin, then place it in the pie plate.
©Tiny New York Kitchen © 2020 All Rights Reserved
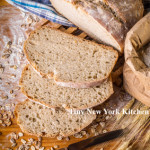
Many people are making bread these days and there’s nothing quite like the smell of bread baking in the house. Here are some answers to frequently asked bread making questions.
Never allow salt to come into direct contact with yeast because it removes the water that yeast needs to live. Instead, add salt to the flour used to make the dough, so the flour can act as a buffer.
A heavy-duty stand mixer is a great appliance for making bread dough. You can use the dough hook for mixing and kneading. If the dough isn’t coming together with the dough hook, switch over to the paddle attachment and mix just until the ingredients are combined, then switch back to the dough hook.
After the dough is mixed, let it rest. Professional bakers call this period, autolyze. It lets the flour fully hydrate and strengthens the gluten in the flour before kneading. Cover the work bowl with plastic and let the dough stand for 20 minutes and then knead on medium speed until the dough is smooth and elastic.
Dough made with a high proportion of whole-grain flour should feel tacky when you are kneading it. In general, moist or even sticky dough makes the best bread. Don’t add too much flour to the dough or the bread will bake up dry and tough.
How can you tell when the dough has been kneaded long enough? Use the windowpane test. Pull off a golf ball knob of dough and pat it into a rectangle. Pulling slowly and consistently from all four corners, stretch the dough into a thin, translucent membrane. If the dough tears easily, knead it longer. This technique won’t work with dough that includes seeds, nuts, or raisins, as they will tear the dough even if it has been kneaded sufficiently. If such ingredients have been used, check for stretchy and resilient dough.
Many bakers use a bowl to hold bread dough, but a straight-sided clear plastic tub is ideal for keeping track of dough as it rises. Mark the beginning level of the dough on the outside with a pen or a piece of tape, and then you can easily see when the dough has doubled. You can also use a glass bowl, but the doubling is a bit harder to define in a slope-sided container. Gently poke a finger into the dough. If the hole doesn’t refill, the dough has probably finished rising.
Many crusty artisanal are baked with steam to help keep the crust soft and pliable, allowing the bread to expand fully. Professional ovens have built-in steam injectors, but home bakers have to be more creative. One recommended method: When you turn on the oven to preheat it, place an empty heavy-duty rimmed baking sheet or pan on a rack near the top of the oven, When the bread dough is added to the oven, toss a handful of ice cubes into the pan and close the door. The ice will melt quickly and create a burst of steam. While the oven door is open, cover the glass on the door with a towel to catch any drips (the cold water could crack the glass) and remove the towel before closing the door.
A common way to test bread for doneness is to rap on the bottom of the loaf and listen for a dull thump. Using a thermometer is more reliable. Insert an instant-read thermometer in the bottom of the loaf, being sure to the tip reaches the center of the loaf. Butter and egg laden breads are finished when their internal temperature reaches 185 to 190 degrees F. Leaner and crispier breads are ready at 200 to 205 degrees F. For breads baked in loaf pans, insert the thermometer just above the rim of the pan, angling the tip down to the center of the loaf.
“Work With What You Got!”
©Tiny New York Kitchen © 2020 All Rights Reserve
These freezer essentials will help you with your weekly meal prep as well as last minute meals that you need to get on the table fast.
Bagged frozen vegetables, like mixed peppers, broccoli, and spinach.
Bagged frozen fruit, like blueberries, mangos, bananas, and strawberries.
Bagged frozen pastas, like tortellini and ravioli.
Frozen waffles and pancakes.
Frozen potatoes, like tots, fries, and breakfast potatoes.
Rice and prepared side dishes.
Pre-made dough, pie crusts, and breads.
Frozen foods are not limited to frozen dinners. You can stock your freezer with healthier ingredients to make putting dinner together easy. There are endless possibilities with what you can make with frozen ingredients. As always, be creative and “work with what you got!”
“Work With What You Got!”
©Tiny New York Kitchen © 2020 All Rights Reserved

Turn out amazing treats with these easy tips and tricks to help you bake your best every time.
Measure Flour Accurately
Using a measuring cup to scoop directly from the bag can pack in too much flour, leading to dry, dense baked goods. Use the “spoon and sweep” method by gently stirring the flour in the bag with a spoon. Spoon the flour into your measuring cup. With the back of a knife, level off the cup and sweep the excess back into the bag.
Warm Eggs To Room Temperature
Room temperature eggs blend more easily in batter and dough, and whites whip up with bigger volume. Take eggs out of the refrigerator a couple hours before baking or add cold eggs to a large-size bowl. Cover with warm, not hot, tap water. Rest for 5 to 7 minutes while you measure other ingredients.
Test Your Baking Soda And Baking Powder
These leaveners help baked goods rise. If they aren’t active, quick breads and pancakes will be flat instead of fluffy. Spoon baking powder and baking soda into separate small bowls. Pour boiling water into baking powder. Pour distilled white vinegar into baking soda. If the ingredients fizz, they’re still active.
Measure Liquid And Dry Ingredients Separately
Too much or too little liquid can change the texture and taste of the finished recipe. Liquid measuring cups give you room to pour right up to the fill line without spilling. Use clear measuring cups with pour spouts for liquids. Use flat-bottomed measuring cups for dry ingredients and use the “spoon and sweep method.”
Prevent Overbaking
Know your oven’s quirks. All ovens run slightly differently, and some spots are hotter than others. Keep an eye on how your baked goods are browning, the temperature, and the time to make the best estimate. Use an oven thermometer to see if your oven runs hot or cold (a few degrees above or below what the dial says), and adjust accordingly. Set a kitchen timer, and check for doneness a few minutes early. Rotate your pan halfway through for even baking.
“Work With What You Got!”
©Tiny New York Kitchen © 2019 All Rights Reserved
Have you ever wondered what the difference between cake flour, bread flour, and pastry flour is? Is it ok to substitute all-purpose flour that call for a specific flour type? These are questions that I get asked often.
Choosing the correct flour is about controlling the amount of gluten in your dough. Gluten is a protein structure that makes dough both firm and elastic. Bread flour comes from “hard” flour, which has a higher protein content (produces more gluten) making it perfect for bread, pizza dough, and any recipe that needs a little more elasticity and cohesion.
Pastry flour is made with “soft” flour, which has a much less protein content and produces less gluten. Dough made with pastry flour is tender, flaky and doesn’t hold together firmly. That’s a good thing because no one wants a rubbery piecrust! Cake flour has even less protein content than pastry flour, but not by much. It has just enough protein to give the cake a little structure, but not enough to make it tough.
All-purpose flour is a blend of “hard” and “soft” flours, which falls in the middle of the gluten spectrum, and works well in most baked goods. Your cakes might not be quite as tender, but in most cases they’ll still come out beautifully. It’s all a matter of degree. Cookies, piecrusts, muffins, quick breads, and scones all do well with all-purpose flour.
Gluten development is also the reason why recipes instruct you not to over mix your dough. Once you add water or any other low-fat liquid to flour, gluten bands start forming and the more you knead or stir the dough, the more these elastic bands start connecting. If you are using all-purpose flour in a cake or piecrust, make sure to stop mixing just when everything comes together.
“Work With What You Got!”
©Tiny New York Kitchen © 2018 All Rights Reserved
Most recipes have been perfected for use at seal level. At higher altitudes, adjustments in the cooking time, temperature, and ingredients could be necessary.
At sea level, water boils at 212 degrees. With each additional 500 feet of altitude, the boiling point drops 1 degree. Even though the boiling point is lower, it takes longer to generate the heat required to cook food. Therefore, at high altitudes, foods boiled in water (such as pasta and beans) will take longer to come to a boil and will require longer cooking times than recipes suggest. The processing times for canning foods and the blanching times for freezing vegetables will vary, too.
At high altitudes, cake recipes may need slight adjustments in the proportions of flour, leavening, liquid, eggs, etc. These adjustments will vary from recipe to recipe, and not set guidelines can be given. Many cake mixes now carry special directions on the label for high-altitude preparation.
High altitudes can also affect the rising of doughs and batters, deep-frying, candy making, and other aspects of food preparation. For complete information and special recipes for your area, call or write to the home agent at your county cooperative extension office or to the home economics department of your local utility company or state university.
“Work With What You Got!”
© Victoria Hart Glavin Tiny New York Kitchen © 2017 All Rights Reserved
Bread can be either leavened or unleavened. Leavened breads are made with rising agents, like yeast or baking powder, which allows the dough to release gases and expand. Unleavened bread contains no yeast, baking soda, baking powder or other leavening agents that allows dough to rise.
Leavened and unleavened bread are nutritionally similar.
It is generally, not a good idea to refrigerate bread. Although bread will last longer when refrigerated, it tends to dry out faster and to lose its soft texture.
As a general rule, bread should be kept in a somewhat air-tight and dry container or area.
Hot bread should not be put in a sealed container until it cools since the steam will cause dampness, which in turn can cause mold to grow more rapidly.
Storing bread on top of the refrigerator is not recommended. Refrigerator tops are usually very warm and this could either cause your bread to dry out more rapidly or cause condensation in the bag.
“Work With What You Got!”
© Victoria Hart Glavin Tiny New York Kitchen © 2016 All Rights Reserved

December is here and is cookie-baking heaven. Here are some basic tips to make a better cookie.
Split the dough. Work with half of the cookie dough at a time when rolling and cutting cookies. Too much handling of the dough makes cookies tough.
Keep the other half refrigerated since chilled dough is easier to handle.
Bake cookies on flat, shiny, heavy aluminum, baking sheets. These baking sheets with no sides are designed for easily sliding cookies onto a cooling rack. Dark sheets may absorb heat, causing cookies to brown too much on the bottom.
Grease baking sheets with cooking spray or solid shortening instead of butter or margarine.
Don’t overload the oven. Bake one sheet of cookies at a time on the middle oven rack.
Make sure to cool baking sheets between batches before reusing. Wipe the surface of each with a paper towel before reusing.
Cool cookies completely, on wire racks, before storing them in airtight containers.
“Work With What You Got!”
© Victoria Hart Glavin Tiny New York Kitchen © 2016 All Rights Reserved
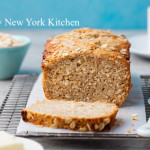
Quick Breads
For mouth-watering breads that don’t require a lot of time, turn to quick breads. By using baking powder, baking soda, steam, or air instead of yeast to leaven dough. An advantage of quick breads is their ability to be prepared quickly and reliably, without requiring time-consuming skilled labor and the climate control needed for traditional yeast breads. Quick breads include banana bread, beer bread, biscuits, cornbread, cookies, muffins, cakes, pancakes, brownies, scones, and soda bread.
Almost all quick breads have the same basic ingredients: Flour, leavening, eggs, fat (butter, margarine, shortening, or oil) and a liquid such as milk. Ingredients beyond these basics are added for variations of flavor and texture. The type of bread produced varies based predominantly on the method of mixing, the major flavoring, and the ratio of liquid in the batter. Some batters are thin enough to pour and others are thick enough to mold into lumps.
There are four main types of quick bread batter:
Pour Batters: Such as pancake batter, have a liquid to dry ration of about 1:1 and so pours in a steady stream – also called a “low-ratio” baked good.
Drop Batters: Such as cornbread and muffin batters, have a liquid to dry ratio of about 1:2.
Soft Doughs: Such as many chocolate chip cookie doughs, have a liquid to dry ratio of about 1:3. Soft doughs stick significantly to work surfaces.
Stiff Doughs: Such as pie crust and sugar cookie doughs, have a liquid to dry ratio of 1:8. Stiff doughs are easy to work in that they only minimally stick to work surfaces, including tools and hands – also called “high-ratio” baked goods.
Preparing a quick bread generally involves two mixing containers. On contains all dry ingredients (including chemical leavening agents or agent) and one contains all wet ingredients (possibly including liquid ingredients that are slightly acidic in order to initiate the leavening process). In some variations, the dry ingredients are in a bowl and the wet ingredients are heated sauces in a saucepan off-heat and cooled.
During the chemical leavening process, agents (one or more food-grade chemicals – usually a weak acid and a weak base) are added into the dough during mixing. These agents undergo a chemical reaction to produce carbon dioxide, which increases the baked good’s volume and produces a porous structure and lighter texture. Yeast breads often take hours to rise, and the resulting baked good’s texture can vary greatly based on external factors such as temperature and humidity. By contrast, breads made with chemical leavening agents are relatively uniform, reliable, and quick. Usually, the resulting baked good is softer and lighter than traditional yeast breads.
Chemical leavening agents include a weak base, such as baking soda (sodium bicarbonate) plus a weak acid, such as cream of tartar, lemon juice, or cultured buttermilk, to create an acid-base reaction that releases carbon dioxide. Quick bread leavened specifically with baking soda is often called “soda bread.” Baking powder contains both an acid and a base in dry powdered form, and simply needs a liquid medium in which to react. Other alternative leavening agents are egg whites mechanically beaten to form stiff peaks, as in the case of many waffle recipes, or steam, in the case of cream puffs.
There are three basic methods for making quick breads, which may combine the “rise” of the chemical leavener with advantageous “lift” from other ingredients.
The Stirring Method: Also known as the quick-bread method, blending method, or muffin method is used for pancakes, muffins, corn bread, dumplings, and fritters. This method calls for measurement of dry and wet ingredients separately, then quickly mixing the two. Often the wet ingredients include beaten eggs, which have trapped air that helps the product to rise. In these recipes, the fats are liquid, such as cooking oil. Using mixing is done using a tool with a wide head such as a spoon or spatula to prevent the dough from becoming over-beaten, which would break down the egg’s lift.
The Creaming Method: Frequently used for cake batters. The butter and sugar are “creamed” or beaten together until smooth and fluffy. Eggs and liquid flavorings are mixed in, and finally dry and liquid ingredients are added in. The creaming method combines rise gained from air bubbles in the creamed butter with the rise from the chemical leaveners. Gentle folding in of the final ingredients avoids destroying these air pockets.
The Shortening Method: Also known as the biscuit method, is used for biscuits and scones. This method cuts solid fat (whether lard, butter, or vegetable shortening) into flour and other dry ingredients using a food processor, pastry blender, or two hand-held forks. The layering from this process gives rise and adds flakiness as the fold of fat melts during baking. This technique is said to produce “shortened” cakes and breads, regardless of whether or not the chosen fat is vegetable shortening.
Quick bread originated in the United States at the end of the 18th century. Before the creation of quick bread, baked goods were leavened with either yeast or by mixing dough with eggs. The discovery of chemical leavening agents and their widespread military, commercial, and home utilization in the United States dates back to 1846 with the introduction of commercial baking soda in New York by Church and Dwight of “Arm & Hammer” fame. This development was extended in 1956 by the introduction of commercial baking powder in Massachusetts, although the best known form of baking powder is “Calumet”, which was first introduced in West Hammond and Hammond, Indiana (later Calumet City, Illinois) in 1889. Both forms of food-grade chemical leaveners are still being produced under their original names.
During the American Civil War (1861-1865) the demand for portable and quickly made food was high, while skilled labor for traditional bread making was scarce. This encouraged the adoption of bread, which was rapidly made and leavened with baking soda, instead of yeast. The shortage of chemical leaveners in the American South during the Civil War contributed to a food crisis.
As the Industrial Revolution accelerated, the marketing of mass-produced prepackaged foods was eased by the use of chemical leaveners, which could produce consistent products regardless of variations in source ingredients, time of year, geographical location, weather conditions, and many other factors that could cause problems with environmentally sensitive, temperamental yeast formulations. These factors were traded off against the loss of traditional yeast flavor, nutrition, and texture.
www.tinynewyorkkitchen.com
“Work With What You Got!”
© Victoria Hart Glavin Tiny New York Kitchen © 2016 All Rights Reserved


