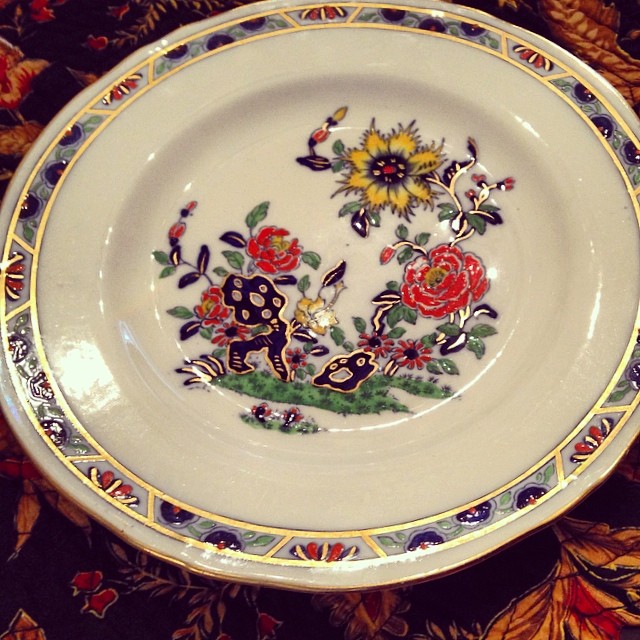
China Markings
The rule of thumb for reading the marks on the underside of china is simple. If there is no mark, the piece was made before 1891, when the United States government began requiring imported china to indicate its country of origin. Pieces labeled only by country probably were made from 1891 to 1914. Thereafter, all imported china was marked “Made in…,” specifying the country of origin.
© Victoria Hart Glavin

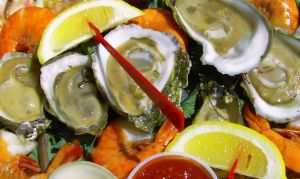
Oysters
Oysters are a type of marine mollusk with a rough, irregular shell, found on the seabed of temperate coastal waters. Oysters have been cultivated as food for more than two thousand years; they are shucked and eaten raw, cooked, or smoked. The top of an oyster tends to be flatter; the bottom is more bowl shaped. On-the-half-shell oysters are left in the bottom half.
The flavor of an oyster is determined by the species and by its home waters. Oysters are classified by their point of origin: Pacific or Japanese, Atlantic or Eastern, and Olympia. Specific names usually indicate their exact point of harvesting. In general, Pacific oysters, such as Hama Hama, Hog Island, Quilcene, Tomales Bay, Wescott Bay and Kumamoto, are known for their creamy texture and slightly mineral flavor. Atlantic oysters, such as Cape Cod, Chesapeake, Kent Island, Long Island, Malpeque, Wellfleet, and Blue Point, have a saline, oceanic taste and crisp texture. The relatively small Olympia (originally from Puget Sound) has been overharvested in the past, but is making a comeback.
Fresh live oysters have a sweet, mild smell. The shells should be tightly closed and feel heavy. If an oyster stays open when touched, do not buy it. If you are eating them raw, the oysters should be fresh and shucked within a few hours before serving. Only buy shucked-for-you oysters that are plump with totally clear liquid.
Put live oysters out on a large tray and cover with a damp cloth. You can keep them in the refrigerator for one to two days, but make sure the cloth stays damp. Refrigerate shucked oysters in their liquor in an airtight container for up to two days. Frozen oysters can be kept for three to four months.
If you don’t have a Chesapeake stabber (an oyster-shucking knife), open the bivalves with an old-fashioned can opener, the kind some people call a church key. Scrub the oysters well with a stiff brush under cold running water. Rinse well before opening. Reserve the liquor. If you soak oysters in club soda for about 5 minutes, the oysters will usually be easier to remove from the shells. Hold an oyster, curved side down, in one hand on a folded kitchen towel. Locate the spot where the top shell meets the bottom shell at the pointed tip of the oyster. Holding the can opener, pointed end up, in your other hand, wedge the tip of it into the crack separating the shells, about 1/4 inch below the pointed tip of the shell. Push the end of the can opener downward, and the shell should pop open from the leverage. Run the can opener around the inside of the shell to open it completely. To loosen the oyster meat from the shell, run a dinner knife under the meat.


 Balsamic Vinegar
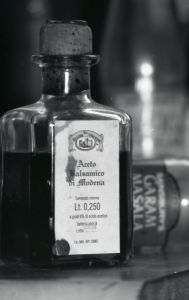
In Italy, true balsamic vinegar is not considered an acidic ingredient for salad dressings, but rather a condiment to sprinkle on grilled meats or the best strawberries of the season. There are three very different kinds available: aceto balsamico tradizionale, commercial, and condiment.
Aceto balsamico tradizionale, or “traditional balsamic vinegar,” is made in small quantities under rigorously controlled conditions in and around the towns of Modena and Reggio Emilia in Emilia-Romagna. This artisanal product is protected by Italian law and by the European Union’s designation of original standards. Created from the boiled-down juice of sweet white grapes (traditionally Trebbiano), it has an underlying sweetness and takes on additional complex flavors from sequential aging in chestnut, oak, and other wood barrels. The long aging further evaporates the liquid, giving it a slightly viscous body. The name comes from balsanum, Latin for an aromatic resin that soothes and relaxes (the English balm is from the same word), indicating that the condiment was originally considered healthful and even used as medicine. Tradizionale must age for 12 year, so it is always expensive, but worth every penny.
Mass-market commercial balsamic vinegar, which is made from artificially flavored red wine and is not aged, is sometimes labeled “balsamic vinegar of Modena.” To improve its flavor and body, add a large pinch of brown sugar for every cup of vinegar.
Condimento balsamic vinegar is often good, and can be a fine alternative to commercial balsamic of questionable quality and the excellent but expensive tradizionale. It is usually made in Modena or Reggio Emilia, and often follows many of the same traditional manufacturing methods as its pricey relative. But unlike aceto balsamico tradizionale, condiment is not protected by a determined set of standards, so big differences can exist among brands. When you find one you like, stick with it.
Many chefs use a drizzle of boiled-down balsamic vinegar to decorate plates and act as an additional flavoring element. To make this useful garnish, boil 1 cup commercial balsamic vinegar in a nonreactive saucepan over a high heat until it has reduced by about three-fourths and is thickened and syrupy. It will keep indefinitely stored in a tightly closed jar at room temperature.

 Fruit Essentials
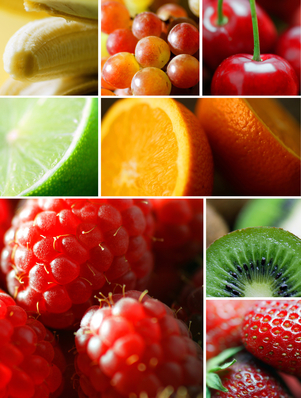
Have you ever come home from the market after purchasing fruit to find that you spent money for nothing? I have plenty of times and it ticks me off every time. Here are some Fruit Essentials that may help you have more fruit shopping success.
Did you know that many plants that are botanically fruits are not sweet? We think of them as vegetables or non-fruits. Avocados, beans, coconuts, corn, cucumbers, eggplants, green peppers, okra, peas, pumpkins, sugar peas, string beans and tomatoes all fall in the fruit category. Some cookbooks make a distinction between fruit, vegetables and fruit vegetables. Fruit vegetables are foods that are botanically fruits, but are most often prepared and served like vegetables. These fruits are considered fruit vegetables: Aubergine, autumn squash, avocado, bitter melon, cantaloupe, chayote, chile, courgette, cucumber, eggplant, gherkin, green bean, green sweet pepper, hot pepper, marrow, muskmelon, okra, olive, pumpkin, red sweet pepper, seedless cucumber, squash, sweet pepper, tomatillo, tomato, watermelon, wax gourd, yellow sweet pepper and zucchini.
Pectin is a substance contained in some fruit which is used for making jams and jellies thicker. High pectin fruits are apples, cranberries, currants, lemons, oranges, plums and quinces. Low pectin fruits are bananas, cherries, grapes, mangos, peaches, pineapples and strawberries.
Low pectin fruits seem to discolor quicker than high pectin fruits ( bananas and eggplants). Lemon juice or vinegar slows the discoloring process. Other fruits and vegetables that discolor quickly are avocados, cauliflower, celery, cherries, figs, Jerusalem artichokes, mushrooms, nectarines, parsnips, peaches, pears, potatoes, rutabaga and yams.
Bruising: When a fruit is bruised the cell walls break down and discoloration begins. The process can be slowed down by refrigeration.
Cleaning: It is important to clean our fruit and vegetables. Rinse fruit in cold running water and scrub as needed before cooking or eating. Soaking fruit in water for more than a few minutes can leach out water soluble vitamins.
Peeling: The fruit skin usually contains a lot of important nutrients, but if you need to peel a thick-skinned fruit cut a small amount of the peel from the top and bottom. Then on a cutting board cut off the peel in strips from top to bottom. A good way to peel thin skinned fruit is to place the fruit in a bowl with boiling water and let stand for about 1 minute. Remove and cool in an ice water bath. You could also spear the fruit with a fork and hold over a gas flame until the skin cracks OR quarter the fruit and peel with a sharp paring knife or potato peeler.
Wax: Oh those beautiful waxed apples that wink at us at the market. They are beautiful because they are waxed. I don’t know about you, but I would rather not eat wax. Wax can be removed from the surface of fruits by washing them with a mild dishwashing soap and then thoroughly rinsing them. This will remove most of the wax, but probably not all of it.
Purchasing Ripe: Purchase these fruits fully ripe: Berries, cherries, citrus, grapes and watermelon. All of the fruits in this list, except berries, can be refrigerated without losing flavor.
Purchasing Not-So-Ripe: Apricots, figs, melons, nectarines, peaches and plums develop more complex flavors after picking. Store these fruits at room temperature until they are as ripe as you would like them.
Refrigeration: You can refrigerate apples,ripe mangos and ripe pears as soon as you get them. Do not refrigerat bananas.
Seasonal Fruit: Winter is the season for citrus. Fall is the season for apples and pears. Late spring is the season for strawberries and pineapples. Summer is perfect for blueberries, melons, peaches and plums.
Washing: Dry fruit with paper towels or kitchen towels and then use a blow dryer on the cool setting to completely dry fruit.
Squeezing: A microwave can be used to get more juice from citrus fruits. Microwave citrus fruits for about 20 seconds before squeezing the fruit for juice.
 Eggplant Essentials
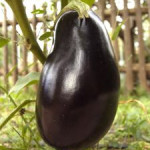
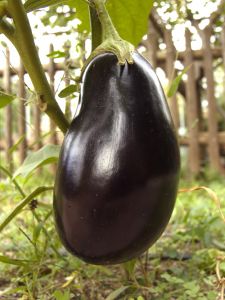
Eggplant (also known as Aubergine or Melongene) is an egg-shaped vegetable with a typically dark purple, shiny skin, though some are yellow or white. Eggplant was so named because the delicate white varieties that resemble eggs. Eggplant grows on a plant (Solanum Esculentum) in the nightshade family and is actually a fruit and not a vegetable. It is actually technically a berry. Eggplants have not always been popular. They were once known as “mad apples,” because it was thought that they caused insanity or death. They have been used in China since 600 BC. Thomas Jefferson first brought the eggplant to America from France in the eighteenth century. Male eggplants are rounder and smoother at the blossom end. They have fewer seeds which are bitter. Female eggplants are more oval and the blossom end is usually deeply indented. They tend to have more bitter seeds.
Eggplants are at their best from July through September. Select smooth, firm, glossy-skinned eggplants with green caps and stems. Smaller eggplants are sweeter than large ones. The fewer the seeds in an eggplant, the sweeter the eggplant. The more seeds in an eggplant, the older the eggplant.
Store eggplants in perforated plastic bags in the vegetable crisper of the refrigerator for four to five days.
Eggplants should be cooked immediately after peeling or cutting because the exposed flesh discolors rapidly due to oxidation. To prevent this start cooking as soon as you have cut it. If there is an unavoidable delay, promptly coat the surface with lemon juice or submerge with pieces in acidulated water.
Salt the flesh of a large cut-up eggplant to draw out any bitterness. For frying, it is always good to salt the eggplant or otherwise remove excess moisture. Only eggplants with tough, thick skins need to be peeled.
Eggplants should be cooked in only the minimum amount of fat or oil or without any at all because they have inner air pockets. Eggplants can absorb several times their weight in oil, even when breaded. Cooking with too much oil or fat breaks down the eggplant’s texture.
Slicing eggplants is so much easier when using a serrated knife.
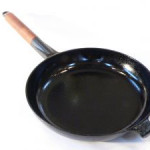
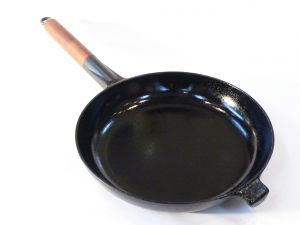 Sautéing Tips
Some foods need moist, long cooking to tenderize them while others just require a quick sauté in a skillet. Sauté means “jump” in French which describes the tossing and turning in the skillet during the cooking process. There are a few basic secrets to perfect sautéing that will help you get better cooking results.
The trick to successful sautéing is to use a medium-high heat and a small amount of oil. As a matter of fact meats and other protein-based foods should not be turned too often because extended contact with the hot skillet will brown the surface of the food which will deliver extra flavor. Heat the skillet over a medium-high heat and if the pan is too hot you will burn the outside of the food before the inside is cooked so turn down the heat a bit.
Do not use butter for sautéing. Use oil. Butter contains milk solids that burn and smoke at high temperatures. Some cookbooks call for mixing butter and oil which supposedly increases the smoke point of the butter. This does not remove the milk solids that are the problem. You can, however, use clarified butter, but it is easier to use oil for cooking meats. If you want a butter flavor then use it in a pan sauce.
Thick cuts of meat can be difficult to cook through when sautéing. You may want to use a double-cooking method for thick cuts. Double-cut pork and lamb chops, porterhouse steaks, and large bone-in, skin-on chicken breast halves are too thick to cook through in a skillet on the stove top. It is best to brown them in the skillet, and then finish cooking them in a 400° F oven. Be sure that your skillet is ovenproof.
Make a pan sauce to take advantage of the browned bits in the pan which are loaded with delicious flavor. Remove the meat from the skillet and tent loosely with aluminum foil to keep the meat warm. Pour off the fat from the skillet and return the skillet to the medium-high heat. Add a couple of tablespoons of minced shallots and a tablespoon of butter. Do not add the butter alone as the skillet may be too hot and the butter will burn. The shallots will act as insulation. Cook for a minute or so to soften the shallots and then add about 1 cup of an appropriate stock. Wine may seem like a good choice, but it can be too strong. Boil the stock, scraping up the bits in the pan with a wooden spoon or spatula until it is reduced to about 1/2 cup. Remove from the heat and whisk in 1to 2 tablespoons of cold butter (a tablespoon at a time) to thicken the sauce lightly.

 A Word About Eggs
Do not transfer your eggs to the egg holder in the refrigerator door. This is actually the warmest place in the fridge and storing them there will hasten spoilage. Leave them in their carton and put them on a shelf.
There is no difference in flavor or nutritional value between white and brown eggs. Choosing one over the other is a matter of aesthetic preference. The breed of chicken determines the color of the eggshell.
To crack an egg with a clean break, rap it on a flat work surface. Eggs that are cracked on the edge of a bowl shatter more easily and you can end up with pieces of eggshell in the bowl.
Eggs are much easier to separate when they are cold. Most chefs learn to separate eggs by passing their contents back and for between halved shells, but this is not the greatest method as the sharp shells can cut into the yolk. It’s much better to use your hands. Working over a bowl, hold the egg in one hand and rap the egg on the work surface. Still using one hand crack the egg into your other cupped free hand. With practice you will soon be able to crack and open an egg with just one hand. Throw away the shell. Gently pass the egg back and forth to your cupped hands. Let the white slip through your fingers into the bowl while the yolk remains intact. Make sure to wash your hands well before starting this process and, of course, after you’ve separated the last egg.
Room temperature eggs will beat more easily because they will incorporate more air than cold eggs. To take the chill off of refrigerated eggs put the uncracked egg in a heatproof bowl and then add hot tap water to cover. Let stand for about 5 minutes.
To bring egg whites to room temperature, separate the cold eggs. Open them over a heatproof bowl so that the whites fall into it. Put the bowl in a larger bowl filled with hot tap water and let stand. Stir occasionally for about 3 minutes or just until the whites lose their chill.
Fat inhibits the aerations of egg whites. When you are beating egg whites make sure that there is not ANY fat that comes in contact with the whites. Bowls and beaters must be absolutely clean. Do not use a plastic or rubber bowl for beating egg whites because they seem to retain grease. To make sure that you have removed all grease from the bowls and beaters put the beaters in the bowl and add a generous splash of vinegar. Wipe out the bowl with paper towels and then wipe down the beaters with the vinegar soaked paper towels. Pour out any vinegar that may remain in the bowl, but do not rinse out the vinegar residue. Due to its acidity, vinegar will react with the egg whites and help them hold their shape when whipped.
For soft scrambled eggs, add a spoonful of heavy cream or milk when you beat the eggs. This should be about 1 tablespoon for every 2 eggs. Salt does toughen the eggs so don’t add the salt until after the eggs are cooked.
Poached eggs should have an attractive oval shape. First, use very fresh eggs, as their whites are firmer than older eggs. Regardless of age, it isn’t easy to get the whites to behave in simmering cooking water. Vinegar and salt will help set and control the spreading whites. Add 1 tablespoon of cider or distilled vinegar and 1/2 teaspoon of kosher salt to every quart of water. When the eggs are done, use a slotted spoon to transfer them to a bowl of hot tap water to rinse off the vinegar flavor and to hold the eggs for a few minutes before serving.
Hard-boiled eggs should be easy to cook. There are two common problems in cooking hard-boiled eggs. 1. Green-ringed yolks 2.Difficulty peeling. First, you should use eggs that have been stored for 7 to 10 days before cooking them. Older eggs are easier to peel. As the egg ages, carbon dioxide escapes through the shell, reducing the acidity of the white and acidity affects how the white clings to the shell. For peeling I find it easier to peel a hard-boiled eggs under running water.
Despite common belief, hard-boiled eggs should not be boiled for two reasons. First of all, the bubbling water can move the eggs so much that the shells crack. Second, it is easy to overcook eggs in boiling water. Overcooking will cause that horrible green ring that sometimes forms around the yolk. A better and easier way to cook the eggs is by putting them in a saucepan and cover with cold water. Bring to a simmer over a high heat. Take the pan off of the heat and cover with a lid. Let the egg stand in the water for 15 minutes. Pour off most of the water from the saucepan and then fill the pan with cold water. Let the eggs stand until they are completely cooled which should be for about 20 minutes. Crack and peel the eggs (under running water) immediately after cooling.
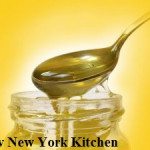
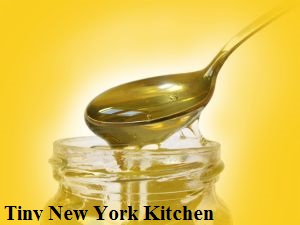 Storing Honey
Did you know that you can keep your honey from crystallizing by storing it in the freezer? You don’t have to worry about it freezing solid because the moisture content is low. When purchasing large amounts of honey, divide it into freezer proof containers and freeze. When you need to use it just defrost it at room temperature for about 1/2 hour. The honey will appear thick and a bit sludge-like until if fully reaches room temperature.

 A Few Words About Bacon
Bacon is salted, dried, cured or smoked meat from the back or sides of a pig. The term is derived from the Germanic bache/backe “back meat,” though at first the word referred to any part of a pig. Flitch (or slab bacon) designates a whole chunk of bacon before it is cut into slices. Burned bacon can be dangerous because burning it will produce carcinogens.
If you’re not doing it already then I have 3 words for you…BAKE YOUR BACON! Frying is the traditional way to cook bacon, but as we all know the high heat can make the bacon fat splatter all over the place. Baking applies lower heat, reducing splattering and shrinkage. It is also the best way to cook large amounts of bacon. Arrange the bacon slices side by side on a large, parchment paper lined, baking sheet. It’s a good idea if the baking sheet has a large rim on it. Bake in a preheated oven at 400º F for about 20 minutes or until the bacon is crisp and browned. Cooking food in the oven at this temperature is actually roasting, but there are times when the terms roasting and baking can be used interchangeably. Remove the rendered fat as it accumulates with a bulb baster, if necessary. When done it’s a good idea to transfer the bacon to paper towels to drain.
Generally bacon is about 50% fat. As it cooks, the fat becomes liquid and separates from the meat. This process is called rendering. The rendered fat can be put in a tightly covered container and stored in the fridge or freezer for sautéing or frying other foods.
Purchasing the leanest bacon can be counterproductive, as the fat gives the bacon most of its desirable flavor and crispness. Most of the extra fat melts off during cooking. The fat on bacon should be about 1/2 to 1/3 of the total weight. If you buy bacon from a butcher, you can ask for the rind to be removed and for the bacon to be sliced. A whole slab stays fresher longer. A butcher-cut slab can be stored for two weeks in the fridge or two months in the freezer. The freezing does create ice crystals which causes the bacon to splatter when fried stovetop.
Did you know that bacon can be frozen for up to 4 weeks? The curing process affects the stability of the fat, which means that bacon can turn rancid even when frozen. Although you can freeze the unopened package, it is usually better to separate the slices into conveniently sized amounts (about 4 ounces or so for breakfast). Wrap the bacon tightly in plastic wrap, then overwrap with aluminum foil. For added protection place in a ziplock bag. Long-term freezing is not recommended. Thaw thoroughly in the fridge before cooking.
Once the vacuum pack is opened, bacon will usually keep for only about a week in the fridge, although sometimes it will keep for a couple of weeks. The ends may darken and dry out and they should be sliced off and thrown away before using. To make bacon crumbles, chop the bacon first and then cook it.
Keep Calm and Eat Bacon!


 All-American Hot Dogs
Summer is here and why pay top dollar going out when you can make delicious hot dogs at home? Here is a guide to the different ways Americans make their frankfurters around the country. I had the Sonoran style hot dogs while I was in Tucson in February and absolutely loved them.
New York Style
Served with brown or German mustard and sauerkraut or onions cooked in tomato paste.
Chicago Style
Served on a poppy seed bun with mustard, pickle relish, sport peppers, onions, tomatoes, dill pickles and celery salt. Pepperoncini can be substituted for sport peppers.
Kansas City Style
Served on a sesame seed bun with brown or German mustard, sauerkraut and Swiss cheese.
Atlanta “Dragged Through The Garden” Style
Serve topped with coleslaw.
Detroit “Coney” Style
Served with chili, onions, mustard and cheddar cheese.
Seattle Style
Served with cream cheese and grilled onions.
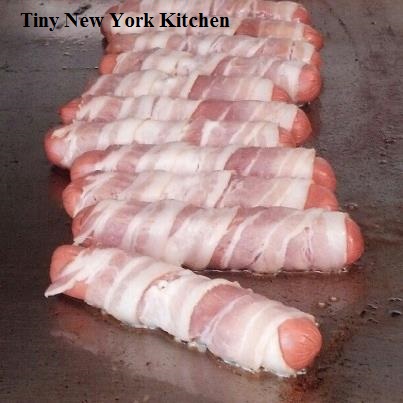
Phoenix/Tucson “Sonoran” Style
Served as a bacon-wrapped hot dog with pinto beans, onions, tomatoes, mustard, mayo, jalapeno peppers and cheese.
Austin “Tex-Mex” Style
Served with queso, guacamole and crushed tortilla chips.
San Francisco “Wine Country” Style
Served with red wine caramelized onions and goat cheese.
Miami “Cuban” Style
Served with mustard, pickles and Swiss cheese.