
Use a cherry pitter to pit olives. If you don’t have a cherry pitter (or an olive pitter) use a flat meat pounder or the bottom of a small skillet to squash the olive on a work surface, crushing the flesh so that you can remove the pit. There are very few recipes that all for perfectly pitted olives, anyway.
If you’re a martini drinker, toss out the olive brine from the jar, and replace it with dry vermouth. You will improve both your olives and your martinis.
A melon baller can be used to pull olives out of the jar. The small hole on the baller drains the brine, too.
“Work With What You Got!”
©Tiny New York Kitchen © 2021 All Rights Reserved

Stone fruit is at its peak during the summer.
Look for fruit without any bruises, cuts, or soft spots.
Peaches bruise easily – hold in the palm of your hand to check ripeness instead of squeezing.
Give a sniff. Ripe fruit has a fragrant scent that makes you want to take a bit.
Ripen peaches by storing in a paper bag for 2 to 3 days at room temperature out of direct sunlight.
Keep cherries in the refrigerator.
All stone fruits offer good-for-you fiber and antioxidants.
Stone fruits are low in calories.
Peaches are a great source of vitamins A and C.
“Work With What You Got!”
©Tiny New York Kitchen © 2019 All Rights Reserved

Here is another use for the whole grains and seeds that you’re seeing at the store. Top off with delicious flavoring, which are also tasty on oatmeal.
Amaranth (3/4 Cup)
Bring 2 1/4 cups water or milk to boil in saucepan. Stir in amaranth. Reduce heat to low, cover and simmer until tender. Cooking time is 25 to 30 minutes. Stir occasionally. Remove from heat and mix in or top with dried cherries, coconut sugar, macadamia nuts, vanilla, banana, or cacao nibs. Serves 2
Millet (3/4 Cup)
Bring 1 1/2 cups water or milk to boil in saucepan. Stir in millet. Reduce heat to low, cover and simmer until tender. Cooking time is 15 to 20 minutes. Stir occasionally. Remove from heat and mix in or top with chopped dates, demerara sugar, hazelnuts, cloves, clementine, or granola. Serves 2
Quinoa (3/4 Cup)
Bring 1 1/2 cups water or milk to boil in saucepan. Stir in quinoa. Reduce heat to low, cover and simmer until tender. Cooking time is 15 to 20 minutes. Stir occasionally. Remove from heat and mix in or top with dried apricots, agave syrup, pine nuts, cardamom, blueberries, or toasted coconut.
Serves 2
“Work With What You Got!”
©Tiny New York Kitchen © 2018 All Rights Reserved

Ice Tea or Iced Tea? It depends on where you live. In the South, it’s called ice tea and everywhere else it’s called iced tea.
Iced tea did not take its current form until the popularity of black tea took off, thanks to the work of the Indian Tea Commission at the St. Louis World’s Fair in 1904. As the legend goes, Richard Blechynden, the head of the commission, watched the fairgoers pass by his elaborate teahouse as the sweltering temperatures made hot beverages unpalatable. Driven to increase the market for Indian black tea in the States, he hit upon the idea of not only serving it iced, but also perhaps more importantly, giving it away for free. His booth was soon the most popular at the fair as the patrons found his golden beverage to be the perfect refreshment.
Spurred on by his success in St. Louis, Blechynden toured the country, giving away more and more iced tea, quickly spreading its popularity nationwide. Brewing the perfect iced tea at home, complete with sweet and often fruity syrups, soon became the hallmark of a great hostess. Iced tea was mixed with all sorts of flavors in delicious punches; lemon, mint, strawberries, cherries, and oranges, whether fresh, preserved, or in syrup form or, for the more mature palette, brandy and bourbon to give it a little extra kick. And though few still have time for such an elaborate and time-consuming production (early recipes recommend beginning to brew tea at breakfast for service at dinner), iced tea remains an American favorite, available in bottles, cans, and even from a soda fountain.
To make iced tea use double the amount of tea or teabags that you would use for hot tea when you’re planning to chill the drink. And allow the tea to come to room temperature before you put it into the refrigerator. Fill an ice cube tray with tepid tea and freeze for ice that won’t dilute your drink. You could also float some minced mint or fruit in the cubes for a special treat.
“Work With What You Got!”
© Victoria Hart Glavin Tiny New York Kitchen © 2017 All Rights Reserved
It’s Jam Making Time Again!

Bread And Cherries
“Cherries, ripe cherries!”
The old woman cried,
In her snowy white apron
And basket beside;
And the little boys came,
Eyes shining, cheeks red,
To buy bags of cherries
To eat with their bread.
By Walter John La Mare (1873-1956)
“Work With What You Got!”
© Victoria Hart Glavin Tiny New York Kitchen © 2016 All Rights Reserved


Ruby Red Grapefruit Iced Tea
This Ruby Red Grapefruit Iced Tea is so refreshing. If you want to make ahead then add the ice cubes before serving.
INGREDIENTS
3 Green Tea Bags
3 Cups Boiling Water
2 Cups Ruby Red Grapefruit Juice
1/2 Cup Agave Nectar
1 Cup Mint Leaves
1 Ruby Red Grapefruit (Thinly Sliced)
1 Cup Fresh Sliced Ginger (Thinly Sliced)
Pitted Cherries For Garnish (Optional)
Ice Cubes (To Serve)
Place tea bags and boiling water in a large-size bowl and set aside to infuse for 5 minutes. Remove the tea bags and allow the tea to cool completely. Add the grapefruit juice and agave nectar. Stir to combine. Place the mint, grapefruit slices, ginger and ice cubes in a 42-ounce capacity jar and pour the tea mixture over to serve. Pour into ice tea glasses and garnish with a single cherry. Makes 42 ounces.
© Victoria Hart Glavin
![]()
![]()

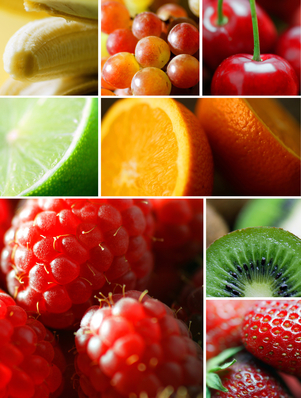 Fruit Essentials
Have you ever come home from the market after purchasing fruit to find that you spent money for nothing? I have plenty of times and it ticks me off every time. Here are some Fruit Essentials that may help you have more fruit shopping success.
Did you know that many plants that are botanically fruits are not sweet? We think of them as vegetables or non-fruits. Avocados, beans, coconuts, corn, cucumbers, eggplants, green peppers, okra, peas, pumpkins, sugar peas, string beans and tomatoes all fall in the fruit category. Some cookbooks make a distinction between fruit, vegetables and fruit vegetables. Fruit vegetables are foods that are botanically fruits, but are most often prepared and served like vegetables. These fruits are considered fruit vegetables: Aubergine, autumn squash, avocado, bitter melon, cantaloupe, chayote, chile, courgette, cucumber, eggplant, gherkin, green bean, green sweet pepper, hot pepper, marrow, muskmelon, okra, olive, pumpkin, red sweet pepper, seedless cucumber, squash, sweet pepper, tomatillo, tomato, watermelon, wax gourd, yellow sweet pepper and zucchini.
Pectin is a substance contained in some fruit which is used for making jams and jellies thicker. High pectin fruits are apples, cranberries, currants, lemons, oranges, plums and quinces. Low pectin fruits are bananas, cherries, grapes, mangos, peaches, pineapples and strawberries.
Low pectin fruits seem to discolor quicker than high pectin fruits ( bananas and eggplants). Lemon juice or vinegar slows the discoloring process. Other fruits and vegetables that discolor quickly are avocados, cauliflower, celery, cherries, figs, Jerusalem artichokes, mushrooms, nectarines, parsnips, peaches, pears, potatoes, rutabaga and yams.
Bruising: When a fruit is bruised the cell walls break down and discoloration begins. The process can be slowed down by refrigeration.
Cleaning: It is important to clean our fruit and vegetables. Rinse fruit in cold running water and scrub as needed before cooking or eating. Soaking fruit in water for more than a few minutes can leach out water soluble vitamins.
Peeling: The fruit skin usually contains a lot of important nutrients, but if you need to peel a thick-skinned fruit cut a small amount of the peel from the top and bottom. Then on a cutting board cut off the peel in strips from top to bottom. A good way to peel thin skinned fruit is to place the fruit in a bowl with boiling water and let stand for about 1 minute. Remove and cool in an ice water bath. You could also spear the fruit with a fork and hold over a gas flame until the skin cracks OR quarter the fruit and peel with a sharp paring knife or potato peeler.
Wax: Oh those beautiful waxed apples that wink at us at the market. They are beautiful because they are waxed. I don’t know about you, but I would rather not eat wax. Wax can be removed from the surface of fruits by washing them with a mild dishwashing soap and then thoroughly rinsing them. This will remove most of the wax, but probably not all of it.
Purchasing Ripe: Purchase these fruits fully ripe: Berries, cherries, citrus, grapes and watermelon. All of the fruits in this list, except berries, can be refrigerated without losing flavor.
Purchasing Not-So-Ripe: Apricots, figs, melons, nectarines, peaches and plums develop more complex flavors after picking. Store these fruits at room temperature until they are as ripe as you would like them.
Refrigeration: You can refrigerate apples,ripe mangos and ripe pears as soon as you get them. Do not refrigerat bananas.
Seasonal Fruit: Winter is the season for citrus. Fall is the season for apples and pears. Late spring is the season for strawberries and pineapples. Summer is perfect for blueberries, melons, peaches and plums.
Washing: Dry fruit with paper towels or kitchen towels and then use a blow dryer on the cool setting to completely dry fruit.
Squeezing: A microwave can be used to get more juice from citrus fruits. Microwave citrus fruits for about 20 seconds before squeezing the fruit for juice.

 Pasta Salad Ideas
Here are some super easy, but versatile Pasta Salad Ideas from Tiny New York Kitchen. All you need to do is add 3 cups of cooked & chilled pasta (of your choice) and 1 tablespoon of extra virgin olive oil to one of these inspiring combinations. Try them all throughout the summer for a whole treasure trove of side salads. If you want to make any of these a main dish then add 1 pound of protein such as grilled chicken breasts, grilled flank steak, grilled shrimp, grilled tuna (or canned tuna) or tofu. All recipes below serve 4.
For the Pasta: Cook 3 Cups of Pasta, Toss With 1 Tablespoon Extra Virgin Olive Oil & Then Chill Until Ready To Use. Add the Pasta to One of the Salad Combinations Below.
Nutty Beans & Greens
1 Cup Trimmed & Steamed Haricot Verts
1 Cup Baby Arugula
3 Tablespoons Toasted & Chopped Walnuts
1 Ounce Shaved Parmigiano-Reggiano Cheese
Snow Peas & Carrots
1/2 Cup Grated Carrot
1 Tablespoon Soy Sauce
1/2 Cup Thinly Sliced Snow Peas
1/2 Cup Shredded Red Cabbage
1/4 Cup Dry Roasted Peanuts
Cheesy Chickpea & Pesto
1/2 Cup Cooked Chickpeas
1 1/2 Ounces Crumbled Feta Cheese
1 Cup Halved Grape Tomatoes
1 Tablespoon Prepared Pesto
Mediterranean Medley
1/3 Cup Chopped Fresh Basil
1/2 Cup Thinly Sliced Cucumber
1 Cup Halved Cherry Tomatoes
1 1/2 Ounces Crumbled Feta Cheese
1 1/2 Ounces Sliced Kalamata Olives
Peppery & Nutty
1 Cup Arugula
2/3 Cup Thinly Sliced Radishes
3 Tablespoons Toasted & Chopped Walnuts
2 Ounces Crumbled Goat Cheese
Melon, Mint & Parm
1/2 Cup Fresh Cubed Cantaloupe
2 Tablespoons Fresh Mint Leaves
2 Ounces Thinly Sliced Prosciutto
1 1/2 Ounces Shaved Parmigiano-Reggiano Cheese
Freshly Ground Pepper
Cherry Almond Crunch
3/4 Cup Pitted Halved Fresh Cherries
1/4 Cup Toasted & Thinly Sliced Almonds
2 Tablespoons Chopped Fresh Basil
1 1/2 Ounces Crumbled Goat Cheese
Picnic Superstar
1/3 Cup Sliced Avocado
1/4 Cup Red Bell Pepper Strips
1/4 Cup Fresh Corn Kernels
2 Cooked Crumbled Center Cut Bacon Slices
2 Ounces Quartered Fresh Baby Mozzarella Balls
“Food, one assumes, provides nourishment; but Americans eat it fully aware that small amounts of poison have been added to improve its appearance and delay its putrefaction.” – John Cage
There has been quite a bit of controversy these days about eating organic. Recent studies state that it really doesn’t matter if you eat organic foods or not. When something is labeled organic, it usually means that a farm has not used pesticides and has taken considerable care to avoid any cross-contamination. Producing organic food undoubtedly costs more money which is passed on to the consumer. Buying organic tends to be quite a bit more expensive than buying non-organic.
Honestly, I don’t care what the studies are saying about eating organic versus eating non-organic. I would rather not put pesticides into my body as well as wanting to support farmers and food companies that are not using pesticides. I love going to farmers’ markets during the spring, summer and fall and when I am shopping in the grocery store I am willing to pay a bit more for organic food.
If you have decided not to buy organic here is a list of foods that have found to be the most and least contaminated.
Most Contaminated
Apples
Bell Peppers
Celery
Cherries
Grapes
Lettuce
Nectarines
Peaches
Pears
Potatoes
Spinach
Strawberries
Least Contaminated
Asparagus
Avocados
Bananas
Broccoli
Cabbage
Corn
Kiwis
Mangos
Onions
Papayas
Peas
Pineapples


