
Extra Virgin Olive Oil, Coconut Oil, Butter, Avocado Oil, Sesame Oil, and Walnut Oil are the fats that you should be cooking with. Try to avoid Canola, Soybean, Corn, Peanut, Sunflower, Safflower, Cottonseed, and Grapeseed Oil as they go through intense processing.
Extra Virgin Olive Oil
The benefits of this mainly monounsaturated, anti-inflammatory and antibacterial, protects against heart disease and raises HDL cholesterol. It has a medium smoke point (the heat at which an oil starts to degrade), so it’s fine for sautéing, but not for cooking at very high temperatures. It excels in sauces and salad dressings.
Coconut Oil
While coconut oil is saturated, it’s a type that operates differently in your body than animal based saturated fats. It also may have special benefits. It boosts fat burning and contains medium chain triglycerides (MCTs), which go straight to the liver to be used as a quick source of energy or turned into ketones.
Butter
Now that margarine has been banished to the neverland of trans fats, butter has made a slow and steady comeback. Butter can create magic in cooking and is completely keto friendly. But it has a low smoke point, so if you want to cook at higher heats, use ghee (clarified butter) instead. You can purchase ghee or make your own.
Avocado Oil
Whole avocados are keto gold and the oil pressed from the fruit is equally healthful. It’s also incredibly versatile, with just about the highest smoke point of any oil (520 degrees) meaning that you can cook at very high heat without having it break down or burn.
Sesame Oil
Sesame seeds have been pressed to extract their oils for thousands of years. They bring a distinctive flavor, particularly savory in Asian inspired dishes, along with hefty omega-3 values and compounds called phytosterols that reduce cholesterol uptake in the body.
Walnut Oil
Walnuts are stars of a keto diet, and so is the oil they provide, which is rich in omega-3 fatty acids as well as vitamins like manganese, niacin, potassium, and zinc. It doesn’t cook well at high heat. Its rich, nutty flavor is better served as a star ingredient in sauces, salad dressings or toppings for grilled meats.
“Work With What You Got!”
©Tiny New York Kitchen © 2021 All Rights Reserved
Buttermilk is a fermented dairy drink that was traditionally the liquid left behind after churning butter out of cultured cream. Today, most modern buttermilk is cultured. Cultured buttermilk was first commercially introduced in the US in the 1920s. Commercially produced buttermilk is milk that has been pasteurized, homogenized, and then inoculated with a culture of Lactococcus lactis to simulate the naturally occurring bacteria in the old-fashioned buttermilk. The tartness of cultured buttermilk is primarily due to lactic acid produced by lactic acid bacteria while fermenting lactose, the primary sugar in milk.
Condensed buttermilk and dried buttermilk are very important in the food industry. Liquid buttermilk is used primarily in the commercial preparation of baked goods and cheese. Buttermilk solids are used in ice cream manufacturing as well as being added to pancake mixes to make buttermilk pancakes.
Buttermilk reacts with the baking soda and powder to give quick breads their rise and tender crumb. The reaction is best at the beginning, you’ll want to get the loaf in the oven right after mixing the wet and dry ingredients. Buttermilk can also be used in marinating meats, especially chicken and pork, because the lactic acid helps to tenderize, retain moisture, and allows added flavors to permeate the meats.
©Tiny New York Kitchen © 2021 All Rights Reserved

Most of us have been stuck at home for months now watching everything we can find on Netflix. There’s nothing like getting comfy on the sofa with a bowl of popcorn and a good movie. You might want to get creative and give your movie nights a popcorn upgrade.
Italian Style
Toss popcorn with finely grated Parmesan, a sprinkling of Italian seasoning and red pepper flakes.
Asian Style
Drizzle lightly buttered popcorn with a small amount of sesame oil, then sprinkle with sesame seeds and crushed seaweed snacks.
Crabby Corn
Sprinkle buttered popcorn with Old Bay seasoning, salt, and a pinch of cayenne.
Tex Mex
Toss buttered popcorn with taco seasoning, garlic powder, and a pinch of chipotle chili powder.
Cinnamon Sugar
Toss hot popcorn in cinnamon sugar immediately after popping to create a kettle corn like crunch. Or combine sugar with a pinch of pumpkin pie spice and toss for pumpkin kettle corn.
Almond Joy
Toss popcorn with mini chocolate chips, coconut flakes and chopped roasted almonds.
Salted Caramel
Sprinkle hot buttered popcorn with turbinado sugar, crushed hard caramel candies, and salt.
©Tiny New York Kitchen © 2021 All Rights Reserved

Holiday baking time is a fun time of the year with the kitchen filled with delicious aromas and an array of treats to share with friends and family. No matter what style or flavor is your favorite, follow these steps for the best cookies you’ve ever baked, every time.
Use Room Temperature Ingredients
Get eggs and butter out of the refrigerator early, so they blend better in your cookie dough. Your cookies will have better texture and volume when all the ingredients are evenly incorporated.
Measure With The Spoon & Sweep Method
Use a spoon to add dry ingredients like flour to a dry (flat edged) measuring cup, then level off with the back of a knife. This method gives you the right amount of flour for the recipe, so your cookies aren’t too dry or dense.
Chill Dough Before Shaping Or Slicing
Refrigerate at least 1 hour or even overnight, so the dough is easier to work with and cookies hold their shape. Giving the ingredients time to meld makes your cookies taste better too.
Flour Your Cookie Cutters As You Go
Keep a small bowl of flour next to your work surface when rolling and shaping cutouts. Dip cookie cutters in flour in between stamping so they release easily and don’t stick to the dough.
Use Parchment Paper To Line Baking Sheets
Ensure that your cookies won’t stick to the baking sheet by using parchment paper liners. Parchment can be used more than once depending on the style of cookie, then can be replaced for more baking and easier cleanup.
Rotate Sheets Halfway Through Baking
All ovens have hot and cold spots. Help cookies bake evenly by switching the sheets between the top and bottom oven racks or rotating the sheets 180 degrees on the rack halfway through the baking time.
Rest On Baking Sheets For 1 To 2 Minutes Before Moving To Cooling Rack
When cookies are removed from the oven, they can still be soft and molten on the inside. Let the cookies settle and cool for a minute or two before transferring to a wire cooling rack with a thin spatula.
Cool Baking Sheets To Room Temperature Between Batches
Unbaked dough can start to melt immediately on a hot baking sheet, causing cookies to spread and overcook in the oven. Let sheets cool to the touch before using again.
Cool Cookies Completely Before Frosting Or Storing
Frosting can soften and melt on warm cookies, while sealing cookies in a container before they are cooled can cause sogginess. Let cookies rest on a rack for at least 1 hour before decorating or packaging.
Add A Small Piece Of Bread Or Orange Peel To the Cookie Tin
The cookies will slowly absorb the moisture from the bread or peel, so they won’t go stale as quickly. Replace the bread or peel every few days as it dries out.
©Tiny New York Kitchen © 2020 All Rights Reserved
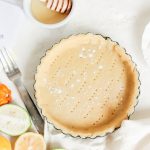
Warm Dough
Make sure not to let the dough get warm. Use cold butter and ice water. Refrigerate the dough before you roll it out. If the butter warms it will be absorbed by the flour, become sticky, and make for a tough crust.
Uneven Crust
To get an even, round crust, begin rolling from the middle of the dough round, pushing outward and stopping the pressure 1/4 inch from the edge. Then lift the round, give it a quarter turn and repeat.
Transferring Crust
To transfer your pie dough from the rolling surface to the pie plate, lift it with a bench scraper, gently drape it over a rolling pin, then place it in the pie plate.
©Tiny New York Kitchen © 2020 All Rights Reserved

I know that summer baking seems counter intuitive, but for some reason I feel compelled to keep baking in the warmer months of the year. Keeping your home cool can be though enough without the oven adding to the heat. Plus, adding in heat-sensitive ingredients and humidity and you can have less than perfect baking results. Summer does bring wonderful seasonal ingredients like berries and stone fruits that should be missed.
Use your oven in the morning or evening. We all know that your oven can heat up your kitchen quickly. This is why I like to bake early in the morning or in the evening when the outside temperature is lower.
Choose recipes with shorter baking times. In keeping with minimizing the heat from your oven, look for baking recipes that don’t require lots of oven time. A simple cake or a pan of mini cupcakes will bake more quickly than a Bundt cake or even a pan of brownies. If you’re a cookie baker try baking a pan at a time to avoid having the oven on for all the time it takes to bake dozens of cookies. You can refrigerate the dough between batches or even freeze the dough to bake when your cookie cravings strike.
Refrigerate cookie dough and pie crusts. Speaking of cookie dough, keep in mind that a warmer kitchen will also make your cookie doughs warmer. If the butter in the dough begins to melt, you could end up with flat, tough cookies. You can try scooping and baking your cookies quickly, but if you refrigerate the dough before baking and between batches you will avoid these issues. This applies to pie crusts as well. It’s not unusual on a warm day to end up with a too warm, too soft pie crust once it’s rolled out, placed in the pan and the edges fluted. When this happens, just put the pie pan in your refrigerator for a bit to let it cool and rest.
Keep an eye on softening butter. With a warmer kitchen butter will soften faster. The warmer it is the faster butter will soften. If you’re using a recipe that contains softened butter, remember to check for softness sooner than normal to ensure that the butter doesn’t get too soft and affect the texture of your baked goods.
Humid days can definitely affect your baking. If you are baking something with a lot of liquid in it, then it may take longer to bake than usual. Keep an eye on whatever you’re baking and follow the recipe’s directions and your best judgement to check for doneness.
Fresh berries and stone fruits are one of summer’s gifts and it is nice to bake with them. There are so many easy ways to bake with summer fruit. A simple fruit crisp or cobbler is always a welcome treat on a summer day. They are also wonderful garnishes for many desserts like cheesecake and pound cake.
Frosting and heat generally don’t mix well. If you’ve made a cake or cupcakes that are frosted you may want to keep them in the refrigerator until it’s time to serve them. Bring them to room temperature before serving. Refrigerating these types of desserts isn’t a bad idea year-round, especially if the dessert won’t be eaten within a day or two.
No bake desserts may be the way to go. Skipping the oven time can still yield amazing desserts that are perfect for the season with their cool, creamy flavors, and textures. From ice cream to cheesecakes to pies and a whole lot more, you can find plenty of ways to satisfy your sweet cravings.
Support your local bakery. If you are lucky enough to have a great local bakery, take advantage of it. A simple pound cake can be turned into something special with just some fresh fruit and sweetened whipped cream. Brownies can be dressed up in a big way with a scoop of ice cream, a drizzle of caramel sauce, and a sprinkling of nuts. Your grocery store can help, too, with shortcut ingredients like puff pastry.
“Work With What You Got!”
©Tiny New York Kitchen © 2020 All Rights Reserved

Have you ever found yourself making a recipe and realize that you don’t have an ingredient that it’s calling for? Here are a few ingredient alternatives that you might have on hand instead.
Mayonnaise
For 1 cup of mayonnaise use 1 cup sour cream or 1 cup plain yogurt with a pinch of salt.
Honey
For 1/4 cup of honey use 1/4 cup maple syrup or light corn syrup.
Buttermilk
For 1 cup of buttermilk use 1 tablespoon vinegar or lemon juice mixed with enough milk or plant-based milk to reach 1 cup.
Butter
If butter is used for baking or in a solid form, solid coconut oil is a good 1 to 1 substitution. If it’s melted or for cooking use olive oil.
Oil
When it comes to oil for baking, applesauce is a great substitute. For 1 cup of oil, use 3/4 cup applesauce mixed with 1/4 cup melted butter. In cooking, any neutral refined oils like canola, olive, vegetable, corn, and peanut oils are interchangeable.
Breadcrumbs
For 1 cup of breadcrumbs use 1 cup of cracker crumbs, finely crushed potato chips, tortilla chips, or pretzels pulsed in your food processor.
Brown Sugar
For 1 cup of light brown sugar, use 1 cup white sugar plus 1 tablespoon molasses. For 1 cup of dark brown sugar, use 2 tablespoons molasses. The sugar and molasses should be mixed together thoroughly.
Baking Powder
For 1 teaspoon baking powder, stir or sift together 1/4 teaspoon baking soda plus 5/8 teaspoon cream of tartar.
“Work With What You Got!”
©Tiny New York Kitchen © 2020 All Rights Reserved

Kick up popcorn’s flavor with easy and creative combinations.
ITALIAN STYLE
Toss popcorn with finely grated Parmesan, a sprinkling of Italian seasoning, and red pepper flakes.
SAVORY SESAME
Drizzle lightly buttered popcorn with a small amount of sesame oil, then sprinkle with sesame seeds, and crushed seaweed snacks.
CRABBY CORN
Sprinkle buttered popcorn with Old Bay seasoning, kosher salt, and a small pinch of cayenne.
TEX MEX
Toss buttered popcorn with taco seasoning, garlic powder, and a pinch of chipotle chili powder.
CINNAMON SUGAR
Toss hot popcorn in cinnamon sugar immediately after popping to create a kettle corn-like crunch. Or combine sugar with a small pinch of pumpkin pie spice and toss for pumpkin kettle corn.
ALMOND JOY
Toss popcorn with mini chocolate chips, coconut flakes, and chopped roasted almonds.
SALTED CARAMEL
Sprinkle hot buttered popcorn with turbinado sugar, crushed hard caramel candies, and sea salt.
“Work With What You Got!”
©Tiny New York Kitchen © 2020 All Rights Reserved

Some people are natural bakers and some people learn as they go. I’m guessing that most people are the “learn as you go” types. Here are some little things that, are not giant revelations, but are useful tips to help you through your holiday baking.
Unwrap Butter Before Bringing To Room Temperature
Many recipes call for softened butter and if you’re using it, here’s a trick. Instructions for softening butter usually directs one to leave the butter on the counter until it reaches room temperature. It’s much better to unwrap the butter straight from the refrigerator and let it soften in the mixing bowl. When butter is cold, it lifts cleanly off the wrapper as opposed to much of it sticking to the paper and the mess it makes.
Use Butter Paper To Grease Pans
If you don’t unwrap your butter when cold and you have butter-globbed butter wrappers, use them to grease pans.
Use A Large Slotted Spoon To Separate Eggs
For separating eggs, break the whole egg into a small-size bowl. Grab the yolk with a metal slotted spoon. Use the wall of the bowl to help and let the white slink off the edge of the spoon, jiggling if the white is stubborn. The white doesn’t actually go through the wholes of the spoon, but the holes somehow seem to facilitate their departure. Do one at a time and transfer each one after so as not to taint the batch should a yolk break. If you are using just the whites and don’t need the yolks right away, stick them in the freezer for later use.
Use The Right Kind Of Measuring Cup
Use spouted cups for the measuring of wet ingredients. Use the scoop/cup type for dry ingredients. It’s hard to get an accurate amount of flour or sugar in a big glass measuring cup, and it’s hard not to spill oil or water when it’s filled to the brim in a scoop measuring cup. For wet ingredients, get to the eye level with the quantity marks and make sure they are even. For dry ingredients, spoon ingredients into the cup and then level it off with a knife.
Better Yet, Use A Scale
Unlike the rest of the world, American recipes use cups for measuring. Baking can be an exact science and as long as the recipe includes weights the scale is the most accurate way to measure.
Don’t Measure Over The Bowl
If you measure your ingredients over the bowl you just may get more in the bowl than you intended. Measure to the side of the bowl, even if it means having to wipe up a few grains of salt from the counter.
Know Your Oven’s Moods
Each oven heats differently. Ovens have hot and cool spots, which might explain uneven baking. Get into the habit of moving shelves around (middle rack is a good bet) and setting a timer to rotate pans halfway through baking. Test your oven by turning your oven to 350 F degrees, line the racks with slices of white bread and cook until they start to toast; remove them and analyze the results for a pattern. Are they even? Are the ones from the back darker than the rest?
Use An Oven Thermometer
Your oven dial may not be giving you an accurate read. The best way to avoid this is by purchasing an oven thermometer that sits inside the oven. Many bakers do this and having the ability to monitor the temperature in real-time allows you to adjust as needed.
Candy Thermometers
All candy thermometers are not created equally. Here’s how to calibrate your candy thermometer: Put the candy thermometer in a pot of water and bring it to a rolling boil, with constant and vigorous bubbles. The boiling point for water is 212 F (100 C), which is what your thermometer should read (if you are at sea level). You can leave it in there for a few minutes to make sure the reading is accurate.
Dark And Light Pans Are Not Perfectly Interchangeable
Are your cookies always overdone on the bottom? Are your roasted vegetables not getting browned enough? This one makes perfect sense. Dark pans absorb heat, light pans reflect it. Use light pans for cookies and cakes that don’t want a brown crust. Use dark pans for roasting vegetables, making pizza, or baking anything in which you want more of a crust.
Swapping Pan Sizes And Shapes
You might now want to use the pan that the recipe calls for. Pick up a copy of, Joy of Baking, and use the Baking Pan Sizes page. It has a list of every pan and its capacity, so that you can switch things around and swap pans with compatible capacities or adjust if needed.
Wear An Apron
Your apron will take a beating, but it will save your clothes!
“Work With What You Got!”
©Tiny New York Kitchen © 2019 All Rights Reserved
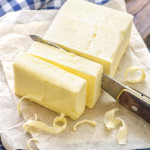
Salted & Unsalted Butter
Butter comes either salted or unsalted (also called sweet). Although all salted butter contains some amount of salt (salt used to be added as a preservative, but today it’s added primarily for flavor), some salted butters are noticeably salty. The problem is the word some. Since the amount of slat can vary from butter to butter, it’s best to use unsalted butter in kitchen and add as much salt as you’d like to each dish. If you prefer salted butter, use it – just remember to adjust the salt in each dish.
Cultured Butter
With this kind of butter, the cream is treated with cultures (like yogurt), allowed to ferment and then churned. The result is a fuller flavor with noticeable acidity. It’s easier to find cultured American butters these days, but as with salted butter, not all cultured butters are the same. A favorite, made by Vermont Creamery, has tang and produces a different sensation on one’s tongue due to its very high butterfat content. Cultured butter is very good to use in baking.
European Butter
The standards for the minimum amount of butterfat in butter are different in Europe and America. Abroad, the minimum is 82 percent; in America it’s 80 percent; everywhere it’s lower for salted butter. When you use European butter you’re likely to have a much richer dish. When I use European butter I don’t make any adjustments to my recipes to make allowances for the difference in butterfat.
Room Temperature Butter
Proper room temperature butter is still slightly cool; it’s really more about texture than temperature. The butter should be soft, but not squishy. The stick should hold it’s shape (a little pressure should leave an indentation), and it should be pliable – if you smash it with a spatula, you shouldn’t have to fight it.
Storing Butter
Keep butter in the refrigerator, well wrapped and away from foods with strong odors. It can be kept in the freezer for almost forever, but let’s call it a year. Defrost overnight in the refrigerator. Butter can keep out at cold room temperature for a day in a butter bell or crock. However, store butter in the refrigerator and then pull it out about 20 minutes before using it.
Clarified Butter
Clarified butter is a magical thing. It’s butter without water (you simmer it away) that won’t burn when used over a high heat. To clarify butter, place the butter in a saucepan, bring it to a simmer, let it bubble gently until it’s covered with foam. Keep simmering the butter until the foam sinks to the bottom and the bubbling just about stops. Line a fine-mesh sieve with cheesecloth or a coffee filter, pour the butter through it into a container, cool and cover. The butter will keep in the fridge for at least 2 months.
“Work With What You Got!”
©Tiny New York Kitchen © 2019 All Rights Reserved


