
Bacon is prepared from several different cuts of meat. It is usually made from side and back cuts of pork, except in the United Sates, where it is almost always prepared from pork belly. The side cut has more meat and less fat than the belly. Bacon may be prepared from either of two distinct back cuts: fatback, which is almost pure fat, or pork loin, which is very lean. Bacon cured pork loin is known as back bacon.
I like bacon that is thick and crispy, not thin and limp. I favor a 1/8-inch sliced bacon that is apple wood smoked for a full, sweet flavor that seems to complement, not overpower, other foods. You can buy this at a butcher’s shop where they will slice it for you from the slab. Many supermarkets now carry thick-sliced bacon.

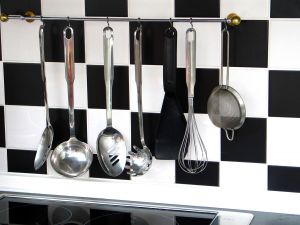
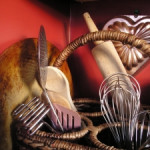
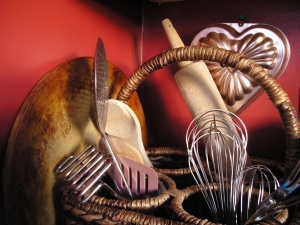
Tiny Kitchen Cooking Utensils
Several years ago I moved from a beautiful giant kitchen to a truly tiny kitchen. It took me awhile to get myself used to cooking in such a small space, but as one would expect, I adapted rather well. New York City apartment kitchens, like many urban kitchens, are very small and it’s difficult to know how to outfit a tiny kitchen. Your kitchen doesn’t have to look like a showroom of cooking utensils. All the equipment you need can be kept in a small cupboard and taken out only when necessary. Here is a list of what you will need.
Series of Saucepans That Range From 5 to 9 Inches in Diameter
4 1/2 Inch Enameled Saucepan
Two Frying pans that are absolutely flat on the bottom, not warped. One should measure 6 1/2 inches across the bottom. The other should measure 7 1/2 inches across the bottom.
Shallow, Fireproof Dish Made of Porcelain or Metal
Kettle, Large Enough to Hold a Quart of Water
Colander
Deep Fryer, or a Pot With a Wire Basket That Fits Into it.
Funnel
Ladle
Skimmer or a Slotted Spoon
Wire Skimmer for Deep Frying
Wire Whisk
Two Wooden Spatulas
Large Sharp Kitchen Knife
Parking Knife
Ordinary Stainless-Steel Knives, Forks, and Spoons
Three Bowls
One Salad Bowl
Coffee Pot With a Filter, Large Enough to Make Two Cups of Coffee (or Two Individual Filters That Fit Over the Cups)
Coffee Grinder
Since the saucepans and frying pans fit into each other, you can store them neatly inside your cabinet. The only thing that really takes up space is your deep fryer. If you use oil for deep-frying, wait until it cools off, then pour it through a large bottle or jar, and keep it in the cabinet too. The spoons, knives, ladle, skimmers, and spatulas will fit into a drawer.
If you want to decorate your kitchen with appetizing pictures, it is best to frame them under glass so the grease from cooking doesn’t spoil them.
When you’re cooking, be sure to open the window as often as you can, and once a week sponge off the kitchen walls with a little soapy water. That way, you kitchen will be a spotlessly clean laboratory that you will transform; I’m sure, into an artist’s studio.
© Victoria Hart Glavin
![]()
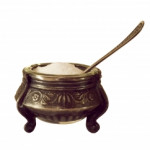

Shaking The Salt Habit
We all know that sodium is an essential mineral that is found in all foods. We need sodium to help regulate our body’s fluid balance, but we probably don’t need as much as we’re getting however.
The American Heart Association recommends limiting sodium intake to 1500 mg per day (about 2/3 teaspoon of table salt), but the average American diet supplies double or triple that amount. Excess sodium leads to fluid build-up, which makes the heart and kidneys work harder and may increase blood pressure.
Foods that have hidden sodium are: Chili sauce, soy sauce, steak sauce, Worcestershire sauce, barbeque sauce, sports drinks, processed cheese, cheese spreads, canned vegetables (look for low or no sodium varieties and always rinse before using); breads; pastries; canned meats; and canned soups. It’s always a good idea to read the labels and purchase as much low or no sodium products as possible.
You can “shake the salt habit” by eating more fresh foods instead of processed convenience foods. Limit cured, pickled, salted or brined products. Prepare more recipes from scratch so you have control over how much salt is added. Try to reduce salt by half in your recipes or eliminate it altogether. Remove the salt shaker from your table and use the pepper mill instead. Season foods with herbs and spices, not salt. Below are some herb parings that are a good starting point for adding more flavor, and less sodium, to your food.
Poultry: Tarragon, Marjoram; Onion Powder; Garlic Powder, Cumin, Bay Leaf, Turmeric
Beef: Ginger, Dry Mustard, Garlic Powder, Chili Powder, Cinnamon, Oregano
Seafood: Thyme, Fennel, Saffron, Red Pepper, Ginger, Sesame, White Pepper
Vegetables: Salt-Free Italian Herb Blend, Black Pepper, Ginger, Sesame
Pork: Caraway, Red Pepper, Paprika, Tarragon, Bay Leaf, Minced Garlic
Potatoes: Dill, Onion Powder, Parsley Flakes, Nutmeg, Freeze-Dried Chives
Rice: Curry Powder, Ginger, Coriander, Chili Powder, Cumin
© Victoria Hart Glavin
![]()
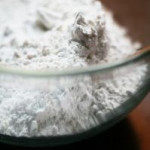
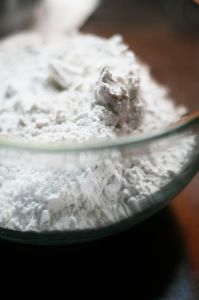
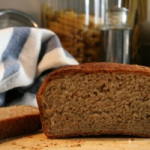
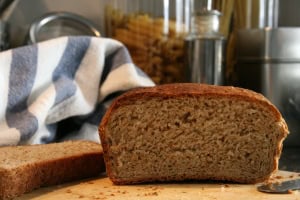
A Few Words About Flour
Playing with different flours in your favorite recipes can create new flavors, aromas and textures. Try using a little of another kind of flour in recipes that call for refined white flours; aside from having less flavor, white flour has been stripped of most of its fiber, minerals and vitamins. For people with wheat sensitivities, there are quite a few non-wheat flours.
Substituting For Wheat
While all grains can be ground to make flour, they are not all interchangeable with wheat. Each grain has its own personality, and flours have textures that range from silky to grainy. When experimenting with substituting them for white flour, do so a little at a time. For instance, if a recipe calls for 1 cup of wheat flour, substitute 1/4 cup of another variety. See how that works, and then add more or less alternative flour depending on the success of your results.
Storing Flour
Make sure to store flours in a cool, dark place, preferably the refrigerator or even the freezer. Allow flour to come to room temperature for accurate measuring.
Gluten Levels And Why They Matter
It is important to keep in mind that all wheat flour contains a high amount of a protein known as gluten. Gluten is responsible for the stretchiness of dough, which allows it to hold air bubbles during rising, producing light and shapely baked goods. If using a large amount of non-wheat flour for baking, you may need to add wheat gluten (basically wheat flour without the starch) in order to produce uniform, well-risen baked goods. In recipes where rising is less of an issue (for coatings or pancakes, for example), there is no need to add gluten.
Flour Varieties
Let’s go over the varieties flour varieties available.
Amaranth: A strong, spicy, nutty-flavored flour. Best used as an accent flour in waffles, pancakes, cookies or muffins. No Gluten.
Bran (Unprocessed): The outer layer of the wheat berry. Add small amounts to cereals and baked goods to increase fiber. Keep refrigerated. High Gluten.
Buckwheat: The edible fruit seed of a plant related to rhubarb. It is not related to wheat or other grains. High proportion of essential amino acids; close to being a complete protein. Commonly combined with wheat flour in pancakes, waffles, blintzes and pasta. Low Gluten.
Cornmeal (Blue): Higher in protein than yellow cornmeal. Turns lavender in color when cooked. Use in muffins and corn tortillas. Kids love purple pancakes! No Gluten.
Cornmeal (Yellow): Rich and buttery in flavor. Use for polenta, cornbread and muffins. No Gluten.
Gluten: Gluten flour is white flour mixed with concentrated wheat protein. Add to bread dough to increase rise: 2 tablespoons per cup of flour in whole grain bread: 1 tablespoon plus 1 teaspoon per cup of flour in white breads. Also add to breads with extra bran, raisins or nuts. Increase kneading time to activate extra gluten. High Gluten.
Graham: Hard whole wheat flour with a course and flaky outer bran layer, and finely ground germ. Most famously used in crackers, but adds texture and nutty flavor to all baked goods. Low Gluten.
Oat Bran: Contains soluble fiber, which can help lower blood cholesterol levels when eaten as part of a low cholesterol diet. Add oat bran to muffins or breads. Use as a coating for chicken and seafood. Low Gluten
Rye Flour: Yields baked goods that are moist and dense. Combine with caraway seeds in crackers and breads. Due to its low-gluten content, it is often mixed with whole wheat flour to increase its rising ability. Low Gluten
Semolina: Durum flour with the bran and germ removed. Never bleached. Used to make high-quality “white” pasta. Adds extra flavor and texture in some bread recipes. High Gluten
Soy: High in protein, it is often used as a protein booster. Usually combined with whole wheat flour to increase its rising ability. No Gluten.
Spelt: An ancient grain gaining popularity today as a wheat substitute. Similar to high protein wheat. If substituting for wheat in a recipe, reduce the liquid by 25%. Low Gluten
Teff: Rich in calcium, protein and iron; sweet malty flavor. Use in quick breads, pancakes and waffles. Use to thicken stews, soups and sauces. Teff is a major crop in Ethiopia, where the flour is used to make the typical spongy flatbread infera. No Gluten
Wheat Germ: Vitamin and mineral-rich layer of the wheat berry. Excellent source of vitamin E. Available toasted and untoasted. Add to cereals, pancakes and baked goods, as well as meat or vegetable loaves. Refrigerate to prevent rancidity. High Gluten.
Whole Durum Wheat: From very high protein wheat with less starch than other wheat flours. Makes a tough dough that can stretch and expand – perfect for whole grain pasta. Nutritional profile similar to whole wheat. High Gluten.
Whole Wheat: Ground from entire wheat berry. Full-bodied flavor and course texture. Generally produces baked goods that are denser, with less rise than those made with white flour. Adds rustic, hearty qualities to baked goods. High Gluten.
Whole Wheat Pastry Flour: Ground from soft wheat berries. Higher in starch and lower in gluten than regular wheat flour. Use in non-yeast baked goods such as cookies, pancakes, muffins, quick breads and cakes. Medium Gluten.
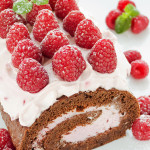
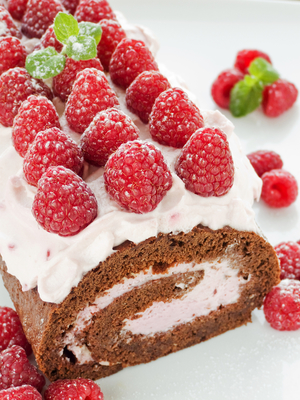
Whipped Cream
I can’t stand that whipped topping stuff you find in the freezer section of the grocery store or that stuff that comes from a spray can. It’s so much better to make the real thing to top your awesome holiday desserts. Here is a super easy Whipped Cream recipe along with some helpful tips.
Whipped Cream Recipe
INGREDIENTS
1 Pint Organic Whipping Cream
1 Teaspoon Vanilla Extract
2 Tablespoons Sugar
For Spiced Whipped Cream add 3/4 teaspoon cinnamon.
For Maple Whipped Cream substitute 3 tablespoons maple syrup for sugar.
Chill all of the ingredients. Beat cream, slowly at first, until consistency is thick, oft and fluffy, or until soft peaks begin to form. Gradually blend in sugar, any spices, and vanilla, and beat until stiff peaks form. Do NOT over-whip.
Important Basics
*Use a deep/tall bowl, 2-quart or larger bowl. Cream doubles in volume when whipped, and a tall bowl reduces splatter.
*Use a whisk, handheld mixer, or standing mixer.
*Adding sweetener and spices is optional.
*Adding a small pinch of salt added to the cream at the beginning helps the whipping process but is optional.
*Cream whips best when it is cold. Keep your cream as cold as possible.
*Use a chilled bowl. Refrigerate for at least 15 minutes. Metal bowls get colder than glass bowls.
*Chill your whisk or beaters as well. Warm metal will transfer its heat to the cream.
*If your kitchen is warm, you may want to keep the bowl in a larger bowl of ice water during and after the whipping process. If winter you may want to work in front of an open window.
*Whipping cream can be quite messy as cream splatters, especially when using an electric mixer. To reduce splatter, start out slow, and gradually increase speed. As cream thickens, its tendency to splatter is reduced.
*Some chefs prefer to use powdered sugar, because the finer texture dissolves in the cream more readily than granulated sugar. Either granulated or powdered sugar will work, as will other sweeteners. Think maple syrup!
*Adding sugar too early in the whipping process will reduce the volume of whopped cream. For maximum whip, wait to add your sweetener, vanilla, and any spices until after the texture starts to thicken and soft peaks form. Add them slowly, from the side of the bowl.
*Whipped cream is ready when the cream forms stiff peaks. The process takes several minutes working with a whisk (depending on cream temperature and your technique), but be careful if using and electric mixer because it works quickly.
*Over-whipped cream will separate and turn to butter, which is delicious on toast, but not a topping for your desserts. If you catch the cream when it’s just starting to curdle, you may be able to salvage it by adding more cream and whisking by hand.
*If possible, whip the cream immediately before using. If not, or if you have leftovers, you can cover and refrigerate whipped cream for up to 24 hours. If the cream separates during storage, simply beat or whisk until cream has incorporated again. You can also revive tired whipped cream that has been sitting out by putting it in the freezer for 1/2 half hour or so, or twice as long in the fridge. Remove and rewhip.
Baking Essentials
The holidays are for baking. Here are my Baking Essentials that will ensure that your holiday baking goes smoothly.
Alcohol: If you are baking with brandy or whiskey it is best to use good quality spirits to flavor your recipes. I like to use brandy and whiskey to flavor cakes and cookies, plump raisins, and season fruitcakes and fruited tea breads.
Butter: When baking with butter I often like to use unsalted, or sweet butter, softened at room temperature. I have no particular favorite brand, brand, but I always use organic butter. Try to avoid salted butter for baking as its moisture content can affect the baking results.
Margarine: Butter is better in my opinion. Nothing is better for the flavor, richness, texture and color of cakes and cookies than real dairy butter. However, if you prefer to use margarine it can be substituted for butter if it contains enough fat. For best results, choose a stick margarine with at least 80 percent vegetable oil or one that contains at least 100 calories per tablespoon. Substituting shortening for butter will give cookies a softer, more cakelike texture and a different flavor.
Chocolate: When baking with chocolate try and use good quality chocolate. When baking with cocoa, either American-style or Dutch, make sure to use the correct amount. Always store chocolate and cocoa in a cool dry dark place.
Coffee: When baking with coffee I like to use instant coffee or espresso powder.
Milk: Make sure to use whole milk when baking or buttermilk. When I bake with ricotta cheese I always use whole-fat ricotta. I always use whole-fat sour cream as well. For cream, I use heavy cream or whipping cream – not half & half. Occasionally I will use canned sweetened condensed milk and canned evaporated milk.
Eggs: Eggs should always be at room temperature. I always purchase U.S. graded jumbo eggs. If using egg whites they should be at room temperature before being beaten.
Recipes: Read each recipe several times. It’s easy to miss an important ingredient. Make certain that you understand the directions and know what ingredients are needed.
Adjust oven racks before turning on the oven.
Have all ingredients at room temperature, unless otherwise stated.
Prepare baking pans and set out racks for cooling.
Assemble your ingredients and utensils.
Combine ingredients in the order that they are listed.
After your recipe is in the oven, set the timer.
Allow baked cakes, pies, and cookies to cool completely, unless otherwise noted.
Store baked items in appropriate containers or refrigerate.
When using extracts and pure flavored oils use only pure extracts. Never use imitations flavors. Always use pure vanilla extract.
Flour: Make sure to use organic all-purpose flour. If a recipe calls for cake flour, self-rising or pastry flour make certain to use these flours. If you need specific flour and cannot find it then try and order it online. Make sure to measure flour by scooping a cup of flour and level it with a knife. If a recipe calls for 1 cup of sifted flour, sift it and then measure it. If a recipe calls for 1 cup flour, sifted, then measure the flour first and then sift it.
Fruit: If you’re baking with fruit make sure to use the fruit called for in the original recipe whenever possible. Use fresh fruit only when it is in season and buy dried fruit in small quantities. If you need to plump dried fruit I like to plump them in orange juice, tea, or brandy before baking. Doing this adds another level of flavor.
Lard: Many pastry recipes often call for lard or a combination of lard and butter. Some cookies and pie crusts are particularly flaky and tender when made from lard or a combination of lard and butter. Often times using lard gives baked goods and “old-world” flavor and texture.
Citrus: When using lemon, limes, orange juice and/or zest use medium-sized lemons and oranges with firm, unblemished skins. Use a microplane or a traditional grater to remove the zest or yellow part of the rind. Leave behind the bitter white pith. Make sure to wash citrus before grating. Roll the fruit on a flat surface to break up the juice pockets first. Cut the fruit in half and juice it on a reamer. Strain the juice to remove any seeds. A lemon weighting 4 1/2 ounces yields about 2 teaspoons of grated zest and 3 tablespoons lemon juice. An orange weighing 6 1/4 ounces yields about 2 tablespoons grated zest and 4 tablespoons orange juice.
Nuts: If you are baking with nuts purchase nuts in small quantities and store them in sealed plastic bags or covered plastic containers in the freezer to preserve their freshness. Be mindful of those who may have nut allergies.
Spices: The most popular baking spices are cinnamon, nutmeg, ginger, cloves, and allspice. Today we are very lucky to have access to these spices because in the past they were not easily accessible and were often expensive. Purchase spices in small quantities and store them in a cool dark place.
Sugar: I use white granulated sugar unless a recipe calls for a specific type of sugar, such as brown sugar, powdered sugar (confectioners’ sugar), or sanding sugar. Often dark brown sugar can be too assertive for recipes that call for light brown sugar due to the molasses content. If you like the more assertive flavor then by all means use dark brown sugar. Other sweeteners with additional flavors include maple syrup, molasses, honey, and dark corn syrup. Store powdered sugar in a sealed plastic bag so that it’s easier to measure. Sift it after measuring to make sure to remove any lumps.
Oil: I use either pure vegetable oil (such as peanut oil or corn oil) or olive oil for baking. Always use fresh oil.
Vegetable Shortening: I use solid vegetable shortening for recipes that call for shortening. Purchase in small containers to ensure freshness and store it according to manufacturer’s instructions. Whenever there is a choice given in a recipe I use butter.
Yeast: I use active dry yeast in recipes that call for a raised dough. I do not use cake yeast. When proofing your yeast, proof in water that has been warmed to 110 degrees.
Baking Pans: Many recipes will note the size, weight, and material of bakeware to use. Standard sizes are the norm. For pies, I use 9 inch ovenproof glass pie pans without handles or ruffles. Manufacturers of glass baking products often suggest a lower temperature when using their products. I suggest that you follow the instructions that come with any product you use. If you need to purchase bakeware, I suggest that you explore all the options. Your best bet is sturdy, single-wall aluminum pans. Keep in mind that shiny bakeware (aluminum, tin, and stainless steel) reflects heat and results in cakes with thin, golden crusts. Dark or dull-finish bakeware (tin, glass, and many nonstick pans) absorbs more heat, increasing the amount of browning. If you use a pan with a dark or dull finish, follow the manufacturer’s directions. Most suggest reducing the oven temperature by 25 degrees and checking doneness 3 to 5 minutes before the minimum recommended baking time. Silicone pans are increasing in popularity. These pans may be used in the oven, microwave, and freezer. Follow the manufacturer’s directions for baking and cooling when using silicone pans. Purchase brand names, and keep instructions on how to use them in a file folder in a handy place.
Preparing the Pan: Unless specified otherwise, grease and lightly flour baking pans or use parchment paper if baking cookies. For cakes use a paper towel or pastry brush to evenly spread the shortening in the pan and add a little flour. Tilt the pan, and tap it so the flour covers all the greased surfaces. Tap out the excess flour. You can use cocoa powder instead of flour for chocolate cakes. Some recipes may direct you to line the bottoms of pans with parchment paper. Cut pieces of parchment paper to the size of the pans. Line the bottoms of the lightly greased pans with paper, then grease and flour as describe by the recipe.
Mixers and Food Processors: I use a KitchenAid standing mixer for most of my baking. It saves time and is extremely convenient. A handheld mixer will work for most recipes, as will a wooden spoon or whisk, but will take more time and effort. The texture and result may also vary. Be careful to note that some recipes require gentle hand mixing. Using a food processor for mixing pastry or cookie dough or grating carrots and oranges saves a lot of time and provides a uniform result.
Stoves & Ovens: I use a gas stove and oven. Some people have gas and some have electric. I suggest that you honor the idiosyncrasies of your own stove and oven because every appliance is different. Using an oven thermometer is key. Turn baking sheets with cookies halfway through the baking time. I usually bake one sheet of cookies at a time, but if you do multiples, switch the baking sheets from rack to rack and turn them front to back halfway through baking, especially if your oven doesn’t bake evenly. A microwave oven is also helpful to melt butter and chocolate. Be sure to use the lowest setting. Always be sure to bake cakes at the correct temperature. If the oven temperature is too hot, the cake may develop tunnels and cracks. If the oven temperature is too low, the cake may have a texture that is too coarse. Allow your oven to preheat while you prepare your batter. Check cakes for doneness after the minimum baking time. To test a butter-type cake insert a wooden toothpick near the center. If it comes out clean, the cake is done. If it comes out wet, bake the cake for a few more minutes, then test in another spot near the center. To test whether a foam cake (such as angel food, sponge, or chiffon cake) is done, touch the top lightly. If it springs back, the cake is finished baking.
Cooling: Cooling is an important process in baking. Before removing a layer cake from its baking pan, allow it ot cool for 10 minutes on a wire rack. To remove the layer, loosen cake edges from pan using a metal spatula or knife. Place an inverted cake rack on the cake layer, turn the cake and the rack over, and lift off the pan. If the pans were lined with parchment paper, gently peel off the paper. Place a second inverted rack on the cake layer and turn it over again so the baked cake is upright; cool completely. A butter-type cake that will be served in its pan should cool on a wire rack. Angel food and sponge cakes baked in tube pans should be cooled upside down to set their structures. Use a long metal spatula to loosen the cooled cake from the pan. Press the spatula against the pan in a continuous motion to avoid tearing the cake.
Tricks of the Trade:
Microplane Graters: This super sharp device grates the peel off citrus fruit in seconds, leaving you with mounds of zest and time to spare. It’s also great for ginger. Fine, medium, and coarse graters are available.
Nut Chopper: Tired of chopping nuts with a knife and watching them roll all over? With this device, nuts are contained and can be chopped in seconds. It also works for onions and garlic.
Nonstick Baking Mat: Prevent cookies from sticking to cookie sheets by lining the sheets with this reusable mat. It’s also perfect for kneading and rolling dough.
To the Freezer: If you are concerned that you’ll have no time for last-minute holiday cookie baking you can get a head start by freezing baked and cooled cookies. Most cookies can be frozen for months, ready to be pulled out at a moment’s notice.
* Use airtight plastic bags and containers specifically labeled for freezer storage. Separate layers of cookies with sheets of waxed paper.
* Tightly seal filled bags and containers and freeze for up to three months. For best results, don’t frost or glaze cookie before freezing. Instead, freeze unfrosted cookies, thaw, then frost before serving.
* Most cookie dough (except bar batters and meringue or macaroon mixtures) can be frozen in an airtight freezer container for up to six months. Thaw dough in its container in the refrigerator. Shape and bake as directed.
Shipping Out: Sending cookies, not crumbs, to loved ones through the mail is possible with a little care. For best results, send crisp or firm varieties including most slice & bake, bar, and drop cookies. Avoid frosted, moist, thin, or filled types. Wrap baked and cooled cookies individually, in back to back pairs, or in stacks in plastic wrap. Line a sturdy box with bubble wrap and pack cookies in layers of packing peanuts or tissue paper so they won’t have room to shift. Write “perishable” on the box and ship early in the week so your package won’t be delayed over a weekend.
Baking Pans I Find Useful:
9x13x1 inch jelly roll or half sheet pan
14×16 inch metal baking sheets
8 cup Bundt pan
10 cup Bundt pan
9 inch tart pan
8 inch metal springform pan
9 inch metal springform pan
10 inch metal springform pan
7 inch metal round cake pan
8 inch metal round cake pan
9 inch metal round cake pan
8x8x2 inch pan for bar cookies and brownies
9x5x3 inch metal loaf pan
9x13x2 inch metal or glass pan
9 inch ovenproof glass pie plate
Metal pudding molds
10 inch angel food cake or tube pan
8 cup tube pan
1 1/2 quart ovenproof glass or ceramic baking dish
Large metal pan for water bath
8 inch frying pan
Heavy bottomed frying pan
Heavy bottomed saucepan
Ovenproof custard cups
Baking Aids I Can’t Live Without
Standing mixer with paddle, whisk, and dough-hook attachments
Food processor with metal blade and grating blade
Microplanes (to grate zest)
Offset spatulas (to smooth batters and frost cakes and cookies)
Oven thermometer
Candy thermometer to test sugar syrup and oil
Instant-read thermometer to test water temperature
Scale (for weighing ingredients)
Disposable gloves
Disposable piping bags
Strainers (for sifting, removing seeds from juice, and dusting with powdered sugar)
Cooling racks in a variety of sizes
Parchment Paper
Wax Paper
Silicone baking liners
Measuring cups for measuring dry ingredients
Measuring spoons for measuring dry and liquid ingredients
Measuring cups for measuring liquid ingredients

 A Few Words About Hamburgers
A delicious, juicy, tender hamburger can be yours, if you choose the right ground beef. The amount of fat directly contributes to the juiciness of the burger, so the leaner the beef, the drier the burger. Some markets state the cut of beef used for grinding while other indicate the percentage of fat in the grind. Some markets do both. Here are the three grinds that most shops carry:
Ground Sirloin
Ground sirloin has only 7 percent fat which makes it the leanest ground beef, but it can make a dense burger if overcooked. To combat dryness add 2 tablespoons of a wet condiment like teriyaki sauce, pesto, Dijon mustard, ketchup or mayonnaise for every pound of ground sirloin.
Ground Round
Ground round is a great choice for hamburgers because it has 15 percent fat.
Ground Chuck
Ground chuck is the ground beef of choice for many burger lovers. It has a relatively high fat content at 20 percent fat which makes a very juicy and very rich burger.
Ground Turkey or Ground Chicken
There are some people who prefer ground turkey or chicken for their burgers. Both must be cooked through so care must be taken to prevent dryness. Make sure to incorporate moisture by adding one of the ingredients suggested for ground sirloin. Also mix in 2 tablespoons of dried bread crumbs. As the meat heats and the fat melts the bread crumbs absorb and retain the fat that would otherwise drip out of the patty.
Shrinkage
Hamburgers shrink during cooking and a perfectly shaped raw patty can end up looking like a hockey puck. To avoid this, shape about 5 ounces of ground meat into a 4 inch round. Then make an indentation about 2 inches wide and 1 inch thick in the top. As the meat cooks the indentation will equalize the shrinkage.
No Don’t Do It!
Never Ever press on a hamburger to speed its cooking. You’ll squeeze out the precious fat and juices that make the burger taste so good. Yes, we’ve all done it…just resist that innate urge to do it again!
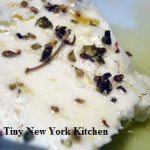
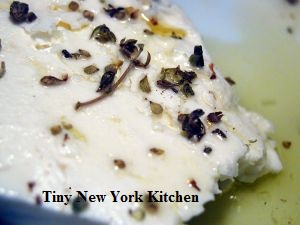 Feta Cheese
Choose the right Feta for your dish!
Goat’s Milk Feta: Goes with pita bread, olives, grapes, cherry tomatoes & pasta
Sheep’s Milk Feta: Goes with watermelon and red onion salad, pizza, lamb & anchovies
Cow’s Milk Feta: Goes with Greek salad, olive oil, rosemary and thyme, black beans, soup or casseroles.
Did you know that Traditional Greek Feta is made with a combination of sheep and goat milk?
Feta is a white, semi-firm, crumbly, salty cheese made from sheep’s or goat’s milk (sometimes cow’s milk) and cured in brine. Originally from Greece, feta translates to “slice,” for one of the stages in its making. The word came into English around 1956. Feta is one of the world’s oldest cheeses. It has been made in Greece and other Balkan countries for centuries. Homer wrote about it, describing how the gods made the cheese.
The finest feta cheese should be purchased direct from its brine bath. If it is prepackaged, it should have some of the brine in the packaging to keep it moist. Feta cheese is best when eaten fresh, so always check the date. If you will not be consuming it immediately, store the feta in a brine or milk bath in the refrigerator. The milk bath will reduce the saltiness and help keep the cheese moist and last for up to 3 months. Freezing is not good for feta cheese. Feta that has been aged in barrels and sold straight from the barrel may be wrapped in a lightweight paper. You may want to wrap your feta in a plastic bag or plastic wrap and store in the fridge however there is some controversy about storing cheese in plastic. You may want to keep the feta in the paper, even when the paper gets soggy from the cheese moisture. Allow at least 30 minutes for feta to come to room temperature, to fully enjoy its rich, tangy flavor and creamy texture.
If you are one who doesn’t like feta’s salty taste then you may want to soak the cheese in fresh water to leach out some of the salt or tone down the salt in dishes that feta is used in. This allows the cheese to supply the salt.
Feta Vinaigrette
The slight sharpness of the feta combined with fresh green herbs makes a versatile vinaigrette dressing that goes beautifully with lightly steamed asparagus or sliced tomatoes as well as artichokes. It is a lovely dressing on potatoes, pasta or shrimp salad as well.
INGREDIENTS
1/4 Cup White Wine Vinegar
1 Teaspoon Minced Fresh Basil
1 Teaspoon Minced Fresh Dill
1 Teaspoon Minced Fresh Mint
1/2 Cup Finely Crumbled Feta Cheese
1/2 Cup Olive Oil
1/4 Cup Safflower Oil
1/4 Teaspoon Kosher Salt
1/4 Teaspoon Freshly Ground Pepper
In a small size bowl, whisk together the vinegar, herbs and cheese. Add the olive oil and safflower oil in a slow thin stream. Whisk constantly until combined and emulsified. Add the kosher salt and pepper. Set aside until you are ready to use. Cover and refrigerate. It will keep for up to 1 week. Stir or shake well before using. Makes 1 cup.

 Ways To Enjoy Asparagus
Spring is here and asparagus is in-season. Here are some ways to enjoy such a wonderful seasonal vegetable.
Quick Pickle: Combine vinegar, cumin, coriander, garlic and chile flakes and pour into a jar. Add the asparagus spears and place in the fridge for a few days. They should be nice and pickled. Eat them for a spicy snack or toss them into a salad.
Side Dish: Toss boiled slices of asparagus, leeks with mint and melted butter for a savory side dish.
Shave Raw: Shave raw asparagus spears and Parmigiano Reggiano, and then toss with tender asparagus tips, olive oil and lemon juice for a vibrant salad.
Grilled: Marinate the asparagus in olive oil and garlic for two hours before grilling. Grill alone or with other vegetables.
Roasted: Roast in the oven at 400º F drizzled with olive oil.
To Prepare For Cooking: Start at the base of each asparagus spear and work toward the tip. Bend the spear a few times until you find a place where it breaks easily. Snap off the woody base at that point. If you would like a clean, smooth look then use a vegetable peeler to scrape off the scales on the spears.
Standard Preparation: For 1 pound of asparagus (15 to 24 spears) Wash and snap off the woody bases where the spears break easily. If you like scrape off the scales. Leave the spears whole or cut into 1 inch pieces. You should get about 2 cups of asparagus pieces. Cook, covered, in a small amount of boiling salted water for 3 to 5 minutes or until crisp-tender. Or you can steam them for 3 to 5 minutes in a steamer insert. To microwave place in a baking dish or casserole dish with 2 tablespoons of water. Cover and microwave on high for 2 to 4 minutes or until crisp-tender.
Roasted Asparagus
INGREDIENTS
2 Pounds Asparagus
2 Tablespoons Olive Oil
1/4 Teaspoon Kosher Salt
1/4 Teaspoon Freshly Ground Pepper
1/4 Cup Shredded Parmesan or Asiago Cheese
Preheat your oven to 400º F. Snap off and throw away the woody bases from the asparagus. I you like, scrape off the scales. Please the asparagus in a medium size baking dish. Drizzle with olive oil and toss to coat. Spread the asparagus in a single layer. Sprinkle with the kosher salt and pepper. Place in the oven and roast, uncovered, for 15 to 20 minutes or until the asparagus are crisp-tender. Turn once halfway through the cooking process. Remove from the oven and transfer to a serving platter. Sprinkle with the shredded cheese. Serves 4
 Easy Homemade Gifts
Many of us are running low on disposable money or we are tired of spending time at the mall getting gifts that your recipients are just going to re-gift anyway. Here are some “From The Kitchen” Easy Homemade Gift ideas.
Jar Gifts. It’s so easy and can be made to look pretty and from the heart. Stock up on glass jars and assemble multiple gifts at once. Not only are these gifts convenient and portable, they can be reused as storage containers later. When you are done filling the jars, seal and add a nice scrap of fabric on the top tied with ribbon or a nice string. Add a gift tag and instructions on how to use your gift.
Here are some ideas to get started.
Lentil Soup Mix
Bean Soup Mix
Granola Mix
Snack Mix
Potpourri
Chocolate Sauce
Salted Caramel Sauce
Jam
Salt Scrub For The Bath
Spiced Nuts
Cookie Mix
Quickbread Mix
Banana Bread Mix
INGREDIENTS
2 Cups Unbleached Flour
1 Cup Sugar
1 Teaspoon Baking Soda
1 Teaspoon Ground Cinnamon
1/4 Teaspoon Kosher Salt
In a large size bowl combine the flour, sugar, baking soda, cinnamon and salt. Pour into gift jar.
For the instruction tag:
INGREDIENTS
1/2 Butter
2 Eggs
2 Ripe Bananas
1 Teaspoon Vanilla Extract
Preheat your oven to 350º F. In a large size bowl mash the bananas. Add the eggs and beat. Add the softened butter and vanilla extract. Mix well and set aside. In a separate large size bowl, pour the banana bread mix and stir with a wooden spoon to make sure that all of the ingredients are combined. Slowly add the mix to the wet ingredients and mix just until combined. Make sure not to overmix the batter. Grease a 9×5 inch loaf pan. Pour the batter into the loaf pan and place in the oven for 1 hour. You may want to place the loaf pan on a baking sheet just in case any spills over the sides. Bake for 1 hour. Remove from the oven and cool. Makes 1 delicious banana bread.


