
Slow-Cooker Meat Cuts
It’s winter and there’s nothing quite like coming home to a hot meal. You count on your slow-cooker for delicious, almost no effort dinners and it can be tempting to throw just about any ingredients into these amazing appliances. BUT for the tastiest results, you need to know which meats do best in it. Delivering low, even heat over a long period of time, slow-cookers break down the connective tissue in typically tough cuts of meat, making them extremely tender. Here is a quick guide to great cuts of meat for your slow-cooker. The good news is that these cuts are often less expensive which, along with saving you time and energy, will also save you money.
Beef: Slowly cooked brisket becomes incredibly tender. Look for marbling. The white steaks of fat are what adds flavor. Beef chuck is another favorite for long braises.
Chicken: Go with dark meat. Thighs and drumsticks are cheaper and richer in flavor than white meat and stand out in soups and stews. Brown or remove the skin before cooking for the best results.
Lamb: Cooked low and slow, lamb shanks become rich and complex flavors. Have your butcher slice them crosswise to fit into your slow-cooker. Lamb shoulder is also a great choice for slow-cooking.
Pork: Always a classic, pork shoulder is a tough cut that becomes silky and flavorful after hours spent simmering in its own juices.
For most of us, it’s cold outside so bring out your slow-cooker and let it work its magic while you’re busy doing other things.
"Work With What You Got!"
© Victoria Hart Glavin Tiny New York Kitchen
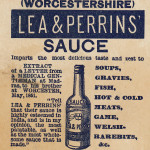
Season With Worcestershire Sauce
Think of Worcestershire sauce as the “Fish Sauce” of American cooking. Worcestershire sauce is probably one of the most underused condiments. The sauce is a fermented mix of vinegar, molasses, anchovies, and other seasonings that adds great flavor to a dish without adding many calories. I often add a splash to salad dressings, marinades, and sauces, or use it to season ground meat for meatloaf or burgers. Just go easy because it’s high in sodium.
"Work With What You Got!"
© Victoria Hart Glavin Tiny New York Kitchen
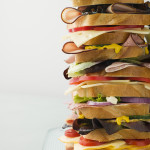
A sandwich doesn’t have to be full of fat and calories. Replace high-fat mayonnaise with one of the reduced-fat varieties. You may want to stir in some chopped fresh herbs into reduced-fat mayonnaise for a flavor boost. You may also want to hold the mayo and spread your bread with mustard, as mustard is naturally low fat. You may also want to try a spread of non-fat yogurt mixed with a bit of mustard. Chutney, delicious by itself or when blended with mayonnaise or mustard, adds a sweet and spicy dimension to a sandwich.
Many lunch meats are high in sodium and calories. Look for alternatives such as grilled vegetables or skinless chicken breast, roasted turkey breast, or shrimp in a low-fat dressing. Another good alternative is water-packed tuna.
Cheese is a high-fat sandwich ingredient that should be eaten in moderation. Choose lighter cheeses such as Swiss or low-fat cheese.
Rather than ordering your sandwich at the deli counter, take a stroll by the salad bar. There are many candidates for a great sandwich just waiting to be piled onto bread (or into a pita) and drizzled with low-fat dressing.
A few healthy choice ingredients are: artichoke hearts, roasted peppers, pepperoncini, sprouts, shredded carrots, asparagus, sliced tomatoes, and tofu.
"Work With What You Got!"
© Victoria Hart Glavin Tiny New York Kitchen
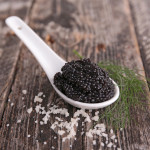
New Year’s Eve is about celebration, which most definitely calls for caviar and champagne. If you’re having a party or small get-together here are a few important tips about caviar.
Keep it simple! When serving caviar, keep it simple. You certainly don’t want to spring for something so speak jut to cover up the flavor with a lot of overkill. Caviar is intensely flavorful, and it goes well with crème fraiche or sour cream and blini. Try it with small boiled potatoes, seafood, soft or hard boiled eggs, or buttered pasta. Caviar can be used almost like a precious garnish, which can also be a great way to stretch out a small amount of it.
Keep it cool! When you bring caviar home, place in the refrigerator immediately in its tin. Place in the coldest part of your fridge, which is usually in the back of the deli drawer. If you’re making hors d’oeuvres, make sure to work quickly and serve immediately or place the completed snacks back in the fridge so that the eggs are sitting out on the table or counter. If you plan on serving the caviar straight up, place the tin or place in another bowl over crushed ice. The caviar doesn’t need to be freezing cold, but should be kept cool so the eggs hold their shape and freshness.
No metal please! Probably the most important rule with caviar is making sure it doesn’t come into contact with reactive metal. You certainly don’t want your precious caviar tasking like metal. This also goes for that beautiful tiny metal spoon you’ve been dying to use. Traditionally, a mother-of-pearl spoon is used to serve caviar. If you don’t have a mother-of-pearl spoon then don’t fret. Wood, ceramic, and glass utensils all work. Just make sure whatever non-metal spoon you use is a dainty little thing.
Leftovers you say? Holy moly, if you’re lucky enough to have leftover caviar please don’t throw it out or freeze it. Eat some more the next day and go out and buy yourself a lottery ticket. Leftover caviar is like seeing a unicorn. There are a number of ways to enjoy it by tossing it with buttered pasta or top your scrambled eggs with it. The good news is that your leftover caviar should last in your refrigerator for about a week.
Happy New Year’s Eve!
"Work With What You Got!"
© Victoria Hart Glavin Tiny New York Kitchen

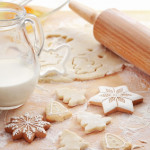
If you have many occasions to use a rolling pin then you really should have different sizes and different shapes of rolling pins on hand. Sometimes a very long, thick, and heavy one will be best. For other dough you will want a smaller, lighter one. The French style, which is extra long, narrow, and tapered at both ends, is especially good for rolling dough into a round shape, as for a pie crust, while the straight-sided rolling pin is better for an oblong shape.
If you’re unfortunate enough to be without any rolling pin at all, other things will do a decent job. Try a straight-sided bottle, tall jar, or a drinking glass.
"Work With What You Got!"
© Victoria Hart Glavin Tiny New York Kitchen
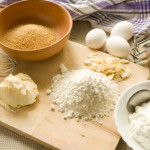
Gluten-Free Baking
Baking can be tricky when you throw gluten-free into the mix, even the most skilled cooks can be challenged. Here are some tips that can make Gluten-Free Baking less challenging.
Gluten-Free flour mixes can generally replace wheat flour cup for cup. Nut and bean flours may need extra experimentation to find the exact amounts to use.
Consider using smaller pans when baking gluten-free. It’s easier to get the center cooked without the edges burning as can happen with larger pans.
Keep a close watch on baking times. Some gluten-free recipes may take longer to bake than their wheat-containing counterparts.
To help gluten-free recipes taste their best, consider boosting flavor with extra nuts, herbs, spices, and flavor extracts such as vanilla and almond.
If converting a recipe to gluten-free, increase the egg amount by one extra egg to help ingredients bind together.
Gluten-free flours can be dry. You may need to increase a recipe’s liquids.
Xanthan gum keeps gluten-free baked goods moister and less prone to crumbling. Add 1/4 to 1/2 teaspoon xanthan gum for each cup of gluten-free flour.
"Work With What You Got!"
© Victoria Hart Glavin Tiny New York Kitchen

Storing Candy
One of the nice things about homemade candy is that it can be eaten when it is at its freshest. In addition, it contains no chemicals, artificial flavoring, or preservatives, although the lack of preservatives does limit its storage capabilities. Most homemade candy, however, will keep well for several weeks if it is stored properly. The exception is divinity, which gets stale quickly and should be eaten within two days of preparation.
Here are some rules for storing candy successfully.
Sticky and chewy candies, like taffy, nougat, and caramels, and hard candies, like butterscotch, should be individually wrapped in waxed paper, plastic wrap, or foil.
All candy keeps best in an airtight container in a cool, dry place. Some chocolate candies, like truffles, are best stored in the refrigerator.
Do not store brittle candies in the same container with soft, creamy candies. The moisture from the soft candies may make the hard candies sticky.
Candy freezes well. Place the candy, individually wrapped if appropriate, in a cardboard box or plastic container. Overwrap the container with freezer paper or foil. To thaw the candy, let it stand for several hours, or overnight, and come to room temperature before opening the container. This will prevent moisture from collecting on the candies because of the temperature change.
"Work With What You Got!"
© Victoria Hart Glavin Tiny New York Kitchen

Making The Best Candy
Candy is not difficult to make. Some candy recipes require little or no cooking at all. Other candy recipes need only careful timing and adequate beating. For some types of candy, however, special care is necessary. Follow these basic instructions and you can become a successful and versatile candy maker.
Always read a recipe through from beginning to end BEFORE starting to cook. This is important with all recipes, but especially candy recipes. You never will know if you need special equipment or a special ingredient until you read the recipe.
Always use the best quality, freshest ingredient available.
Measure ingredients accurately, using standard measuring spoons for small amounts, a fluid measuring cup for liquids, and graduated measuring cups for dry ingredients.
Follow recipes carefully. Use only the ingredients specified and add them in the order and by the method given.
To prevent sugaring, carefully follow directions about stirring and about covering the pan.
Use moderate or low heat, according to instructions in the recipe, so the syrup does not reach the boiling point too quickly.
Always use a saucepan large enough to allow space for the candy to bubble up when boiling. A 2 quart pan is large enough in most cases, but sometimes a 3 quart or even a 4 quart pan is preferable. A pan in which candy is made should be a heavy gauge metal, which holds heat evenly and will prevent sticking.
Candy making involves a lot of stirring and beating. Although an electric mixer may be used in some stages of preparation, such as beating egg whites for divinity, for most candy mixtures a spoon is best. A long handled wooden spoon is preferable, since it will never get too hot to handle. God bless wooden spoons!
A candy thermometer that clips onto the side of the pan is almost a necessity for successful candy making, since it is critical that the candy be removed fro the heat at the moment it reaches the proper temperature. It is best to use a clearly marked, easy to read thermometer with a mercury ball that is set low enough to measure the temperature of the boiling syrup, but does not touch the bottom of the pan.
To use a candy thermometer, be sure it is at room temperature before putting it into the hot syrup. Lower the thermometer gradually into the candy mixture AFTER the sugar is dissolved and the syrup has begun to boil.
The cold-water test is an alternative to a candy thermometer. Many cooks still rely upon this test, although it is not as accurate as a candy thermometer (hard ball/soft ball).
Temperature Tests For Candy
Temperature of Syrup Test Description of Syrup When Dropped Into Very Cold Water
234° to 240 ° Soft Ball Forms a soft ball that flattens on removal from water
244° to 248° Firm Ball Forms a firm ball that does not flatten on removal from water
250° to 266° Hard Ball Forms a hard ball that, on removal from water remains hard enough to hold its shape yet pliable
270° to 290° Soft Crack Separates into threads that are hard, but not brittle, when removed from water
300° to 310° Hard Crack Separates into threads that are hard and very brittle
To water-test, use very cold, but NOT ice, water. Use a clean cup, spoon, and fresh water for each test. Remove the pan from the heat and drop a little of the hot mixture into the water. Use your fingers to gather the drops into a ball and feel its consistency. If the candy is not yet ready, immediately return the pan to the heat.
Avoid making candy on damp or rainy days. High humidity is the candy maker’s enemy. If for any reason you cannot postpone a candy making session, cook the candy 1 or 2 degrees higher on the thermometer than indicated in the recipe.
Altitude also affects candy making. Temperatures given in recipes are typically for sea level. At high altitudes the candy must be cooked about 2 degrees higher.
Be patient and always allow sufficient time. Most candy does take time to make, and there is no way to rush the cooking with disaster.
"Work With What You Got!”
© Victoria Hart Glavin Tiny New York Kitchen
Tips For Baking A Better Cookie
After making thousands and thousands of cookies over the years one learns a few important tricks on how to make a better cookie. Here are some tips from the Tiny New York Kitchen’s kitchen.
Making Dough:
Bring butter to room temperature for 30 minutes to 1 hour before you start (unless otherwise directed). If you’re short on time, cut the butter into pieces and microwave in 5-second intervals, just until butter is soft, but not melted.
To measure flour, spoon it into your measuring cup, then level it with a knife. If you pack flour into the cup, your cookies could turn out dry and heavy.
Check the expiration dates on your baking powder and baking soda, or test the freshness by dropping a pinch into vinegar: If the baking soda or powder foams and bubbles, it’s still good.
Use pure extracts. The imitation stuff just isn’t the same.
Baking Cookies:
Buy an inexpensive oven thermometer and adjust your oven setting accordingly.
If you’re baking more than one tray of cookies at a time, switch the positions of the pans from top to bottom halfway through baking and give each pan a 180-degree turn.
Cool and quickly wash your baking sheets between batches. If you drop dough onto a hot baking sheet, the butter will start melting instantly and the cookies could lose their structure.
Line baking sheets with parchment paper for easy cleanup.
Let cookies cool for a few minutes on the baking sheets (just until they’re firm enough to move), and then remove them to a rack to cool completely (unless otherwise directed). If you leave the cookies on the pan, they could end up too crisp.
"Work With What You Got!”
© Victoria Hart Glavin Tiny New York Kitchen

Ways To Resist Overeating During The Holidays
Tiny New York Kitchen’s new motto is that December is the new January! With countless cocktail parties, cookie exchanges, and holiday meals this time of year, even the most responsible eaters can be tempted to go all out. Here are a few tips that can prevent total diet derailment, and still enjoy yourself, during the holiday season.
Fill your fridge with healthy, protein-rich snacks that will fill you up and keep you full so that you are less likely to indulge during holiday festivities.
Decide which temptations you would like to resist and to what degree. Remember moderation is key!
Indulge wisely. Allow yourself to enjoy those must-have treats that you look forward to all year long. Whether it’s eggnog, mashed potatoes, pecan pie, or red velvet cake – keep in mind that there is no need for an all-out binge-fest. Enjoy a reasonable yet rewarding amount of holiday foods that you absolutely love. Remember that no single meal will wreck your waistline.
Pay attention to how much water you are drinking. Try and consume 8 to 10 glasses of water per day.
Hit the gym. This way if you do indulge a bit at least it can be somewhat “guilt-free.”
Eat breakfast! When you skip breakfast you set yourself up to eat more at the next meal. Whatever you do, eat breakfast!
To recover the day after “food hangover” feeling that follows a rich meal, eat a normal breakfast with protein, such as yogurt or eggs, the next morning. The rest of the day, avoid refined carbs, drink at least 8 to 10 glasses of water to flush out the sodium. Also, fill up on “clean” foods such as fruits, vegetables, and protein.
Freeze those leftovers. Have leftover pecan pie? Freeze it! Storing tempting foods in the freezer to keep them out of sight means you’re much less likely to eat them since you’d have to defrost them first.
Be a smart snacker! Before you head out to those holiday parties, have a nibble of something so you don’t risk becoming starved. A handful of nuts, a mozzarella stick, Greek yogurt, or protein bar will work wonders.
Double up on those drinks! When you arrive at a party, start with a non-alcoholic drink to quench your thirst. Then have a glass of wine, champagne, or cocktail, but always alternate with zero-calorie liquids such as water or club soda. You’ll feel much better at the end of the night, and certainly the next day.
It’s ok to tell lies, but do it politely, of course. It’s hard to say “no” to your boss or your nana when they offer you a treat. Tell them thank you and take it. Tell them how delicious it looks, but that you’ve just eaten and are going to save it for later. Wrap it up and take it with you. If it ends up in the trash or given to someone else then that’s A-Okay!
If you’re going to a holiday party, offer to bring a healthy dish that you love. Bringing something healthy that you love will guarantee that there is something healthy that you can fill your plate with. It will also give you a chance to show your friends, family or coworkers that healthy food can taste great.
Get Up, Stand Up! When you’re at a party or buffet, get one plate, and then step away from the food table, but stay on your feet! Standing up helps with digestion and makes it more difficult to keep piling food on your plate, and burn calories.
Get thyself distracted! After a holiday meal, get your mind off food by offering to help clear the table or do the dishes. Chew a piece of gum or pop a breath mint. Its kind of like brushing your teeth so that you won’t be tempted to ruin your fresh breath for another piece of pecan pie.
Cut those serving portions down. There is no need to ruin a family recipe by reducing sugar or cutting out fatty ingredients. Instead make the real version of your great-grandmother’s famous date-nut cake, but cut it into 18 small slices rather than 10 giant pieces.
If you do overeat don’t beat yourself up, acknowledge it and then let it go. If you do go a little crazy at a party, it’s really not helpful to beat yourself up about it. Each day and each party is like a “reset,” it’s a chance to try again.
Happy Holidays!
"Work With What You Got!”
© Victoria Hart Glavin Tiny New York Kitchen


