

Constitution Week – Foods of Our Forefathers Part II
The standard grains included wheat, barley, oats and rye. Finely ground wheat flour, “boulted” or sieved through a fine cloth, was used to make white bread for the rich early in the fifteenth century. Most of the gentry ate what we would call cracked or whole wheat bread. The poor ate bread of coarse-ground wheat flour mixed with oats, ground peas or lentils.
During the ocean crossing to the New World, immigrants subsisted on an even more monotonous diet for weeks. The Mayflower provisions were typical – brown biscuits and hard white crackers, oatmeal, and black-eyed peas, plus bacon, dried salted codfish and smoked herring for animal protein. The only vegetables on the trip were parsnips, turnips, onions and cabbages. Beer was the beverage.
As pilgrims set foot on their new homeland, they hardly knew what to expect. Each brought a stock of basic foods to get them through the first year, as well as a variety of basic utensils and kitchen tools. Also included were the essential accompaniments for whatever they found or could raise when they arrived – a bushel of coarse salt, 2 gallons of vinegar, a gallon of “oyle” and a gallon of aquavite.
Nothing they had been told, however, prepared them for the staggering variety of totally unfamiliar plants that were being used as food by the Indians – corn, sweet potatoes, peppers, pumpkins, squash, sunflower seeds and cranberries were examples. In addition to the strange food, there were strange ways of cooking. In Europe, meat was boiled; the Indians, lacking iron pots, roasted theirs on a spit over a fire. The Indians also had a long, slow cooking process that yielded what we now call Boston baked beans, and they used a fire-heated, rock-lined pit for what we would now call a clam-bake. Where the pilgrims were accustomed to raised wheat bread, the Indians introduced them to corn based spoon bread. Corn also provided hominy, used as a vegetable, and later, of course, as grits. For sweetening, the Indians used maple syrup and honey, as sugar was unknown.
Although many of the food the Pilgrims and other colonists found were totally strange, others had travelled the route before them. The Spanish had brought pigs, which thrived especially in areas where peanuts grew. Peaches and oranges were also native which spread throughout climatically suitable areas in a short time.
Even the white potato was an early migrant to the New World, following a zig-zag route, from its original home in Peru to Spain in 1520, from Spain to Florida forty years later, from Florida to England in 1565, always being treated as a culinary curiosity. By the 1600’s they had become a popular food staple in Ireland, and were carried by Colonists both to New England and Virginia, where they quickly established themselves. There they served as a valuable source of vitamin C, protein and trace minerals, in addition to the starch.
Potatoes, incidentally were significant in another, later migration to America: the climate in Ireland proved so amenable to their culture, and their nutrient content was so high, that many poor Irish farmers grew only potatoes on their small farms. In fact, as fathers subdivided farms for their sons, many found themselves supporting whole families on the potatoes grown on less than an acre of ground, while the family itself lived in a roofed-over ditch. When blight struck in 1845, the sole food source of millions of people literally withered away before their eyes. A half-million of the 8 1/2 million population died of starvation or disease, and 1 1/2 million emigrated to England or America – following the “Irish potatoe.”
Spices were in short supply in America’s earliest days. The English pretty well monopolized the trade with the New World. Within a few years, however, settlers had planted the seeds they had brought or imported, and most had adapted to the climate and were flourishing in orderly rows and patterns in kitchen gardens all along the Atlantic Coast. There were a few – ginger, pepper, cloves, mace, cinnamon, nutmeg, and allspice – that simply couldn’t cope with the weather or soil – and were scarce. Olive oil, lime juice, prunes and saffron were available, but only at high prices.
To Be Continued…

Roast Beef Tenderloin 3 Ways
Here are three different ways to cook Beef Tenderloin. Remember to let your roast rest for a bit after removing from the oven because it will continue to cook.
Classic
1 Two to Six Pound Beef Tenderloin
4 Tablespoons Olive Oil
1 Tablespoon Minced Garlic
3 Tablespoons Rosemary
2 Tablespoons Thyme
2 Tablespoons Kosher Salt
2 Tablespoons Freshly Ground Pepper
Preheat your oven to 350° F. With 2 tablespoons olive oil lightly oil a roasting pan. Position the oven rack on center rack. In a small-size bowl combine 2 tablespoons of olive oil, garlic, rosemary, thyme, kosher salt, and pepper. Rub the spice mixture over the entire surface of tenderloin. Place into roasting pan and place into oven. Cook for about 35 to 55 minutes depending on target temperature. Remove from oven and let rest 15 minutes before serving. Serves 2 to 6 depending on size of tenderloin.
Smoked Paprika
1 Two to Six Pound Beef Tenderloin
5 Tablespoons Olive Oil
3 Tablespoons Smoked Paprika
1 Teaspoon Oregano
Zest of 1 Lemon
Juice of 1 Lemon
1 Teaspoon Kosher Salt
1 Teaspoon Freshly Ground Pepper
Preheat your oven to 350° F. With 2 tablespoons olive oil lightly oil a roasting pan. Position the oven rack on center rack. In a small-size bowl combine 3 tablespoons of olive oil, smoked paprika, oregano, zest & juice of lemon, kosher salt, and pepper. Rub the spice mixture over the entire surface of tenderloin. Place into roasting pan and place into oven. Cook for about 35 to 55 minutes depending on target temperature. Remove from oven and let rest 15 minutes before serving. Serves 2 to 6 depending on size of tenderloin.
Cajun Style
1 Two to Six Pound Beef Tenderloin
2 Tablespoons Olive Oil
3 Tablespoons Cajun Seasoning
1/2 Teaspoon Cayenne Pepper
1 Teaspoon Kosher Salt
1 Teaspoon Freshly Ground Pepper
Preheat your oven to 350° F. With 2 tablespoons olive oil lightly oil a roasting pan. Position the oven rack on center rack. In a small-size bowl combine Cajun seasoning, cayenne pepper, kosher salt, and pepper. Rub the spice mixture over the entire surface of tenderloin. Place into roasting pan and place into oven. Cook for about 35 to 55 minutes depending on target temperature. Remove from oven and let rest 15 minutes before serving. Serves 2 to 6 depending on size of tenderloin.
 Eggplant Essentials
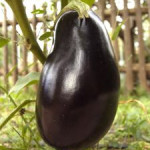
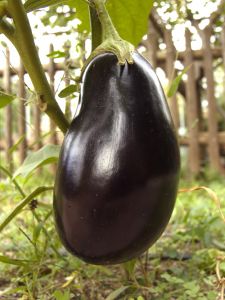
Eggplant (also known as Aubergine or Melongene) is an egg-shaped vegetable with a typically dark purple, shiny skin, though some are yellow or white. Eggplant was so named because the delicate white varieties that resemble eggs. Eggplant grows on a plant (Solanum Esculentum) in the nightshade family and is actually a fruit and not a vegetable. It is actually technically a berry. Eggplants have not always been popular. They were once known as “mad apples,” because it was thought that they caused insanity or death. They have been used in China since 600 BC. Thomas Jefferson first brought the eggplant to America from France in the eighteenth century. Male eggplants are rounder and smoother at the blossom end. They have fewer seeds which are bitter. Female eggplants are more oval and the blossom end is usually deeply indented. They tend to have more bitter seeds.
Eggplants are at their best from July through September. Select smooth, firm, glossy-skinned eggplants with green caps and stems. Smaller eggplants are sweeter than large ones. The fewer the seeds in an eggplant, the sweeter the eggplant. The more seeds in an eggplant, the older the eggplant.
Store eggplants in perforated plastic bags in the vegetable crisper of the refrigerator for four to five days.
Eggplants should be cooked immediately after peeling or cutting because the exposed flesh discolors rapidly due to oxidation. To prevent this start cooking as soon as you have cut it. If there is an unavoidable delay, promptly coat the surface with lemon juice or submerge with pieces in acidulated water.
Salt the flesh of a large cut-up eggplant to draw out any bitterness. For frying, it is always good to salt the eggplant or otherwise remove excess moisture. Only eggplants with tough, thick skins need to be peeled.
Eggplants should be cooked in only the minimum amount of fat or oil or without any at all because they have inner air pockets. Eggplants can absorb several times their weight in oil, even when breaded. Cooking with too much oil or fat breaks down the eggplant’s texture.
Slicing eggplants is so much easier when using a serrated knife.

 Tiny New York Kitchen Household Hints
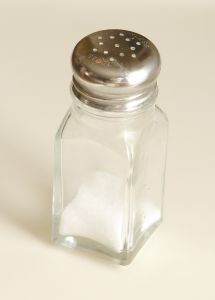
Yesterday I was asked how to keep salt shakers unclogged.
For Clogged Salt Shakers:
Heat a teaspoonful of rice and mix with the salt. You could also use a pinch of ground arrowroot added to the salt. Both methods will prevent the salt for clogging the shaker. To keep the metal tops from being eaten away spread a bit of heated paraffin on the inside of the metal top. When the heated paraffin begins to cool open the holes with a pin or a wooden toothpick.
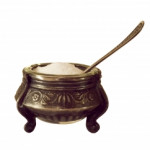
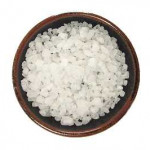
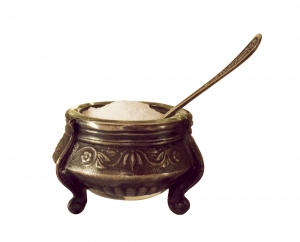 Why I Like Kosher Salt
I nearly always cook with kosher salt (coarse salt) for its ease and its pure mild flavor. It’s coarser in texture than standard table salt, but the crystals are actually fine flecks that cling to food and dissolve quickly. The large irregular flakes also make it easier to sprinkle evenly and discriminately, especially when seasoning food to taste with a pinch of the fingers. If you are substituting table salt for kosher salt in a recipe, begin with half the amount listed.
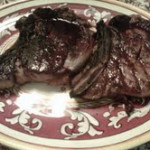
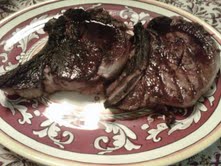 A Note About Grilled Steaks
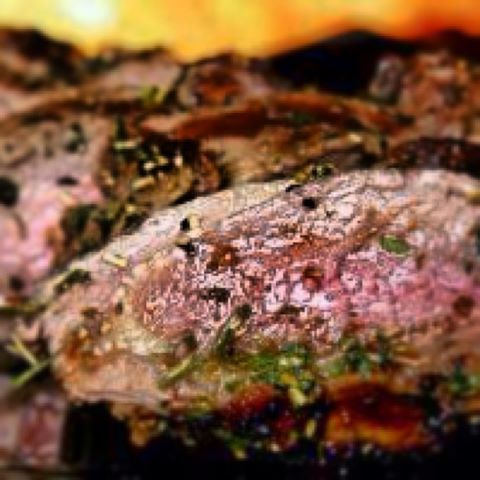
Steak is perfect for the grill. A well marbled, cut thin and flat steak is made for searing over a bed of hot coals. A grilled steak is mouthwatering if it is brown and crisp on the outside and pink & juicy on the inside. There really isn’t an easier and less complicated dinner than a grilled steak with a green salad on the side. Plus, the cleanup is practically effortless. Most any cut of steak is great for grilling. The classics are rib eye, New York, filet, tenderloin and porterhouse. The lesser cuts are cheaper and usually every bit as tasty if they are marinated. A flatiron, chuck, skirt steak, hangar steak, top sirloin or tri-tip are lesser cuts of steak that I tend to marinate overnight. Steaks can be grilled as a single portion or larger steaks can be grilled whole and sliced for more than one. A steak is best cut 1 to 2 inches thick. If a steak is thinner, then the inside will be overdone before the outside is properly seared. If a steak is thicker then the outside, it will start to char before the inside is ready. Trim off all but a fourth of an inch layer of fat. The less dripping fat means fewer flare-ups.
Seasoning a steak is simple. All you really need is kosher salt and freshly ground black pepper. Some people like an herb crust. Chopping fresh herbs together in any combination is great. You can combine thyme, rosemary, oregano and/or oregano; however, you should always use rosemary. Mix the fresh herbs with kosher salt and freshly ground pepper. Rub onto the steak with some olive oil an hour or so before grilling. You should take the steaks out of the refrigerator about 1 hour before grilling to allow the steaks to come to room temperature.
Clean your grill with a wire brush and then prepare a hot fire. Oil the grill and put on the steaks. Your grill should be so hot that you shouldn’t be able to tolerate the heat for more than a couple seconds. Cook for 5 to 6 minutes. Turn the steaks over and cook for another 5 to 6 minutes. If your steak has a border of fat then turn this onto the grill by holding the steak up with your tongs. Sear the fat for 1 to 2 minutes. After you flip your steaks you should start checking for doneness after about 2 minutes. Press the back of your tongs into the steak. If it is rare it will be soft. If it springs a bit then it is medium rare. If it is resilient then it is well done. Keep testing by using the “back of the tong” method. You can check by cutting into the steaks, but I really think that it is better not to cut into the steaks. Keep working on the “back of the tong” method and you will become a good judge pretty quickly. I think that it is a good idea to take the steaks off of the grill when they are a little less done than you want them to be. They will continue to cook while they rest. A 1 inch steak will be grilled rare in about 8 minutes and for medium it should take about 12 minutes. Check your fire while the steaks are cooking. Move the coals as needed to make the fire hotter or cooler. If your fire flares up then move the steaks out of the flames right away or the fire will burn up your steak. This will form a black and acrid crust. When you remove your steaks from the grill let them take a little rest for a few minutes before serving. Resting stabilizes the internal juices so that they don’t run out excessively when you cut into the steaks. If you are not going to serve right away, make sure to cover loosely with aluminum foil to help keep warm. Don’t seal tightly or they will continue to cook.
Happy Grilling!

 17 Things To Do With Homemade Ricotta
Now that you’ve made your Homemade Ricotta what are you going to do with it? Here are 17 things to do with that delicious Homemade Ricotta.
- Make a Cheesecake
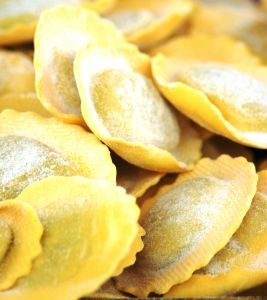
- Fill Ravioli
- Eat Warm Drizzled With Good Quality Olive Oil
- Make A Tart
- Toss With Penne Pasta And Quickly Cooked Tomatoes
- Savory Bruschetta – Toast Or Grill SlicesOf Italian Bread. Top With Sun Dried Tomatoes, Ricotta, Fresh Basil Leaves, Salt & Pepper
- Eat For Breakfast With Milk, Honey And Nuts
- Enrich Egg Dishes
- Make A Fruit Dip By Blending Cocoa Powder, Ground Cinnamon And Sugar
- Layer In Gratins And Lasagna
- Top A Dish Of Cavatelli
- Stuff Pasta Shells
- Bake In Pancakes
- Enrich Sauces
- Sweet Bruschetta – Spread On Thick Slices Of Italian Bread And Top With Jam Or Fruit For Breakfast Or A Snack
- Use In Italian Meatballs
- Use With Fresh Berries
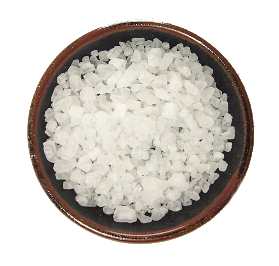
Rock Salt
Rock Salt has a grayish color because it retains more minerals than other salts. It is not a food-grade salt, but it is used to make hand cranked ice cream and is traditionally used as a bed on which to serve baked oysters and clams.


