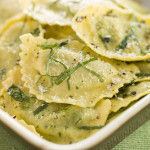
Spring Ravioli
Capture springtime on the plate with fresh ravioli enveloping a purée of sweet English peas that is bolstered with a touch of cheese and herbs. Simmer these ravioli for just a few minutes, drain (but not too thoroughly) and add a couple of tablespoons of butter to the pan. Once the butter melts, return the ravioli to the pan, add a bright toss of lemon zest and season with salt and pepper. Some grated Parmesan and slivers of fresh mint or a handful of pea shoots are worthy embellishments.
“Work With What You Got!”
© Victoria Hart Glavin Tiny New York Kitchen All Rights Reserved

Life is too short for fake butter, cheese or people.

Perplexing Foodstuffs
There are those foods that can be rather difficult to figure out how to eat without looking like you were born in a cave. Here are some useful tips for properly eating perplexing foodstuffs.
Artichokes
Pluck off artichoke leaves and scrape the tender part (not the prickly point) between your teeth (preferably after dipping in melted butter). Work your way to the delicate inner leaves, and then use a knife to cut off the remaining small leaves and feathery innards. Cut the artichoke “heart” into bite-sized pieces and eat with a fork.
Asparagus
Eat asparagus with your fingers if served raw as crudités. Eat with a fork and knife if served with dinner.
Bread
Break bread into bite-sized pieces, and butter it or dip it into olive oil just one piece at a time.
Crab (Soft-Shelled)
Eat entire crab, including shell, either in sandwich form or using a fork and knife. Remove inedible pieces from your mouth with a fork.
Fajitas
Place meats, vegetables, and other fillings on a flat tortilla. Roll up and use your fingers to eat fajitas from one end.
Fondue
Spear bread, vegetables, or fruit with a fondue spear and dip into cheese or sauce. Remove food from spear using a dinner fork, and eat from a plate. DO NOT double dip. Spear uncooked meat cubes and place spear into fondue broth or sauce. When cooked, transfer meat to a plate using a dinner fork and cut into smaller pieces to eat.
Lobster
Wear a lobster bib to avoid fishy splatters, Crack shells with shellfish crackers and extract meat with a small fork or pick. Cut larger pieces with a knife, and eat with a fork after dipping in melted butter. Clean your hands by dipping fingers into finger bowls, and use lemon (if provided) to cut extra grease. Dry your hands with your napkin.
Peas
Use a knife to push peas onto a fork. Do not mash peas before eating, or eat peas from a knife.
Raw Shellfish
Use a small fork to extract mussels, clams, or oysters from the half-shell. Season with fresh lemon or cocktail sauce. In informal settings, you may quietly slurp shellfish from shells.
Soup
Using a soup spoon, spoon soup away from your body and then quietly sip from side of spoon. Tilt bowl away from you to spoon up remaining drops.
Spaghetti
Twirl pasta with fork tines into bite-sized portions, and allow any dangling pieces to fall back onto your fork. You may also rest fork tines against the bowl of a spoon while you twirl pasta.
Steamers
Extract clam from shell using a small fork, and use a fork and knife to remove inedible neck. In informal settings, it is permissible to use fingers.
“Work With What You Got!”
© Victoria Hart Glavin Tiny New York Kitchen

Tips For Baking A Better Cookie
After making thousands and thousands of cookies over the years one learns a few important tricks on how to make a better cookie. Here are some tips from the Tiny New York Kitchen’s kitchen.
Making Dough:
Bring butter to room temperature for 30 minutes to 1 hour before you start (unless otherwise directed). If you’re short on time, cut the butter into pieces and microwave in 5-second intervals, just until butter is soft, but not melted.
To measure flour, spoon it into your measuring cup, then level it with a knife. If you pack flour into the cup, your cookies could turn out dry and heavy.
Check the expiration dates on your baking powder and baking soda, or test the freshness by dropping a pinch into vinegar: If the baking soda or powder foams and bubbles, it’s still good.
Use pure extracts. The imitation stuff just isn’t the same.
Baking Cookies:
Buy an inexpensive oven thermometer and adjust your oven setting accordingly.
If you’re baking more than one tray of cookies at a time, switch the positions of the pans from top to bottom halfway through baking and give each pan a 180-degree turn.
Cool and quickly wash your baking sheets between batches. If you drop dough onto a hot baking sheet, the butter will start melting instantly and the cookies could lose their structure.
Line baking sheets with parchment paper for easy cleanup.
Let cookies cool for a few minutes on the baking sheets (just until they’re firm enough to move), and then remove them to a rack to cool completely (unless otherwise directed). If you leave the cookies on the pan, they could end up too crisp.
"Work With What You Got!”
© Victoria Hart Glavin Tiny New York Kitchen

Substitution Guide
|
Ingredient |
Substitution |
|
Allspice (1 tsp.) |
1/2 tsp. cinnamon + 1/4 tsp. nutmeg + 1/4 tsp. ground clove |
|
Baking Powder (1 tsp.) |
1/4 tsp. baking soda + 1/2 tsp. cream of tartar |
|
Baking Soda (1 tsp.) |
2 tsp double-acting baking powder + replace acidic liquid ingredient in recipe with non-acidic liquid |
|
Balsamic Vinegar |
Equal amount of sherry or cidar vinegar |
|
Bread Crumbs (1 cup) |
3/4 cup cracker crumbs |
|
Brown Sugar (1 cup) |
1 Tbsp. light molasses + enough sugar to fill 1 dry measure cup or 1 cup raw sugar |
|
Butter, salted (1 cup or 2 sticks) |
1 cup or 2 sticks unsalted butter + 1/4 tsp. salt or 1 cup margarine or 7/8 cup lard or vegetable shortening |
|
Buttermilk (1 cup) |
Place 1 Tbsp. white vinegar or lemon juice in a liquid measure. Fill to 1 cup with room temp whole or 2% milk and let stand for 5 minutes or 1 cup milk + 3/4 tsp. cream of tartar or 1 cup plain yogurt |
|
Canola, Sunflower and Vegetable Oils |
Substitute one for one |
|
Chocolate, Bittersweet or Semi-Sweet (1 oz.) |
1/2 oz. Unsweetened chocolate + 1 Tbsp. granulated sugar |
|
Cocoa Powder (3 Tbsp. Dutch-processed) |
1 oz. Unsweetened chocolate + 1/8 tsp. baking soda + reduce fat in recipe by 1 Tbsp. or 3 Tbsp. natural cocoa powder + 1/8 tsp. baking soda |
|
Corn Starch (as a thickener) |
Equal amounts of Minute Tapioca for cornstarch, use slightly less for flour |
|
Cream of Tartar (1/2 tsp.) |
1/2 tsp. white vinegar or lemon juice |
|
Egg (1 whole large egg) |
3-1/2 Tbsp. thawed frozen egg or egg substitute or 2 egg whites |
|
Garlic (1 fresh clove) |
1 tsp. Garlic Salt or 1/8 tsp. Garlic Powder or 1/4 tsp. dried minced garlic |
|
Gingerroot (1 Tbsp. minced) |
1/8 tsp. ground ginger powder or 1 Tbsp. rinsed and chopped candied ginger |
|
Half & Half (1 cup) for cooking or baking |
1-1/2 Tbsp. butter or margarine + enough milk to equal 1 cup |
|
Heavy Cream (1 cup) for cooking or baking |
3/4 cup milk + 1/3 cup butter or margarine |
|
Herbs, Fresh (1 Tbsp.) |
1 tsp. dried herbs |
|
Honey (1 cup) for cooking or baking |
1 1/4 cups granulated sugar + 1/4 cup of liquid appropriate for recipe |
|
Italian Seasoning (1 tsp.) |
1/2 tsp. dried basil + 1/4 tsp. dried oregano + 1/4 tsp. dried thyme |
|
Molasses (1 cup) |
1 cup honey or 1 cup dark corn syrup or 3/4 cup light or dark brown sugar dissolved in 1/4 cup liquid |
|
Mushrooms, fresh (1 cup sliced and cooked) |
1 can (4 oz.) mushrooms, drained |
|
Mustard, Prepared (1 Tbsp.) |
1/2 tsp. dry mustard powder + 2 tsp. white vinegar |
|
Onion (1 small minced) |
1/2 tsp. onion powder |
|
Poultry Seasoning (1 tsp.) |
1/4 tsp. ground thyme + 3/4 tsp. ground sage |
|
Pumpkin Pie Spice (1 tsp.) |
1/2 tsp. ground cinnamon + 1/4 tsp. ground ginger + 1/8 tsp. allspice + 1/8 tsp. nutmeg |
|
Sour Cream (1 cup) |
1 cup plain yogurt or 1 Tbsp. lemon juice and enough evaporated milk to equal 1 cup |
|
Tomato Juice (1 cup) for cooking |
1/2 cup tomato sauce + 1/2 cup water |
|
Tomato Sauce (1 cup) for cooking |
1/2 cup tomato paste + 1/2 cup water |
|
Wine, Red (1 cup) |
1 cup nonalcoholic wine, apple cider, beef broth or water |
|
Wine, White (1 cup) |
1 cup nonalcoholic wine, white grape juice, apple juice, chicken broth or water |
|
Yogurt (1 cup) |
1 cup buttermilk or 1 Tbsp. lemon juice and enough milk to equal 1 cup or 1 cup sour cream |
"Work With What You Got!"
© Victoria Hart Glavin Tiny New York Kitchen

That's a lot of butter!
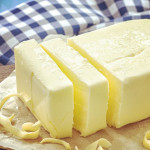
If You're Afraid Of Butter Use Cream! – Julia Child


Constitution Week – Foods of Our Forefathers Part V
In her food preparation and preservation, the early American housewife was tied tightly to the calendar and the clock – much more tightly than today’s homemaker is. Local availability of foodstuffs and the limitations of existing food preservation techniques meant that nature largely called the shots on timing. Fruits and vegetables had to be picked at the right moment and processed quickly. Animals had to be slaughtered at their peak to keep best, and the peak varied from animal to animal. Even cheese and butter had a better likelihood of successful preservation depending on the season of the year in which they were processed.
Weather conditions played a major role: herbs had to be picked on a dry day to retain color and flavor; slaughter had to be done in cold weather to allow the carcass to cool rapidly; milk winters produced little ice for the following summer.
Also, once begun, preservation techniques sometimes had to be carried uninterruptedly through a long and tedious series of steps. There was no turning back – or time for vacations. Hams being cured had to be turned regularly, fish being dried had to be restacked four times a day, pickles had to have their brine skimmed and changed – or the product would be lost.
The labor involved in such food preservation was frequently heavy, but the routine of the rest of the house went on as usual. Organizational ability and endurance were essential, and woe betide the housewife who didn’t “keep up appearances” with her neighbors.
Just as the make-up of the early American’s diet varied with his geographic location, so did his needs – and abilities – in food preservation.
For example, the southern areas had access to a more varied food supply over the course of the year and consequently had less need to provide stores for the hard winter. At the same time, it was more difficult and expensive to get ice for short-term protection against the warmer climate. Ice was actually shipped from Massachusetts to the Southern states and to Cuba and Jamaica in the early 19th century, but it was obviously only available to the wealthier residents. The ice-box itself didn’t become popular until the mid 1800’s.
The shorter growing season in the North reduced the variety of produce available, but it also made cold storage in root cellars practical in small towns and rural areas. Above-ground ice houses and ice-saws, invented in the mid-nineteenth century, drastically reduced the cost of storing ice into the summer, and simplified storage of dairy products, fish and meat.
In many respects, the northern colonies had the greatest difficulty in providing a nutritious, varied diet throughout the year. Although fruits, berries, and summer vegetables were plentiful from the midsummer to early fall, proving vitamin-rich foodstuffs, during the winter and spring took special care. Many food items, of course, could be stored in relatively simple root cellars – where winter temperatures hovered between 30 and 40 degrees. In especially cold weather, a large tub of water was placed on the floor. This water gave off heat as it froze, which kept the vegetables safe. Turnips, beets and squash were kept in the driest areas. Carrots would keep anywhere. Cabbages and celery were buried in sand, cauliflower was set in holes and covered with straw, while cranberries were floated in water in a tub. Other crops were arranged loosely on slatted shelves for free air circulation, sometimes lying on straw.
Some vegetables, such as summer squash and potatoes, kept better at somewhat higher temperatures, and these were usually stored in the dark basement of the home. Temperatures between 50 and 60 degrees were ideal.
Eggs could also be stored in the root cellar, or in the basement of the house. Two methods were common. In one, the eggs (which the housewife was instructed to collect “in fine weather”) were dipped in boiling water for 20 seconds, then coated all over with butter or “sweet oil” (glycerin) and packed in sawdust. They would keep this way for some two to three weeks. Other housewives kept their eggs in crocks, submerged in “water glass” (sodium silicate). In this technique, it was important not to wash the eggs first, since their shells possess a natural coating which prevented the water glass from penetrating through the shell and ruining the egg. Even stored at room temperature, such eggs would keep for several months, while the hens sulked through the dark winter days.
If a family didn’t have room for a root cellar, it could accomplish somewhat the same effect with a pit, with the vegetables in layers separated by straw, and the whole covered with earth. Obviously, retrieving vegetables thus buried was a messy chore, and needed careful planning.
Under either type of storage, frequent examination was necessary, in order to detect spoilage and eliminate those items of fruit or vegetables which had gone rotten. The proverb about “one rotten apple spoiling the barrel” was not taken lightly! In fact, many housewives wouldn’t put apples in barrels, but spread them out, in order to “pick them over” more easily as the winter progressed. Spoiling apples were cut up, and the good parts made into applesauce as the winter progressed. Early cookbooks instructed the housewife to add a teaspoon of tartaric acid to the apples when making sauce late in the winter, as the apples lost their flavor. New Englanders even had a name for the period after the vegetables had spoiled or been used up, but before the dandelion greens appeared. They called it “the six weeks want.”
In the South, storage of this sort was less necessary, and the typical New England vegetables such as Hubbard squash and turnips were rarely seen on Southern menus.
To Be Continued…
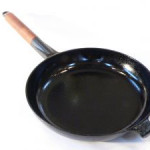
 Sautéing Tips
Some foods need moist, long cooking to tenderize them while others just require a quick sauté in a skillet. Sauté means “jump” in French which describes the tossing and turning in the skillet during the cooking process. There are a few basic secrets to perfect sautéing that will help you get better cooking results.
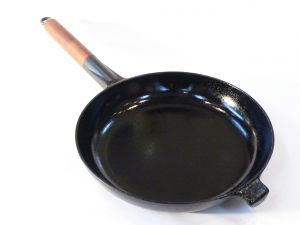
The trick to successful sautéing is to use a medium-high heat and a small amount of oil. As a matter of fact meats and other protein-based foods should not be turned too often because extended contact with the hot skillet will brown the surface of the food which will deliver extra flavor. Heat the skillet over a medium-high heat and if the pan is too hot you will burn the outside of the food before the inside is cooked so turn down the heat a bit.
Do not use butter for sautéing. Use oil. Butter contains milk solids that burn and smoke at high temperatures. Some cookbooks call for mixing butter and oil which supposedly increases the smoke point of the butter. This does not remove the milk solids that are the problem. You can, however, use clarified butter, but it is easier to use oil for cooking meats. If you want a butter flavor then use it in a pan sauce.
Thick cuts of meat can be difficult to cook through when sautéing. You may want to use a double-cooking method for thick cuts. Double-cut pork and lamb chops, porterhouse steaks, and large bone-in, skin-on chicken breast halves are too thick to cook through in a skillet on the stove top. It is best to brown them in the skillet, and then finish cooking them in a 400° F oven. Be sure that your skillet is ovenproof.
Make a pan sauce to take advantage of the browned bits in the pan which are loaded with delicious flavor. Remove the meat from the skillet and tent loosely with aluminum foil to keep the meat warm. Pour off the fat from the skillet and return the skillet to the medium-high heat. Add a couple of tablespoons of minced shallots and a tablespoon of butter. Do not add the butter alone as the skillet may be too hot and the butter will burn. The shallots will act as insulation. Cook for a minute or so to soften the shallots and then add about 1 cup of an appropriate stock. Wine may seem like a good choice, but it can be too strong. Boil the stock, scraping up the bits in the pan with a wooden spoon or spatula until it is reduced to about 1/2 cup. Remove from the heat and whisk in 1to 2 tablespoons of cold butter (a tablespoon at a time) to thicken the sauce lightly.

Easy Non-Salad Radish Ideas
I love radishes and am always drawn to the pretty color of a pile of radishes. Most of us just slice them into a green salad and the left-over radishes die a fateful death in the fridge. Here are some non-salad ideas that will expand your radish repertoire.
Radish Sauté – It doesn’t really occur to many people that you can cook radishes (as with cucumbers). It’s so simple to sauté radishes in olive oil or butter. They are delicious and make you appreciate radishes in a while new way.
Kimchi – Sprinkle the radishes with a bit of kosher salt and a little chili paste. Toss together and then pack them into a glass jar. Place in the back of the fridge for two weeks. Excellent on top of a burger.
Butter & Sea Salt – A fine butter and a pinch of sea salt on top of a radish slice make the perfect summer bite.
Radish “Sauerkraut” – Slice 1 pound of radishes and toss with 1 tablespoon of kosher salt. Pack tightly into a glass jar. Weigh down with a wrapped can and place on a shelf for two weeks. Makes a great addition to a sandwich.
Shaved & Lightly Poached In A Tasty Liquid – Slivers of radish dropped in a simmering stock and/or wine for 10 seconds are a great compliment to fresh fish. They let go of their bite, but retain some of their unique crunch we all know and love.
Braised – Sauté a little onion and garlic. Add in some radish quarters and a healthy splash of red wine. Cover and simmer for 20 minutes. Finish with a squeeze of lemon or dash of vinegar. Excellent draped over a grilled steak or pork chop.
Pickled – Slice some 1/4 inch coins and throw them into a jar. Pour brine over them (1 teaspoon kosher salt, 1/2 teaspoon sugar, 1/2 cup water and 1 1/2 cups cider vinegar). You may want to throw in a few dried chilis if you want a bit of spice. Let sit in your fridge for a week.
Soup – Simmered for 30 minutes in a soup. The radishes will take on a sweet and velvety character.
Grated – Grate the radishes along with some freshly grated ginger and use as a condiment with any oily fish such as trout or mackerel.
Roasted – Quarter and toss with a little olive oil. Season with kosher salt and freshly ground pepper. Roast in an oven at 425º F for 20 minutes. They should be a little brown and will become sweet. Toss them with some toasted nuts. They are a great side dish at any potluck picnic.


